FREE SOFTWARE DOWNLOADS
ATTENTION HELIX STADIUM OWNERS:
Updating your Helix® Stadium firmware directly from via WiFi is strongly recommended as the best way to update. However, if you’re using Line 6 Central or the Helix Stadium application to update via USB, always update the application first.
Looking for older hardware or software?
A complete list of hardware and software options is available here.Here are your search results:
Helix Native
Helix Native
Please copy and paste or open this link in a browser of your choice to view the full 3.80 release notes.
Helix Native
Helix Native
Please copy and paste or open this link in a browser of your choice to view the full 3.80 release notes.
Get Download
Helix Native
Helix Native

Helix/HX 3.80 (released November 19, 2024) includes 6 new amps, 4 new cabs, 1 new effect, and bug fixes and is strongly recommended for all users of Helix and HX.
How do I update to 3.80?
Updating Helix Native
- Before updating Helix Native, it is highly recommended that you export a preset/setlist bundle. Click the gear icon in the lower left, select the Presets/IRs tab, and then click Export Bundle. Some hardware compatibility modes (HX Stomp, HX Stomp XL, HX Effects) do not have this feature as they have only one setlist. In these cases, at the top of the preset list, click the yellow EXPORT to export the setlist.
- Quit your DAW and download and install Helix Native 3.80:
- Helix Native 3.80 (macOS): https://line6.com/software/readeula.html?rid=12909
- Helix Native 3.80 (Windows): https://line6.com/software/readeula.html?rid=12911
- Open your DAW and open an instance of Helix Native.
- OPTIONAL: The only way to hear 3.80's new factory presets is to restore them. IMPORTANT! MAKE SURE YOU'VE EXPORTED A BUNDLE (OR ANY IMPORTANT SETLISTS) FIRST, AS RESTORING FACTORY SETLISTS WILL ERASE ALL YOUR WORK! Click the gear icon in the lower left, select the Presets/IRs tab, and then click Restore Factory Setlists. Click Yes.
New Amps in 3.80
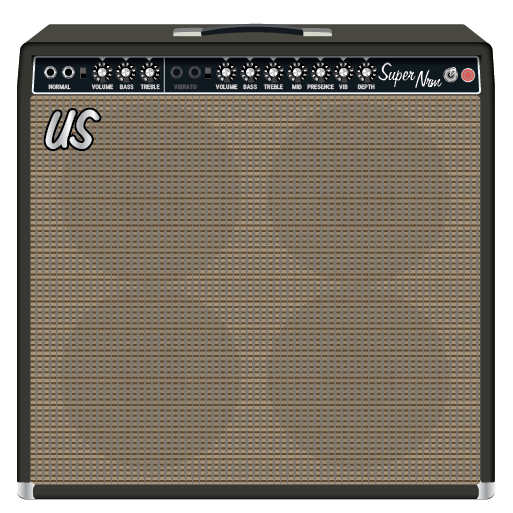
Amp/Preamp > US Super Nrm, based on* the Fender® Super Reverb (normal channel)
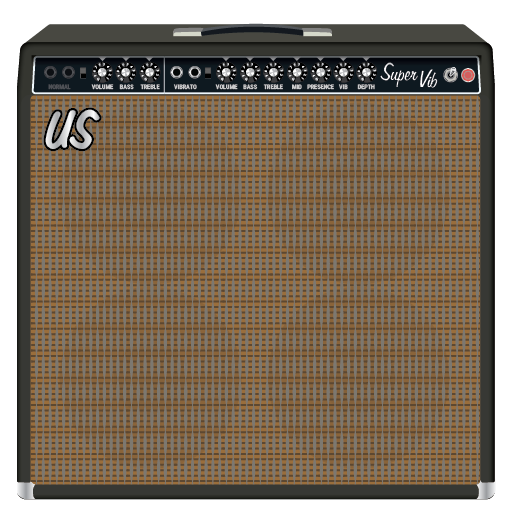
Amp/Preamp > US Super Vib, based on* the Fender® Super Reverb (vibrato channel)
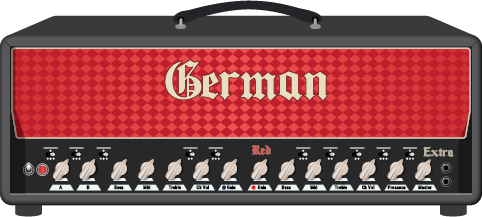
Amp/Preamp > German Xtra Red, based on* the Bogner Ecstasy 101B (EL34) (red channel)
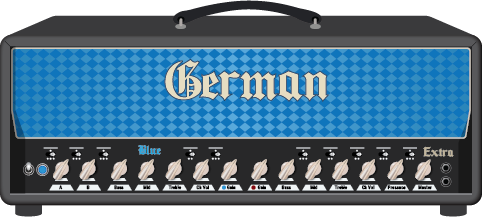
Amp/Preamp > German Xtra Blue, based on* the Bogner Ecstasy 101B (EL34) (blue channel)
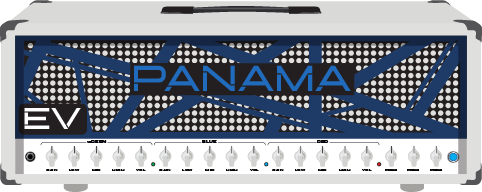
Amp/Preamp > EV Panama Blue, based on* the EVH 5150III 100 [6L6] (Blue channel)
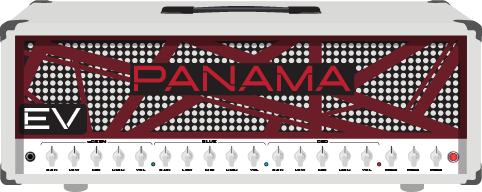
Amp/Preamp > EV Panama Red, based on* the EVH 5150III 100 [6L6] (Red channel)
New Cabs in 3.80
Cab > 4x10 US Super (Single, Dual), captured from* the Fender® Super Reverb

Cab > 4x12 Cartog Guv (Single, Dual), captured from* Ben Adrian's Cartographer cabinet (Modified Lee Jackson 4x12 with Eminence Governor speakers)

Cab > 4x12 Cartog C90 (Single, Dual), captured from* Ben Adrian's Cartographer cabinet (Modified Lee Jackson 4x12 with Mesa C90 speakers)
Cab > 4x12 SoloLead EM (Single, Dual), captured from* the Soldano SLO 4x12 cabinet

New Effects in 3.80
Wah > Teardrop Bass Q (Mono, Stereo), based on* the Dunlop 105Q bass wah

- Position—Sets the position of the wah's pedal position. By default, this is assigned to Expression Pedal 1. You may set the Min and Max value parameters to set the wah's frequency sweep range from the Controller Assign menu
- Q Trim—Controls the Q or bandwidth of the effect. Lower values boost a wider frequency band and higher values boost a narrower frequency band
- Vol Trim—Emulates the actual pedal's side volume trim knob
- Mix—Controls the wet/dry mix of the wah effect. When set to 0%, no wah effect is heard; when set to 100%, no dry signal is heard
- Level—Sets the overall (transparent) level of the block
*NOTE: All product names used in this document are trademarks of their respective owners and neither Yamaha Guitar Group nor Line 6 are associated or affiliated with them. These trademarks appear solely to identify products whose tones and sounds were studied by Line 6 during sound model development.
Bug Fixes in 3.80
- Delay > Cosmos Echo would apply the same wow/flutter modulation to the left and right delays, making it appear in certain cases as though the Spread control was inoperable—FIXED
- If you let your Helix Native sit, doing nothing for many hours, certain delay and modulation effects could stop processing audio until the preset was reloaded—FIXED
- If the Amp > Ampeg B-15NF's Bass parameter was set to 10.0, the model could gradually lose volume over the course of 30 minutes or so—FIXED
- If the Amp > Mandarin Bass 200's Bass parameter was set to 0.0, the model could lose volume over the course of 30 minutes or so—FIXED
- Delay > Poly Sustain could sometimes exhibit glitching audio if Random or Random Speed knobs were maxed out—FIXED
- Other minor fixes and improvements
Get Download
Helix Native
Helix Native
Helix/HX 3.80 (released November 19, 2024) includes 6 new amps, 4 new cabs, 1 new effect, and bug fixes and is strongly recommended for all users of Helix and HX.
How do I update to 3.80?
Updating Helix Native
- Before updating Helix Native, it is highly recommended that you export a preset/setlist bundle. Click the gear icon in the lower left, select the Presets/IRs tab, and then click Export Bundle. Some hardware compatibility modes (HX Stomp, HX Stomp XL, HX Effects) do not have this feature as they have only one setlist. In these cases, at the top of the preset list, click the yellow EXPORT to export the setlist.
- Quit your DAW and download and install Helix Native 3.80:
- Helix Native 3.80 (macOS): https://line6.com/software/readeula.html?rid=12909
- Helix Native 3.80 (Windows): https://line6.com/software/readeula.html?rid=12911
- Open your DAW and open an instance of Helix Native.
- OPTIONAL: The only way to hear 3.80's new factory presets is to restore them. IMPORTANT! MAKE SURE YOU'VE EXPORTED A BUNDLE (OR ANY IMPORTANT SETLISTS) FIRST, AS RESTORING FACTORY SETLISTS WILL ERASE ALL YOUR WORK! Click the gear icon in the lower left, select the Presets/IRs tab, and then click Restore Factory Setlists. Click Yes.
New Amps in 3.80
Amp/Preamp > US Super Nrm, based on* the Fender® Super Reverb (normal channel)
Amp/Preamp > US Super Vib, based on* the Fender® Super Reverb (vibrato channel)
Amp/Preamp > German Xtra Red, based on* the Bogner Ecstasy 101B (EL34) (red channel)
Amp/Preamp > German Xtra Blue, based on* the Bogner Ecstasy 101B (EL34) (blue channel)
Amp/Preamp > EV Panama Blue, based on* the EVH 5150III 100 [6L6] (Blue channel)
Amp/Preamp > EV Panama Red, based on* the EVH 5150III 100 [6L6] (Red channel)
New Cabs in 3.80
Cab > 4x10 US Super (Single, Dual), captured from* the Fender® Super Reverb
Cab > 4x12 Cartog Guv (Single, Dual), captured from* Ben Adrian's Cartographer cabinet (Modified Lee Jackson 4x12 with Eminence Governor speakers)
Cab > 4x12 Cartog C90 (Single, Dual), captured from* Ben Adrian's Cartographer cabinet (Modified Lee Jackson 4x12 with Mesa C90 speakers)
Cab > 4x12 SoloLead EM (Single, Dual), captured from* the Soldano SLO 4x12 cabinet
New Effects in 3.80
Wah > Teardrop Bass Q (Mono, Stereo), based on* the Dunlop 105Q bass wah
- Position—Sets the position of the wah's pedal position. By default, this is assigned to Expression Pedal 1. You may set the Min and Max value parameters to set the wah's frequency sweep range from the Controller Assign menu
- Q Trim—Controls the Q or bandwidth of the effect. Lower values boost a wider frequency band and higher values boost a narrower frequency band
- Vol Trim—Emulates the actual pedal's side volume trim knob
- Mix—Controls the wet/dry mix of the wah effect. When set to 0%, no wah effect is heard; when set to 100%, no dry signal is heard
- Level—Sets the overall (transparent) level of the block
*NOTE: All product names used in this document are trademarks of their respective owners and neither Yamaha Guitar Group nor Line 6 are associated or affiliated with them. These trademarks appear solely to identify products whose tones and sounds were studied by Line 6 during sound model development.
Bug Fixes in 3.80
- Delay > Cosmos Echo would apply the same wow/flutter modulation to the left and right delays, making it appear in certain cases as though the Spread control was inoperable—FIXED
- If you let your Helix Native sit, doing nothing for many hours, certain delay and modulation effects could stop processing audio until the preset was reloaded—FIXED
- If the Amp > Ampeg B-15NF's Bass parameter was set to 10.0, the model could gradually lose volume over the course of 30 minutes or so—FIXED
- If the Amp > Mandarin Bass 200's Bass parameter was set to 0.0, the model could lose volume over the course of 30 minutes or so—FIXED
- Delay > Poly Sustain could sometimes exhibit glitching audio if Random or Random Speed knobs were maxed out—FIXED
- Other minor fixes and improvements
Helix Native
Helix Native
Helix Native 3.71: (released January 11, 2024) includes several bug fixes, and is strongly recommended for all users.
Please follow or copy and paste this link into a browser of your choice to view the full release notes.
Helix Native
Helix Native
Helix Native 3.71: (released January 11, 2024) includes several bug fixes, and is strongly recommended for all users.
Please follow or copy and paste this link into a browser of your choice to view the full release notes.
Get Download
Helix Native
Helix Native
Helix Native 3.70 (released November 16, 2023) includes 10 new amps, 9 new cabs, 5 new effects, new features, and bug fixes, and is strongly recommended for all users.
How do I update to 3.70?
Updating Helix Native
- Before updating Helix Native, it is highly recommended that you export a preset/setlist bundle. Click the gear icon in the lower left, select the Presets/IRs tab, and then click Export Bundle. Some hardware compatibility modes (HX Stomp, HX Stomp XL, HX Effects) do not have this feature as they have only one setlist. In these cases, at the top of the preset list, click the yellow EXPORT to export the setlist.
- Quit your DAW and download and install Helix Native 3.70:
- Helix Native 3.70 (macOS): https://line6.com/software/readeula.html?rid=12405
- Helix Native 3.70 (Windows): https://line6.com/software/readeula.html?rid=12403
- Open your DAW and open an instance of Helix Native.
- OPTIONAL: The only way to hear 3.70's new factory presets is to restore them. IMPORTANT! MAKE SURE YOU'VE EXPORTED A BUNDLE (OR ANY IMPORTANT SETLISTS) FIRST, AS RESTORING FACTORY SETLISTS WILL ERASE ALL YOUR WORK! Click the gear icon in the lower left, select the Presets/IRs tab, and then click Restore Factory Setlists. Click Yes.
New Guitar Amps in 3.70
Helix Floor, Helix Rack, Helix LT, Helix Native, HX Stomp, HX Stomp XL
The six Original Amp Designs in Helix/HX 3.70 (Clarity, Aristocrat, Carillon, Voltage, Kinetic, and Oblivion) are taken from Line 6's popular line of Catalyst guitar amps. Each boasts a unique, integrated boost circuit optimized specifically for that amp. You can assign the Boost parameter to a stomp switch:
- Select one of the six Original Amp Design models below.
- Press and hold the Boost knob. Helix/HX jumps to the Controller Assign screen.
- [HX only: Press PAGE> to show the Learn knob.] Press Learn.
- Press the desired stomp switch. Helix/HX automatically assigns it. If you like, adjust Min Value and Max Value to dial in how much boost you want.
- Press HOME to exit. Wonder to yourself "wait, it's that easy to assign any parameter in Helix/HX to a stomp switch? Why haven't I done this before?"—OR—ponder "I'm a power user who knows all the shortcuts. I should assign parameters to switches more often."
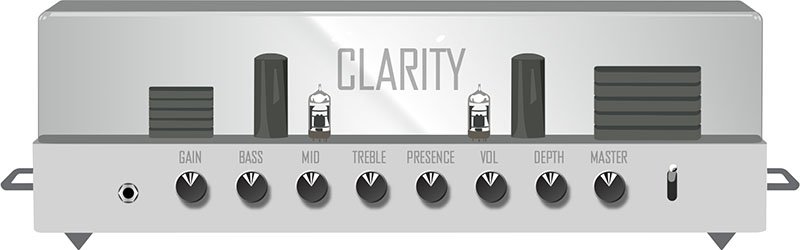
Amp/Preamp > Line 6 Clarity, Original Amp Design inspired by classic clean solid-state and tube amps. Lots of clean headroom with just a touch of overdrive at the very end of the Drive knob's range.
Amp/Preamp > Line 6 Aristocrat, Original Amp Design inspired by rare, unobtainable boutique mid-gain black-panel amps. Features aren’t limited by what can be done with analog circuits.
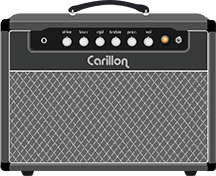
Amp/Preamp > Line 6 Carillon, Line 6 Original inspired by modern and vintage versions of a popular EL84 driven tube amp with added grit at higher gain settings. We kept the good quirks and eliminated the ugly ones, while also making the tone controls more flexible.
Amp/Preamp > Line 6 Voltage, Line 6 Original inspired by the classic British "plexi" amp, but with an additional gain stage and more tonal versatility.

Amp/Preamp > Line 6 Kinetic, Line 6 Original where all the preamp stages clip at roughly the same time, allowing the amp to go from mostly clean to heavily distorted using the guitar's volume control.

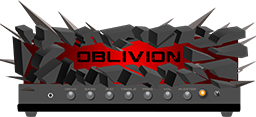
Amp/Preamp > Line 6 Oblivion, Line 6 Original designed to cover both modern metal and old-school '80s thrash. We took out a lot of the noise associated with high gain, retaining just enough so that it doesn’t sound sterile or artificial.
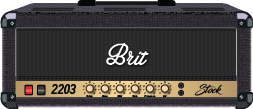
Amp/Preamp > Brit 2203, based on* the Marshall JCM800 2203 (Stock)
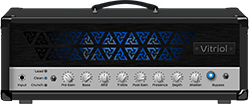
Amp/Preamp > PV Vitriol Clean, based on* the Peavey Invective (Clean Channel)
New Bass Amps in 3.70
Helix Floor, Helix Rack, Helix LT, Helix Native, HX Stomp, HX Stomp XL
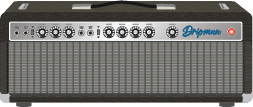
Amp/Preamp > US Dripman Nrm, based on* the Fender Bassman (Silver Panel)
Should I use US Dripman Nrm as a bass amp or a guitar amp?
Yes.
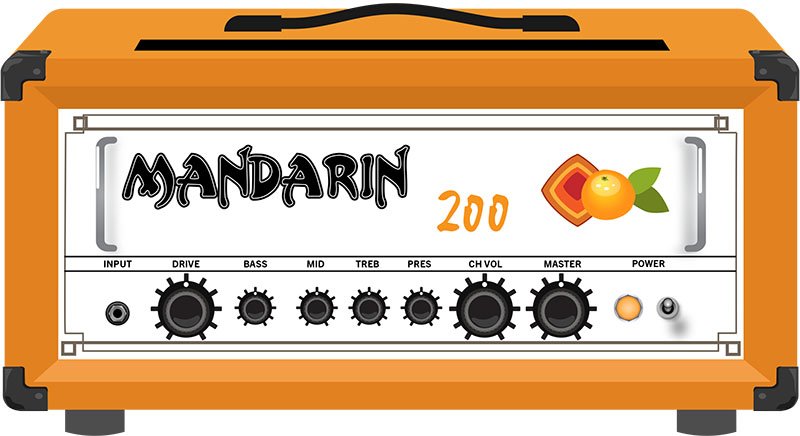
Amp/Preamp > Mandarin 200, based on* the Orange AD200 MkIII bass amp
New Cabs in 3.70
Helix Floor, Helix Rack, Helix LT, Helix Native, HX Stomp, HX Stomp XL
Cab > Soup Pro Ellipse (Single, Dual), captured from* the 1x6×9″ Supro® S6616

Cab > 1x8 Small Tweed (Single, Dual), captured from* the 1×8″ Fender® Champ

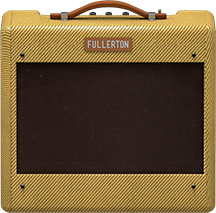
Cab > 1x12 Fullerton (Single, Dual), captured from* the 1x12" Fender® 5C3 Tweed Deluxe
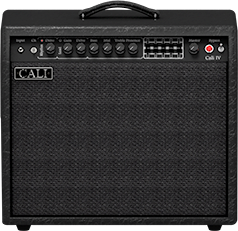
Cab > 1x12 Cali IV (Single, Dual), captured from* the 1x12" MESA/Boogie® Mk IV combo
Cab > 2x12 Interstate (Single, Dual), captured from* the 2×12″ Dr Z® Z Best V30

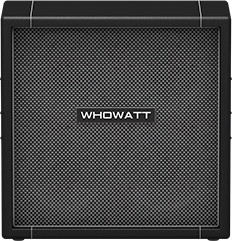
Cab > 4x12 WhoWatt 100 (Single, Dual), captured from* the 4×12″ Hiwatt® AP Fane®
Cab > 4x12 Greenback 30 (Single, Dual), captured from* the 4×12″ Marshall® Basketweave G12H-30

Cab > 2x15 Dripman (Single, Dual), captured from* the 2x15" Fender® Bassman JBL D130
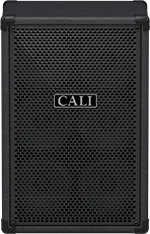
Cab > 6x10 Cali Power (Single, Dual), captured from* the 6×10″ MESA/Boogie® Power House
New Effects in 3.70
Helix Floor, Helix Rack, Helix LT, Helix Native, HX Effects, HX Stomp, HX Stomp XL, HX One
Distortion > Prize Drive (Mono, Stereo), based on* the Nobels ODR-1

- Drive—Sets the amount of distortion
- Spectrum—When turned down, mids are accentuated; when turned up, lows and highs are accentuated. Could almost be considered a "scoop" control.
- Level—Sets the overall level of the block.
- Bass Cut—When set to "On," slightly attenuates low bass frequencies.
- Voltage—The Nobels ODR-1 can behave differently depending on how much power it receives. Choose 9V or 18V, which gives a bit more headroom.
Distortion > Regal Bass DI (Mono, Stereo), based on* the Noble Preamp bass DI

- Bass—Adds a 150Hz bass boost to the signal. 0.0 is flat.
- Treble—Adds a 3.5kHz treble boost to the signal. 0.0 is flat.
- Low Cut—Applies a 90Hz low cut (high pass) filter to the signal (6dB/octave).
- Volume—Controls the overall output level of the DI.
Dynamics > Feedbacker (Mono), Line 6 Original feedback generator
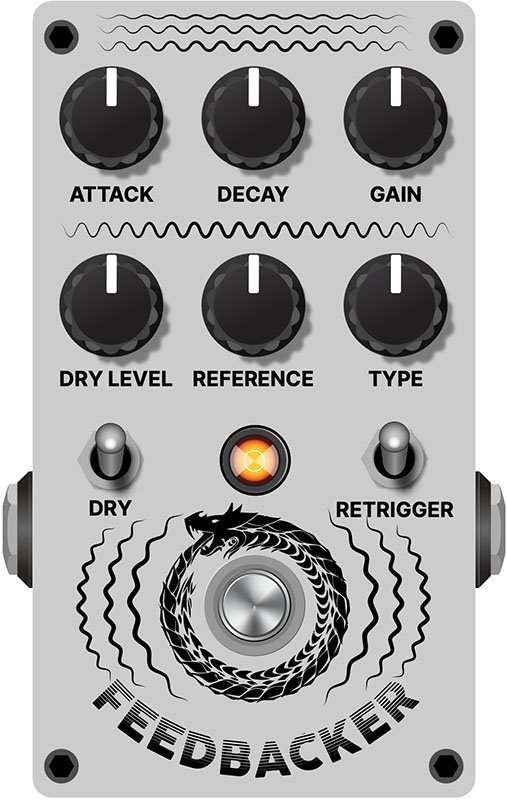
Oh man, this one is fun with a capital Ffffff but you'll want to read up on how to get the best results. Works best as one of the first blocks in your signal flow. NOTE: Feedbacker loads bypassed by default.
- Fdbk Gain—Controls the amount of feedback. At higher settings, can easily overwhelm your guitar signal; at lower settings, the feedback can better "sit" between chords. WARNING! Be careful, as this effect can quickly go off the rails, just like real feedback. Consider assigning it to a momentary stomp so feedback only appears while you hold the switch.
- Fdbk Type—Determines the type of the feedback generated. TIP: Try assigning different Feedback Type values to snapshots.
- –Octave—Feedback appears one octave below the "reference frequency," which is basically the note Feedbacker chooses to base its feedback generation on. Depending on the chord, Feedbacker may choose different reference frequencies.
- Unison—Feedback appears at the reference frequency.
- +Octave—Feedback appears one octave above the the reference frequency.
- Oct +5th—Feedback appears one octave plus a 5th above the the reference frequency.
- +2 Octaves—Feedback appears two octaves above the the reference frequency.
- 2 Oct+3rd—Feedback appears two octaves plus a 3rd above the reference note frequency.
- 2 Oct+5th—Feedback appears two octaves plus a 5th above the reference note frequency.
- 2 Oct+7th—Feedback appears two octaves plus a 7th above the reference note frequency.
- Mid to Low—Feedback typically starts on the highest harmonic below 500 Hz and drops down to lower harmonics as the signal decays.
- High to Low—Feedback typically begins on the highest harmonic below 1200 Hz and descends to lower harmonics as the signal decays.
- Rndm Onset—New harmonics are selected randomly every time a new onset (note or chord's attack) is detected. In this case, repeating the same chord could still generate different harmonics.
- Rndm Trigger—New harmonics are selected randomly every time the Retrigger parameter is set to "Trigger." See the Retrigger parameter below.
- Attack—Controls how quickly feedback appears.
- Release—Controls how quickly each harmonic dies out or transitions to a different one. At higher values, you may hear more than one harmonic as they transition.
- Dry Kill—Determines what happens to the dry (unaffected) signal:
- Off—The dry signal is controlled by the Dry Level parameter but is otherwise unaffected when the Feedbacker block is turned on
- On—The dry signal is muted when the Feedback block is turned on. TIP: With Dry Kill on and Fdbk Type set to "Unison," playing slower, single notes can result in sounds similar to using an E-bow.
- Always—The dry signal is completely muted from the entire path, regardless of whether the Feedback block is on or off. TIP: Use this setting only when Feedbacker is on a parallel path.
- Dry Level—Sets the amount of dry signal through the Feedbacker block. TIP: Assign this parameter to an expression pedal for blending in the dry signal behind the feedback.
- Reference—Determines which note within a chord is referenced by the feedback. "Lowest" prioritizes a chord's lowest-pitched note as the feedback reference, which often represents the fundamental frequency of the chord. "Loudest" prioritizes the loudest note in the chord as the feedback reference, which may not be the lowest note.
- Silence Thr—Sets the level threshold above which feedback is generated. Below this level, no feedback will be generated.
- Onset Thr—When Feedback Type is set to Rndm Offset, sets the threshold of onsets (plucks) that cause changes to the feedback note. Lower values increase sensitivity to plucking and strumming, so changes to the feedback note take place more often. Higher values reduce sensitivity to plucking and strumming, so changes to the feedback note take place less often.
- Offset Thr—Rapid drops in the signal level by this amount will quickly kill the feedback to prevent warbling.
- Retrigger—Okay, Retrigger isn't a parameter per sé; it's meant for you to assign it to an unused momentary stomp switch. (Press and hold the Retrigger knob, press Learn, press the desired stomp switch, and then set Type to "Momentary.") Every time you press the switch (and the parameter changes from "---" to "Trigger"), the feedback generated will change, depending on the type of mode:
- Mid to Low or High to Low modes—Pressing the Retrigger switch will cause the Feedbacker to descend to lower harmonics.
- Rndm Trigger or Rndm Onset—Pressing the Retrigger switch will cause the Feedbacker to randomly choose a different harmonic.
- All other modes—Pressing the Retrigger switch will cause feedback to regenerate at the mode's selected frequency.
- Trails—When on, feedback continues to ring out (for the duration of the Release parameter) after the block is bypassed. When off, feedback stops abruptly when the block is bypassed.
Reverb > Dynamic Bloom (Mono, Stereo), Line 6 Original bloom reverb.

- Decay—Sets the decay of the reverb (0.1 sec ~ 45.0 sec, or Infinity).
- Damping—Determines the frequency above which the reverb will be absorbed. For example, if your hall is full of people wearing fake ocelot jumpsuits, more high frequencies would be absorbed than if the room were empty.
- Mot Rate—Motion Rate, or how fast the echoes' intensity changes.
- Rise Time—Sets how long it takes for the reverb to bloom. Choose Short, Medium (default), or Long.
- Mix—Controls the wet/dry mix of the reverb. When set to 0%, no reverb is heard; when set to 100%, no dry signal is heard.
- Low Freq—Sets the frequency below which the Low Gain parameter is applied.
- Low Gain—Sets the reverb time for frequencies below the Low Freq value. Values below 0.0dB mean the bass frequencies decay faster than the treble frequencies; values above 0.0dB mean the bass frequencies decay slower than the treble frequencies.
- Low Cut—Applies a low cut (or high pass) filter to the reverb, letting you remove the effected signal below a certain frequency.
- High Cut—Applies a high cut (or low pass) filter to the reverb, letting you remove the effected signal above a certain frequency.
- Ducking—Traditionally, ducking controls how much of the entire reverb is dropped in volume (or "ducked") while the signal is active. With Dynamic Bloom, the ducking instead applies to the reverb's feedback only. For example, if you set Decay really high and strum one chord, you'll hear that chord sustain for a long time. While it's ringing out, hit another chord. Without ducking, both chords now sustain together. With Ducking set high, the first chord quickly fades out, and all you'll hear sustaining is the 2nd chord. This can help your bloom from turning into a sloppy mess.
- Level—Sets the overall level of the block.
- Trails—When set to "Off," reverb decay is instantly muted when the block is bypassed. When set to "On," the reverb continues to decay naturally when the block is bypassed or a different snapshot is selected.
Reverb > Nonlinear (Mono, Stereo), Line 6 Original nonlinear reverb with a variety of decay tail shapes (including multiple reverse reverb shapes).
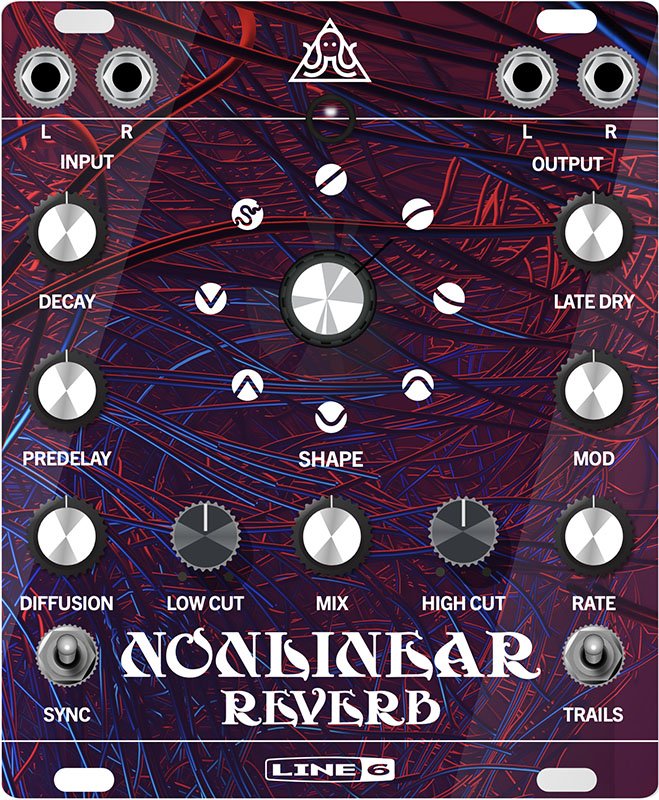
- Decay—Sets the decay of the reverb (1.0 ms ~ 2.000 sec). Press the knob to toggle between ms/sec and note values. TIP: When set to note values, playing a note/chord 4 beats (Decay set to "1/1") or 2 beats (Decay set to "1/2") before a song transition can cause the reverb to stop right on the downbeat.
- Predelay—Determines the amount of delay heard before the signal enters the reverb.
- Shape—Determines the shape of the reverb's decay:
- Linear—Traditional reverse reverb with an even, linear slope; abruptly stops after the decay length.
- Log—Reverse reverb with a logarithmic curve so it starts low and ramps up toward the decay's end.
- Inverse Log—Reverse reverb with an inverse logarithmic curve so it ramps up quickly.
- Gauss—Ramps up and then down in a gaussian curve shape.
- Inverse Gauss—Ramps down and then up in a gaussian curve shape.
- Triangle—Ramps up and then down in a triangle shape.
- Inverse Triangle—Ramps up and then down in a triangle shape.
- Full—No ramp at all; the reverb is on full blast for the duration of the decay and then abruptly stops after the decay length.

- Late Dry—Adds a bit of the original signal as the very last tap. Most audible when playing simple lines with gaussian and triangle shapes.
- Mix—Controls the wet/dry mix of the reverb. When set to 0%, no reverb is heard; when set to 100%, no dry signal is heard.
- Level—Sets the overall level of the block.
- Diffusion—Sets the amount of smearing between discrete echoes, sometimes resulting in a softer effected signal.
- Low Cut—Applies a low cut (or high pass) filter to the reverb, letting you remove the effected signal below a certain frequency.
- High Cut—Applies a high cut (or low pass) filter to the reverb, letting you remove the effected signal above a certain frequency.
- Mod—Controls the amount of modulation applied to the reverb.
- Rate—Controls the rate or speed of modulation applied to the reverb.
- Spread (Stereo version only)—Determines the stereo width or spread of the effected signal.
- Trails—When set to "Off," reverb decay is instantly muted when the block is bypassed. When set to "On," the reverb continues to decay naturally when the block is bypassed or a different snapshot is selected.
*NOTE: All product names used in this document are trademarks of their respective owners and neither Yamaha Guitar Group nor Line 6 are associated or affiliated with them. These trademarks appear solely to identify products whose tones and sounds were studied by Line 6 during sound model development.
New Features in 3.70
Cab Delay > Auto Value
Helix Floor, Helix Rack/Control, Helix LT, HX Stomp, HX Stomp XL
Helix/HX's new cab engine (introduced with 3.50) makes it easy to quickly find a great cab sound by automatically phase and time-aligning the mics in dual cab setups; this avoids the phasing or "thinning out" that can occur naturally when using two mics at different distances. However, some studio engineers are very adept at using phase misalignment to achieve interesting sounds. We've now added a new "Auto" value to the Cab > Delay parameter (all the way left, before 0.0 ms) that automatically approximates the delay through the air when changing the mic Distance parameter.
For most people, however, we recommend leaving Delay set to the default "0.0 ms."
Bug Fixes in 3.70
- When Amp/Preamp > PV Vitriol Crunch's Gain knob was turned all the way up, the signal could drop out unexpectedly—FIXED
- With very fast attack times, Dynamics > Deluxe Comp could sometimes exhibit distortion on some source material—FIXED
- Some reverbs would not reflect the Tuner > Trails parameter—FIXED
- Stereo versions of select distortion and modulation effects could exhibit an unbalanced stereo field, some more so than others—FIXED
- In rare cases, some HX Command messages could appear laggy when assigned to a stomp switch with many other assignments—FIXED
- HX Stomp/HX Stomp XL only: Accessing the Tempo panel by touching the Tap switch could sometimes make the Tempo knob non-responsive—FIXED
Known Issues in 3.70
- The mono version of Reverb > Nonlinear exhibits a less-smooth decay than the stereo version, which is especially noticeable on percussive material. It also affects the stereo version if merged to a mono path or when utilizing a mono output.
- In some cases if a Path 1B or 2B Input block is set to the same return as a block on a B path in a corresponding preset, the preset can load blank.
- After performing a Factory Reset, attempting to load 128 or more IRs can result in a "Failed to get impulse names" -8207 error. Instead, load fewer than 128 IRs at once.
- If Looper > 1 Switch Looper is playing, the first MIDI CC62 (Play Once) command is ignored. Sending a second CC62 command will work properly.
- Helix LT only: After entering and exiting the tuner from Snapshot performance view, Helix LT returns to the home screen
- HX Stomp/HX Stomp XL only: If you have a snapshot command set to a footswitch (and Global Settings > Displays > LED Rings is set to "Off/Brt"), the footswitches may not light up red when pressed.
Get Download
Helix Native
Helix Native
Helix Native 3.70 (released November 16, 2023) includes 10 new amps, 9 new cabs, 5 new effects, new features, and bug fixes, and is strongly recommended for all users.
How do I update to 3.70?
Updating Helix Native
- Before updating Helix Native, it is highly recommended that you export a preset/setlist bundle. Click the gear icon in the lower left, select the Presets/IRs tab, and then click Export Bundle. Some hardware compatibility modes (HX Stomp, HX Stomp XL, HX Effects) do not have this feature as they have only one setlist. In these cases, at the top of the preset list, click the yellow EXPORT to export the setlist.
- Quit your DAW and download and install Helix Native 3.70:
- Helix Native 3.70 (macOS): https://line6.com/software/readeula.html?rid=12405
- Helix Native 3.70 (Windows): https://line6.com/software/readeula.html?rid=12403
- Open your DAW and open an instance of Helix Native.
- OPTIONAL: The only way to hear 3.70's new factory presets is to restore them. IMPORTANT! MAKE SURE YOU'VE EXPORTED A BUNDLE (OR ANY IMPORTANT SETLISTS) FIRST, AS RESTORING FACTORY SETLISTS WILL ERASE ALL YOUR WORK! Click the gear icon in the lower left, select the Presets/IRs tab, and then click Restore Factory Setlists. Click Yes.
New Guitar Amps in 3.70
Helix Floor, Helix Rack, Helix LT, Helix Native, HX Stomp, HX Stomp XL
The six Original Amp Designs in Helix/HX 3.70 (Clarity, Aristocrat, Carillon, Voltage, Kinetic, and Oblivion) are taken from Line 6's popular line of Catalyst guitar amps. Each boasts a unique, integrated boost circuit optimized specifically for that amp. You can assign the Boost parameter to a stomp switch:
- Select one of the six Original Amp Design models below.
- Press and hold the Boost knob. Helix/HX jumps to the Controller Assign screen.
- [HX only: Press PAGE> to show the Learn knob.] Press Learn.
- Press the desired stomp switch. Helix/HX automatically assigns it. If you like, adjust Min Value and Max Value to dial in how much boost you want.
- Press HOME to exit. Wonder to yourself "wait, it's that easy to assign any parameter in Helix/HX to a stomp switch? Why haven't I done this before?"—OR—ponder "I'm a power user who knows all the shortcuts. I should assign parameters to switches more often."
Amp/Preamp > Line 6 Clarity, Original Amp Design inspired by classic clean solid-state and tube amps. Lots of clean headroom with just a touch of overdrive at the very end of the Drive knob's range.
Amp/Preamp > Line 6 Aristocrat, Original Amp Design inspired by rare, unobtainable boutique mid-gain black-panel amps. Features aren’t limited by what can be done with analog circuits.
Amp/Preamp > Line 6 Carillon, Line 6 Original inspired by modern and vintage versions of a popular EL84 driven tube amp with added grit at higher gain settings. We kept the good quirks and eliminated the ugly ones, while also making the tone controls more flexible.
Amp/Preamp > Line 6 Voltage, Line 6 Original inspired by the classic British "plexi" amp, but with an additional gain stage and more tonal versatility.
Amp/Preamp > Line 6 Kinetic, Line 6 Original where all the preamp stages clip at roughly the same time, allowing the amp to go from mostly clean to heavily distorted using the guitar's volume control.
Amp/Preamp > Line 6 Oblivion, Line 6 Original designed to cover both modern metal and old-school '80s thrash. We took out a lot of the noise associated with high gain, retaining just enough so that it doesn’t sound sterile or artificial.
Amp/Preamp > Brit 2203, based on* the Marshall JCM800 2203 (Stock)
Amp/Preamp > PV Vitriol Clean, based on* the Peavey Invective (Clean Channel)
New Bass Amps in 3.70
Helix Floor, Helix Rack, Helix LT, Helix Native, HX Stomp, HX Stomp XL
Amp/Preamp > US Dripman Nrm, based on* the Fender Bassman (Silver Panel)
Should I use US Dripman Nrm as a bass amp or a guitar amp?
Yes.
Amp/Preamp > Mandarin 200, based on* the Orange AD200 MkIII bass amp
New Cabs in 3.70
Helix Floor, Helix Rack, Helix LT, Helix Native, HX Stomp, HX Stomp XL
Cab > Soup Pro Ellipse (Single, Dual), captured from* the 1x6×9″ Supro® S6616
Cab > 1x8 Small Tweed (Single, Dual), captured from* the 1×8″ Fender® Champ
Cab > 1x12 Fullerton (Single, Dual), captured from* the 1x12" Fender® 5C3 Tweed Deluxe
Cab > 1x12 Cali IV (Single, Dual), captured from* the 1x12" MESA/Boogie® Mk IV combo
Cab > 2x12 Interstate (Single, Dual), captured from* the 2×12″ Dr Z® Z Best V30
Cab > 4x12 WhoWatt 100 (Single, Dual), captured from* the 4×12″ Hiwatt® AP Fane®
Cab > 4x12 Greenback 30 (Single, Dual), captured from* the 4×12″ Marshall® Basketweave G12H-30
Cab > 2x15 Dripman (Single, Dual), captured from* the 2x15" Fender® Bassman JBL D130
Cab > 6x10 Cali Power (Single, Dual), captured from* the 6×10″ MESA/Boogie® Power House
New Effects in 3.70
Helix Floor, Helix Rack, Helix LT, Helix Native, HX Effects, HX Stomp, HX Stomp XL, HX One
Distortion > Prize Drive (Mono, Stereo), based on* the Nobels ODR-1
- Drive—Sets the amount of distortion
- Spectrum—When turned down, mids are accentuated; when turned up, lows and highs are accentuated. Could almost be considered a "scoop" control.
- Level—Sets the overall level of the block.
- Bass Cut—When set to "On," slightly attenuates low bass frequencies.
- Voltage—The Nobels ODR-1 can behave differently depending on how much power it receives. Choose 9V or 18V, which gives a bit more headroom.
Distortion > Regal Bass DI (Mono, Stereo), based on* the Noble Preamp bass DI
- Bass—Adds a 150Hz bass boost to the signal. 0.0 is flat.
- Treble—Adds a 3.5kHz treble boost to the signal. 0.0 is flat.
- Low Cut—Applies a 90Hz low cut (high pass) filter to the signal (6dB/octave).
- Volume—Controls the overall output level of the DI.
Dynamics > Feedbacker (Mono), Line 6 Original feedback generator
Oh man, this one is fun with a capital Ffffff but you'll want to read up on how to get the best results. Works best as one of the first blocks in your signal flow. NOTE: Feedbacker loads bypassed by default.
- Fdbk Gain—Controls the amount of feedback. At higher settings, can easily overwhelm your guitar signal; at lower settings, the feedback can better "sit" between chords. WARNING! Be careful, as this effect can quickly go off the rails, just like real feedback. Consider assigning it to a momentary stomp so feedback only appears while you hold the switch.
- Fdbk Type—Determines the type of the feedback generated. TIP: Try assigning different Feedback Type values to snapshots.
- –Octave—Feedback appears one octave below the "reference frequency," which is basically the note Feedbacker chooses to base its feedback generation on. Depending on the chord, Feedbacker may choose different reference frequencies.
- Unison—Feedback appears at the reference frequency.
- +Octave—Feedback appears one octave above the the reference frequency.
- Oct +5th—Feedback appears one octave plus a 5th above the the reference frequency.
- +2 Octaves—Feedback appears two octaves above the the reference frequency.
- 2 Oct+3rd—Feedback appears two octaves plus a 3rd above the reference note frequency.
- 2 Oct+5th—Feedback appears two octaves plus a 5th above the reference note frequency.
- 2 Oct+7th—Feedback appears two octaves plus a 7th above the reference note frequency.
- Mid to Low—Feedback typically starts on the highest harmonic below 500 Hz and drops down to lower harmonics as the signal decays.
- High to Low—Feedback typically begins on the highest harmonic below 1200 Hz and descends to lower harmonics as the signal decays.
- Rndm Onset—New harmonics are selected randomly every time a new onset (note or chord's attack) is detected. In this case, repeating the same chord could still generate different harmonics.
- Rndm Trigger—New harmonics are selected randomly every time the Retrigger parameter is set to "Trigger." See the Retrigger parameter below.
- Attack—Controls how quickly feedback appears.
- Release—Controls how quickly each harmonic dies out or transitions to a different one. At higher values, you may hear more than one harmonic as they transition.
- Dry Kill—Determines what happens to the dry (unaffected) signal:
- Off—The dry signal is controlled by the Dry Level parameter but is otherwise unaffected when the Feedbacker block is turned on
- On—The dry signal is muted when the Feedback block is turned on. TIP: With Dry Kill on and Fdbk Type set to "Unison," playing slower, single notes can result in sounds similar to using an E-bow.
- Always—The dry signal is completely muted from the entire path, regardless of whether the Feedback block is on or off. TIP: Use this setting only when Feedbacker is on a parallel path.
- Dry Level—Sets the amount of dry signal through the Feedbacker block. TIP: Assign this parameter to an expression pedal for blending in the dry signal behind the feedback.
- Reference—Determines which note within a chord is referenced by the feedback. "Lowest" prioritizes a chord's lowest-pitched note as the feedback reference, which often represents the fundamental frequency of the chord. "Loudest" prioritizes the loudest note in the chord as the feedback reference, which may not be the lowest note.
- Silence Thr—Sets the level threshold above which feedback is generated. Below this level, no feedback will be generated.
- Onset Thr—When Feedback Type is set to Rndm Offset, sets the threshold of onsets (plucks) that cause changes to the feedback note. Lower values increase sensitivity to plucking and strumming, so changes to the feedback note take place more often. Higher values reduce sensitivity to plucking and strumming, so changes to the feedback note take place less often.
- Offset Thr—Rapid drops in the signal level by this amount will quickly kill the feedback to prevent warbling.
- Retrigger—Okay, Retrigger isn't a parameter per sé; it's meant for you to assign it to an unused momentary stomp switch. (Press and hold the Retrigger knob, press Learn, press the desired stomp switch, and then set Type to "Momentary.") Every time you press the switch (and the parameter changes from "---" to "Trigger"), the feedback generated will change, depending on the type of mode:
- Mid to Low or High to Low modes—Pressing the Retrigger switch will cause the Feedbacker to descend to lower harmonics.
- Rndm Trigger or Rndm Onset—Pressing the Retrigger switch will cause the Feedbacker to randomly choose a different harmonic.
- All other modes—Pressing the Retrigger switch will cause feedback to regenerate at the mode's selected frequency.
- Trails—When on, feedback continues to ring out (for the duration of the Release parameter) after the block is bypassed. When off, feedback stops abruptly when the block is bypassed.
Reverb > Dynamic Bloom (Mono, Stereo), Line 6 Original bloom reverb.
- Decay—Sets the decay of the reverb (0.1 sec ~ 45.0 sec, or Infinity).
- Damping—Determines the frequency above which the reverb will be absorbed. For example, if your hall is full of people wearing fake ocelot jumpsuits, more high frequencies would be absorbed than if the room were empty.
- Mot Rate—Motion Rate, or how fast the echoes' intensity changes.
- Rise Time—Sets how long it takes for the reverb to bloom. Choose Short, Medium (default), or Long.
- Mix—Controls the wet/dry mix of the reverb. When set to 0%, no reverb is heard; when set to 100%, no dry signal is heard.
- Low Freq—Sets the frequency below which the Low Gain parameter is applied.
- Low Gain—Sets the reverb time for frequencies below the Low Freq value. Values below 0.0dB mean the bass frequencies decay faster than the treble frequencies; values above 0.0dB mean the bass frequencies decay slower than the treble frequencies.
- Low Cut—Applies a low cut (or high pass) filter to the reverb, letting you remove the effected signal below a certain frequency.
- High Cut—Applies a high cut (or low pass) filter to the reverb, letting you remove the effected signal above a certain frequency.
- Ducking—Traditionally, ducking controls how much of the entire reverb is dropped in volume (or "ducked") while the signal is active. With Dynamic Bloom, the ducking instead applies to the reverb's feedback only. For example, if you set Decay really high and strum one chord, you'll hear that chord sustain for a long time. While it's ringing out, hit another chord. Without ducking, both chords now sustain together. With Ducking set high, the first chord quickly fades out, and all you'll hear sustaining is the 2nd chord. This can help your bloom from turning into a sloppy mess.
- Level—Sets the overall level of the block.
- Trails—When set to "Off," reverb decay is instantly muted when the block is bypassed. When set to "On," the reverb continues to decay naturally when the block is bypassed or a different snapshot is selected.
Reverb > Nonlinear (Mono, Stereo), Line 6 Original nonlinear reverb with a variety of decay tail shapes (including multiple reverse reverb shapes).
- Decay—Sets the decay of the reverb (1.0 ms ~ 2.000 sec). Press the knob to toggle between ms/sec and note values. TIP: When set to note values, playing a note/chord 4 beats (Decay set to "1/1") or 2 beats (Decay set to "1/2") before a song transition can cause the reverb to stop right on the downbeat.
- Predelay—Determines the amount of delay heard before the signal enters the reverb.
- Shape—Determines the shape of the reverb's decay:
- Linear—Traditional reverse reverb with an even, linear slope; abruptly stops after the decay length.
- Log—Reverse reverb with a logarithmic curve so it starts low and ramps up toward the decay's end.
- Inverse Log—Reverse reverb with an inverse logarithmic curve so it ramps up quickly.
- Gauss—Ramps up and then down in a gaussian curve shape.
- Inverse Gauss—Ramps down and then up in a gaussian curve shape.
- Triangle—Ramps up and then down in a triangle shape.
- Inverse Triangle—Ramps up and then down in a triangle shape.
- Full—No ramp at all; the reverb is on full blast for the duration of the decay and then abruptly stops after the decay length.
- Late Dry—Adds a bit of the original signal as the very last tap. Most audible when playing simple lines with gaussian and triangle shapes.
- Mix—Controls the wet/dry mix of the reverb. When set to 0%, no reverb is heard; when set to 100%, no dry signal is heard.
- Level—Sets the overall level of the block.
- Diffusion—Sets the amount of smearing between discrete echoes, sometimes resulting in a softer effected signal.
- Low Cut—Applies a low cut (or high pass) filter to the reverb, letting you remove the effected signal below a certain frequency.
- High Cut—Applies a high cut (or low pass) filter to the reverb, letting you remove the effected signal above a certain frequency.
- Mod—Controls the amount of modulation applied to the reverb.
- Rate—Controls the rate or speed of modulation applied to the reverb.
- Spread (Stereo version only)—Determines the stereo width or spread of the effected signal.
- Trails—When set to "Off," reverb decay is instantly muted when the block is bypassed. When set to "On," the reverb continues to decay naturally when the block is bypassed or a different snapshot is selected.
*NOTE: All product names used in this document are trademarks of their respective owners and neither Yamaha Guitar Group nor Line 6 are associated or affiliated with them. These trademarks appear solely to identify products whose tones and sounds were studied by Line 6 during sound model development.
New Features in 3.70
Cab Delay > Auto Value
Helix Floor, Helix Rack/Control, Helix LT, HX Stomp, HX Stomp XL
Helix/HX's new cab engine (introduced with 3.50) makes it easy to quickly find a great cab sound by automatically phase and time-aligning the mics in dual cab setups; this avoids the phasing or "thinning out" that can occur naturally when using two mics at different distances. However, some studio engineers are very adept at using phase misalignment to achieve interesting sounds. We've now added a new "Auto" value to the Cab > Delay parameter (all the way left, before 0.0 ms) that automatically approximates the delay through the air when changing the mic Distance parameter.
For most people, however, we recommend leaving Delay set to the default "0.0 ms."
Bug Fixes in 3.70
- When Amp/Preamp > PV Vitriol Crunch's Gain knob was turned all the way up, the signal could drop out unexpectedly—FIXED
- With very fast attack times, Dynamics > Deluxe Comp could sometimes exhibit distortion on some source material—FIXED
- Some reverbs would not reflect the Tuner > Trails parameter—FIXED
- Stereo versions of select distortion and modulation effects could exhibit an unbalanced stereo field, some more so than others—FIXED
- In rare cases, some HX Command messages could appear laggy when assigned to a stomp switch with many other assignments—FIXED
- HX Stomp/HX Stomp XL only: Accessing the Tempo panel by touching the Tap switch could sometimes make the Tempo knob non-responsive—FIXED
Known Issues in 3.70
- The mono version of Reverb > Nonlinear exhibits a less-smooth decay than the stereo version, which is especially noticeable on percussive material. It also affects the stereo version if merged to a mono path or when utilizing a mono output.
- In some cases if a Path 1B or 2B Input block is set to the same return as a block on a B path in a corresponding preset, the preset can load blank.
- After performing a Factory Reset, attempting to load 128 or more IRs can result in a "Failed to get impulse names" -8207 error. Instead, load fewer than 128 IRs at once.
- If Looper > 1 Switch Looper is playing, the first MIDI CC62 (Play Once) command is ignored. Sending a second CC62 command will work properly.
- Helix LT only: After entering and exiting the tuner from Snapshot performance view, Helix LT returns to the home screen
- HX Stomp/HX Stomp XL only: If you have a snapshot command set to a footswitch (and Global Settings > Displays > LED Rings is set to "Off/Brt"), the footswitches may not light up red when pressed.
Helix Native
Helix Native
Helix Native 3.61 Release Notes
Bug Fixes in 3.61
- Bass cabinets incorrectly displayed guitar microphone graphics.
- Other minor fixes and improvements.
Get Download
Helix Native
Helix Native
Helix Native 3.61 Release Notes
Bug Fixes in 3.61
- Bass cabinets incorrectly displayed guitar microphone graphics.
- Other minor fixes and improvements.
Get Download
Helix Native
Helix Native
Helix/HX 3.60 (released April 25, 2023) includes 3 new amps, 9 new cabs, 2 new effects, additional improvements, and bug fixes, and is strongly recommended for all users.
How do I update to 3.60?
Updating Helix Native
- Before updating Helix Native, it is highly recommended that you export a preset/setlist bundle. Click the gear icon in the lower left, select the Presets/IRs tab, and then click Export Bundle. Some hardware compatibility modes (HX Stomp, HX Stomp XL, HX Effects) do not have this feature as they have only one setlist. In these cases, at the top of the preset list, click the yellow EXPORT to export the setlist.
- Quit your DAW and download and install Helix Native 3.60:
- Helix Native 3.60 (macOS): https://line6.com/software/readeula.html?rid=11895
- Helix Native 3.60 (Windows): https://line6.com/software/readeula.html?rid=11896
- Open your DAW and open an instance of Helix Native.
- OPTIONAL: The only way to hear 3.60's new factory presets is to restore them. IMPORTANT! MAKE SURE YOU'VE EXPORTED A BUNDLE (OR ANY IMPORTANT SETLISTS) FIRST, AS RESTORING FACTORY SETLISTS WILL ERASE ALL YOUR WORK! Click the gear icon in the lower left, select the Presets/IRs tab, and then click Restore Factory Setlists. Click Yes.
New Amps in 3.60
Helix Floor, Helix Rack, Helix LT, Helix Native, HX Stomp, HX Stomp XL
Amp/Preamp > Grammatico GSG, based on* the Grammatico GSG100.
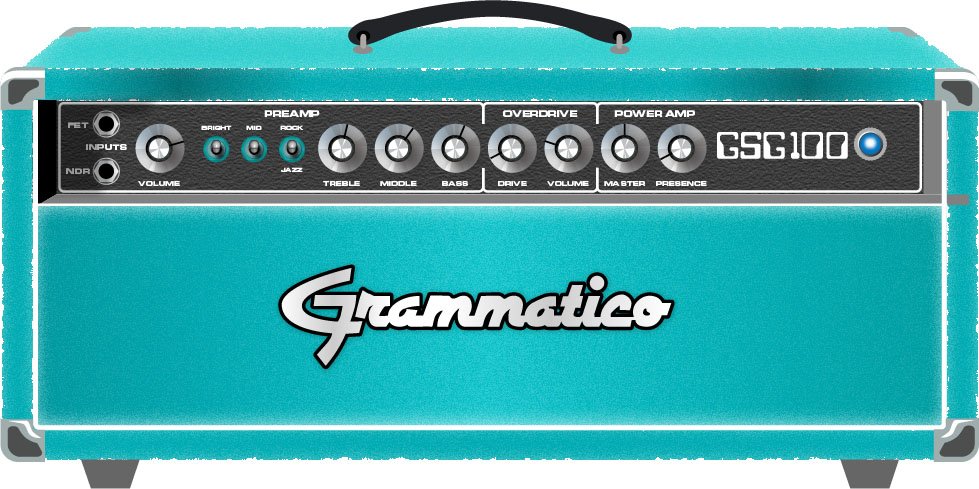
"The Grammatico GSG100 is an amp based on the study of legendary amps made around 1980. This model aims to capture all the unique details of this amplifier circuit, many of which are quite different than popular guitar amps from the major companies. The GSG100 is a feature-rich and complicated amp. There are many amazing sounds in the amp; however, the controls allow for such a wide range of adjustment that it's possible to get unpleasant sounds from it as well. To best use the amp, it really helps to know exactly what each of these features is doing to the guitar signal. Let's go through the parameters as they are found in the Helix model:"
—Ben Adrian, Sound Design Manager
- Drive—This is the first volume control on the amp. It's called "drive" on the model to fit the pattern of all the Helix models. On the real amp is says "Volume."
- Bass, Mid, Treble—The normal tone controls on the amp (called a tone stack by amp nerds), located between the first and second gain stages in the preamp. These have different ranges than traditional guitar amp tone controls. Also, the whole voicing of the tone stack can be changed with the "Rock/Jazz" switch, which will be explained later.
- Presence—This is like the presence controls on other guitar amps. It changes the amount of high frequency in the power amp by modifying the EQ filtering in the power amp's negative feedback loop.
- Ch Vol—This controls the output level of the amp model. It has no effect on the tone or distortion of the amp model
- Master—This is the master volume on the front panel of the amp. It is located between the preamp and power amp and can be used to get more or less power amp distortion. This amp is VERY loud, and most players would probably run the master volume on the lower side. If the master volume is cranked, the power amp distortion can be pushed into unpleasant territory. Most players would never crank the master in real life as the actual output would be way too loud for most musical settings.
- Mid Switch—This switch changes the value of the treble capacitor in the tone stack. When it is off, the amp has more of a scooped sound. When it is on, there is a noticeable upper-mid boost.
- Jazz/Rock—This switch changes the wiring of the tone stack circuit. It allows for two totally separate tonal voices. Jazz is quieter with a lower center frequency for the mids. Rock is louder with a more traditional mid frequency center. Tone controls rarely translate well between the Jazz and Rock settings. If a good sound is achieved in one mode, it is not guaranteed that the same settings in the opposite mode will still sound pleasing.
- OD Switch—This turns the two-gain-stage tube overdrive circuit on and off. This circuit is located AFTER the tone controls and Drive knob. When the overdrive is turned on it's as if a third and fourth gain stage is added to the preamp. Generally, it's best to set up the base tone of the amp with the Drive and tone controls first, and then adjust the overdrive circuit to work with the desired base tone.
- OD Drive—This controls the amount of drive or saturation in the overdrive circuit. Since the whole overdrive circuit is after the amp's regular drive and tone controls, the range of OD Drive knob will change based on those earlier knob settings.
- OD Level—This controls the output level of the overdrive circuit.
- Bright—This is a three position switch. The settings are "off" and two different values of bright capacitor. This bright capacitor works with the Drive (volume) knob earlier in the circuit, and is similar to other amps that have bright switches. When the Bright switch is engaged, the effect is more pronounced with lower Drive settings. The bright becomes less effective at higher Drive settings. When the Drive is at 10, the switch is effectively removed from the amp circuit, and changing the switch settings has no audible effect.
- FET Boost—The GSG100 has a solid state, FET (Field Effect Transistor) boost circuit at the very beginning of the amp circuit. It is akin to placing a FET Boost pedal before the amp. On the physical unit there are two input jacks, but on the model it is placed on a switch and can even be made foot-switchable. The FET Boost has a fixed boost amount of about 7 to 9 dB and also gives a slight EQ change.
- PAB—This stands for "Preamp Boost." The PAB works by removing the tone controls from the circuit. Tone controls work by removing frequencies and signal level. Engaging the PAB circuit returns all of this lost signal level, but the side effect is that tone controls no longer work. It truth, the treble knob does work slightly, and the mid switch will change how much lows and mids comes through the circuit. In general, though, the PAB trades tone control functionality for a full blast level between tube gain stages 1 and 2.
- Sag—This is a control that is added to all the Helix models. Every tube amp has some amount of power supply sag, which feels like compression, squish, and sustain to the player. This control makes the sag amount user-adjustable.
- Hum—This is a control that is added to most of the Helix models. Preamp tube heaters in tube amps will leak a little bit of 60 cycle hum into the audio signal. When this hum mixes with the distorted audio signal, a non-musical distortion is created at low levels. To some players, this low-level, non-harmonic distortion adds a bit of realism to the amp model. The best way to put it is that sometimes the model sounds more "wrong" without the hum. However, if you don't like it, you can just turn it down.
- Ripple—This is a control that is added to most of the Helix models. Power amp circuits will sometimes let a little bit of rectified 120Hz hum (that the power supply filter caps can't quite fully remove) into the audio signal. When the power supply is being pushed hard, more of this ripple can get through the audio path. Much like the hum, this provides a bit of non-musical distortion to the power amp at distorted settings. To some people, this sounds like harmonic complexity that is enjoyable and realistic. Other players just don't like it and turn it off.
- Bias—This control is in most Helix models. It adjusts the bias of the tubes in the power amp, causing a change in tonality and the distortion characteristic.
- Bias X—This is the most difficult parameter to describe in Helix models, so hang on. All tube amps need to bias the power amp tubes. This is usually achieved by applying a negative voltage to the input audio signal. (Cathode bias works differently, but that's a story for a different time.) However, when the power tubes are distorting, free electrons can form around the input grid and cause a shift in the bias voltage. This shift only happens during the moments when distortion is occurring. This shift causes a tonal and texture change much like adjusting the bias control. However, once the tubes leave the distorted state, the free electrons dissipate and the bias returns to normal. Another way to put it (less accurately) is that this is a level/envelope controlled bias shift. This behavior is modeled in all Helix amps, and the Bias X control allows users to control the amount of bias shift that is happening. It is a very subtle change, so please don't expect high drama from this knob.
Grammatico GSG factory presets to check out:
- FACTORY 1—04B [013] Grammatico GSG
- FACTORY 1—13A [048] Grammatico JNC. Preset created by John Cordy
- FACTORY 1—13B [049] Screams JNC. Preset created by John Cordy
Amp/Preamp > Line 6 Elmsley, Line 6 Original
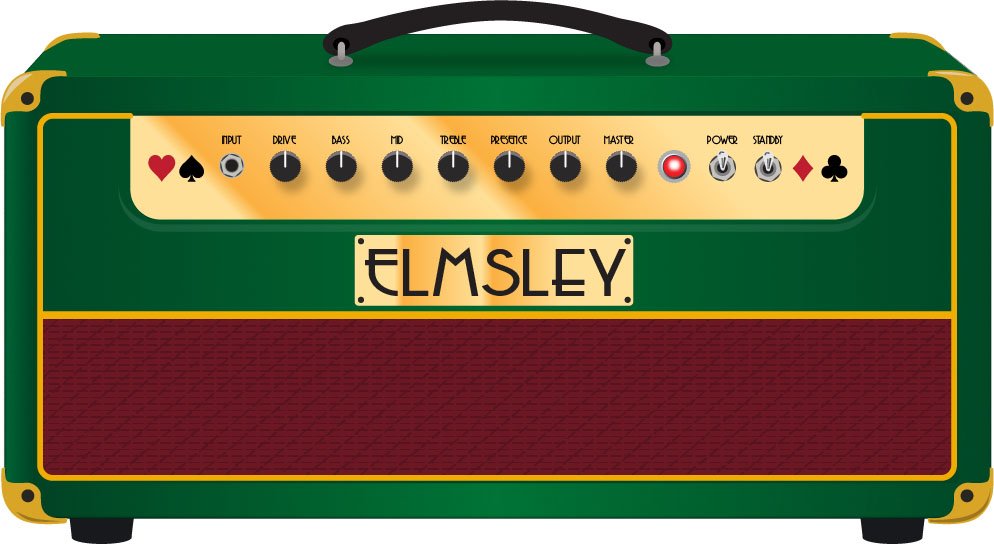
"The Line 6 Elmsley is a new Line 6 original amplifier that employs a parallel distortion topology that layers distinct saturation characteristics across the lower and upper registers. The Elmsley features a smooth and present bottom end with some exceptional sparkle and definition all through the midrange and above. The result is an amplifier that is dazzling across the full spectrum, and the amplifier deals with pedals in spades.
"The other new key feature of The Elmsley's power amp section is the Negative Feedback (NFB) parameter, where the amount of feedback within the power section's response can be dialed anywhere from wild and unhinged, tight and punchy, and anything in between. As with many amplifier designs, the presence and depth controls are part of this negative feedback circuit and functions to control the brilliance and resonance of the power amp, respectively. As the NFB param is reduced, the presence and depth controls' influences are also influenced, and they become effectively deactivated when the NFB knob is at zero. These interactions allow the player to create countless tonal variations to suit their needs.”
—Sam Hwang, Sound Designer
Line 6 Elmsley factory preset to check out:
- FACTORY 1—04C [014] Line 6 Elmsley. Turn Distortion > Minotaur off to hear more of the character of the amp. Press the NFB switch to instantly adjust with your feet
Amp/Preamp > Agua Sledge, based on* the Aguilar Tone Hammer

Agua Sledge factory presets to check out:
- FACTORY 1—10D [039] BAS:Agua Sledge
- FACTORY 1—11C [042] BAS:Hire Me!
New Cabs in 3.60
New Guitar Cabs
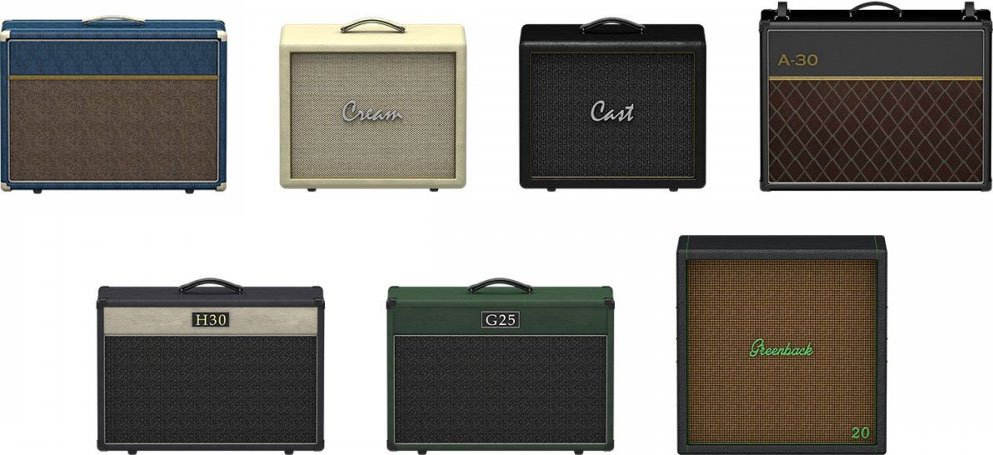
Cab > 1x12 Blue Bell (Single, Dual), captured from* the 1×12″ Vox® AC-15 Blue Alnico
Cab > 1x12 Open Cream (Single, Dual), captured from* a custom 1x12" open back cabinet G12M-65
Cab > 1x12 Open Cast (Single, Dual), captured from* a custom 1x12" open back cabinet EVM12L
Cab > 2x12 Silver Bell (Single, Dual), captured from* the 2×12″ Vox® AC-30TB Silver Alnico
Cab > 2x12 Match H30 (Single, Dual), captured from* the 2x12" Matchless® DC-30 custom G12H-30
Cab > 2x12 Match G25 (Single, Dual), captured from* the 2x12" Matchless® DC-30 custom G12M-25
Cab > 4x12 Greenback 20 (Single, Dual), captured from* the 4×12″ Marshall® Basketweave G12M-20
- Mic—Select from up to 12 mics:
- 57 Dynamic—Shure® SM57
- 421 Dynamic—Sennheiser® MD 421-U
- 7 Dynamic—Shure SM7
- 906 Dynamic—Sennheiser e906
- 30 Dynamic—Heil Sound® PR 30
- 121 Ribbon—Royer® R-121
- 160 Ribbon—Beyerdynamic® M 160
- 4038 Ribbon—Coles 4038
- 84 Ribbon—AEA R84
- 414 Cond—AKG® C414 XLS
- 47 Cond FET—Neumann® U47 FET
- 67 Cond—Neumann U67
- Position—Sets the lateral location of the mic in relation to the speaker cone. Choose from Center ~ Cap Edge ~ Edge. Cap Edge may appear in a different location depending on the selected cab
- Distance—Sets the distance of the mic from the speaker cone. Choose from 1.00" to 12.00" in 1/4" increments
- Angle—Sets the angle of the mic. 0 degrees is pointing directly at the speaker, 45 degrees is pointing off-axis
- Low Cut—Applies a low cut (high pass) filter, letting you remove all audio below a certain frequency. May be useful in removing undesirable low end rumble
- High Cut—Applies a high cut (low pass) filter, letting you remove all audio above a certain frequency. May be useful in removing high end harshness
- Level—Sets the overall level of the cab
- Pan (Dual only)—Moves the signal left or right across the stereo sound field. For example, if you're running a stereo playback system with two or more speakers, panning the first cab to Left 100 and the second cab to Right 100 can make your tone sound notably wider. Press the knob to return to Center
- Delay (Dual only)—Although the new cabs in 3.60 perfectly line up with one another, there may be situations where you want to delay one side very slightly, to perhaps impart a bit of phase incoherence or at higher values, to increase the apparent stereo spread. A little goes a long way here
New Bass Cabs
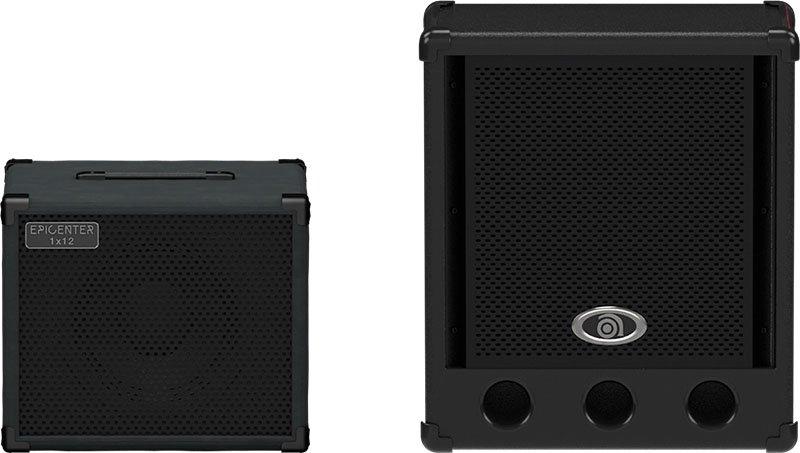
Cab > 1x12 Epicenter (Single, Dual), captured from* the 1x12" Epifani® Ultralight series cabinet
Cab > 4x10 Ampeg Pro (Single, Dual), captured from* the 4x10" Ampeg® PR-410HLF
- Mic—Select from up to 12 mics:
- 57 Dynamic—Shure SM57
- 421 Dynamic—Sennheiser MD 421-U
- 7 Dynamic—Shure SM7
- 88 Dynamic—Beyerdynamic M88TG
- 52 Dynamic—Shure Beta 52A
- 112 Dynamic—AKG D112
- D6 Dynamic—Audix D6
- 40 Dynamic—Heil Sound PR 40
- 4038 Ribbon—Coles 4038
- 414 Cond—AKG C414 TLII
- 47 Cond FET—Neumann U47 FET
- 67 Cond—Neumann U67
- All other parameters the same as for guitar cabs (see above)
New Effects in 3.60
Helix Floor, Helix Rack, Helix LT, Helix Native, HX Effects, HX Stomp, HX Stomp XL
Distortion > Dark Dove Fuzz (Mono, Stereo), based on* the Electro-Harmonix® Russian Big Muff

- Sustain—Sets the amount of distortion
- Tone—Sets the overall tonal balance of the distortion
- Level—Sets the overall level of the block
Modulation > Triple Rotary (Stereo only), inspired by* the Yamaha® RA-200 rotary speaker (famously implemented by Pink Floyd's David Gilmour).

"The Line 6 Triple Rotary is inspired by the Yamaha RA-200 Rotary speaker. The original RA-200 was a combo solid state amplifier designed to be used with organs much like other rotary speakers. However; the RA-200 unit was unique compared to the traditional rotary speakers, which typically have rotating horns and a rotating drum over a woofer, the Yamaha designs had midrange speakers which rotated vertically on top of a traditional non-rotating speaker cabinet.
"To make the model more versatile, we made this effect to behave more as a stereo effect rather than modeling the whole cabinet, and suggest using the effect in combination with a cabinet model if recording direct or listening through FRFR systems."
—Sam Hwang, Sound Designer
- Speed—Sets whether the speaker reflects the Slow Speed or Fast Speed
- Slow Speed—Sets the rate for the Slow Speed. Press the knob to toggle between a static rate (0.0 ~ 10.0) or note values for syncing with Tap Tempo and incoming MIDI clock
- Fast Speed—Sets the rate for the Fast Speed. Press the knob to toggle between a static rate (0.0 ~ 10.0) or note values for syncing with Tap Tempo and incoming MIDI clock
- Ramp Time—Adjusts how fast switching from Slow Speed to Fast Speed and back takes place
- Mix—Controls the wet/dry mix of the rotary effect. When set to 0%, no rotary effect is heard; when set to 100%, no dry signal is heard
- Level—Controls the overall output level of the block
- Drive—Controls the amount of drive into the speaker's power amp
- Headroom—Adds up to 12.0dB of additional headroom
- Low Cut—Applies a low cut (high pass) filter to the speakers, letting you remove the effected signal below a certain frequency
- High Cut—Applies a high cut (low pass) filter to the speakers, letting you remove the effected signal above a certain frequency
- Wobble—Models how evenly the rotating speaker and its ballast weight are balanced about the axis. At zero, the speaker and ballast are perfectly balanced, and as the wobble control is increased the rotation of the speakers becomes more eccentric.
- Separation—The separation of the stereo field. Practically, this simulates moving the two listening points further apart as the separation knob is increased
- Rotor Drift—Adjusts how close the three rotor motors are in sync with each other in speed. As each of the rotors were belt driven, there are often some differences in belt or motor wear, and it creates some subtle modulation effects between the three rotors
- Rotor 2 Lvl—Sets the individual volume of the second rotor
- Rotor 3 Lvl—Sets the individual volume of the third rotor
*NOTE: All product names used in this document are trademarks of their respective owners and neither Yamaha Guitar Group nor Line 6 are associated or affiliated with them. These trademarks appear solely to identify products whose tones and sounds were studied by Line 6 during sound model development.
Changes and Improvements in 3.60
- As 3.60 adds a second Grammatico amp, the three existing Grammatico LaGrange amp models have been renamed to "GrammaticoLG Nrm," "GrammaticoLG Brt," and "GrammaticoLG Jmp"
- A few 3.50 factory presets have been updated to utilize 3.60 cabs where appropriate
Bug Fixes in 3.60
- After a long period of time with tonestack parameters set a certain way, the Amp > Moo)))n amp models could stop processing audio—FIXED
- Helix Floor/Rack/LT only: The 8 TEMPLATES setlist preset numbers were offset by one—FIXED
- Helix Native only: Loading an Amp+Cab > Bass model could sometimes crash the plugin—FIXED
Get Download
Helix Native
Helix Native
Helix/HX 3.60 (released April 25, 2023) includes 3 new amps, 9 new cabs, 2 new effects, additional improvements, and bug fixes, and is strongly recommended for all users.
How do I update to 3.60?
Updating Helix Native
- Before updating Helix Native, it is highly recommended that you export a preset/setlist bundle. Click the gear icon in the lower left, select the Presets/IRs tab, and then click Export Bundle. Some hardware compatibility modes (HX Stomp, HX Stomp XL, HX Effects) do not have this feature as they have only one setlist. In these cases, at the top of the preset list, click the yellow EXPORT to export the setlist.
- Quit your DAW and download and install Helix Native 3.60:
- Helix Native 3.60 (macOS): https://line6.com/software/readeula.html?rid=11895
- Helix Native 3.60 (Windows): https://line6.com/software/readeula.html?rid=11896
- Open your DAW and open an instance of Helix Native.
- OPTIONAL: The only way to hear 3.60's new factory presets is to restore them. IMPORTANT! MAKE SURE YOU'VE EXPORTED A BUNDLE (OR ANY IMPORTANT SETLISTS) FIRST, AS RESTORING FACTORY SETLISTS WILL ERASE ALL YOUR WORK! Click the gear icon in the lower left, select the Presets/IRs tab, and then click Restore Factory Setlists. Click Yes.
New Amps in 3.60
Helix Floor, Helix Rack, Helix LT, Helix Native, HX Stomp, HX Stomp XL
Amp/Preamp > Grammatico GSG, based on* the Grammatico GSG100.
"The Grammatico GSG100 is an amp based on the study of legendary amps made around 1980. This model aims to capture all the unique details of this amplifier circuit, many of which are quite different than popular guitar amps from the major companies. The GSG100 is a feature-rich and complicated amp. There are many amazing sounds in the amp; however, the controls allow for such a wide range of adjustment that it's possible to get unpleasant sounds from it as well. To best use the amp, it really helps to know exactly what each of these features is doing to the guitar signal. Let's go through the parameters as they are found in the Helix model:"
—Ben Adrian, Sound Design Manager
- Drive—This is the first volume control on the amp. It's called "drive" on the model to fit the pattern of all the Helix models. On the real amp is says "Volume."
- Bass, Mid, Treble—The normal tone controls on the amp (called a tone stack by amp nerds), located between the first and second gain stages in the preamp. These have different ranges than traditional guitar amp tone controls. Also, the whole voicing of the tone stack can be changed with the "Rock/Jazz" switch, which will be explained later.
- Presence—This is like the presence controls on other guitar amps. It changes the amount of high frequency in the power amp by modifying the EQ filtering in the power amp's negative feedback loop.
- Ch Vol—This controls the output level of the amp model. It has no effect on the tone or distortion of the amp model
- Master—This is the master volume on the front panel of the amp. It is located between the preamp and power amp and can be used to get more or less power amp distortion. This amp is VERY loud, and most players would probably run the master volume on the lower side. If the master volume is cranked, the power amp distortion can be pushed into unpleasant territory. Most players would never crank the master in real life as the actual output would be way too loud for most musical settings.
- Mid Switch—This switch changes the value of the treble capacitor in the tone stack. When it is off, the amp has more of a scooped sound. When it is on, there is a noticeable upper-mid boost.
- Jazz/Rock—This switch changes the wiring of the tone stack circuit. It allows for two totally separate tonal voices. Jazz is quieter with a lower center frequency for the mids. Rock is louder with a more traditional mid frequency center. Tone controls rarely translate well between the Jazz and Rock settings. If a good sound is achieved in one mode, it is not guaranteed that the same settings in the opposite mode will still sound pleasing.
- OD Switch—This turns the two-gain-stage tube overdrive circuit on and off. This circuit is located AFTER the tone controls and Drive knob. When the overdrive is turned on it's as if a third and fourth gain stage is added to the preamp. Generally, it's best to set up the base tone of the amp with the Drive and tone controls first, and then adjust the overdrive circuit to work with the desired base tone.
- OD Drive—This controls the amount of drive or saturation in the overdrive circuit. Since the whole overdrive circuit is after the amp's regular drive and tone controls, the range of OD Drive knob will change based on those earlier knob settings.
- OD Level—This controls the output level of the overdrive circuit.
- Bright—This is a three position switch. The settings are "off" and two different values of bright capacitor. This bright capacitor works with the Drive (volume) knob earlier in the circuit, and is similar to other amps that have bright switches. When the Bright switch is engaged, the effect is more pronounced with lower Drive settings. The bright becomes less effective at higher Drive settings. When the Drive is at 10, the switch is effectively removed from the amp circuit, and changing the switch settings has no audible effect.
- FET Boost—The GSG100 has a solid state, FET (Field Effect Transistor) boost circuit at the very beginning of the amp circuit. It is akin to placing a FET Boost pedal before the amp. On the physical unit there are two input jacks, but on the model it is placed on a switch and can even be made foot-switchable. The FET Boost has a fixed boost amount of about 7 to 9 dB and also gives a slight EQ change.
- PAB—This stands for "Preamp Boost." The PAB works by removing the tone controls from the circuit. Tone controls work by removing frequencies and signal level. Engaging the PAB circuit returns all of this lost signal level, but the side effect is that tone controls no longer work. It truth, the treble knob does work slightly, and the mid switch will change how much lows and mids comes through the circuit. In general, though, the PAB trades tone control functionality for a full blast level between tube gain stages 1 and 2.
- Sag—This is a control that is added to all the Helix models. Every tube amp has some amount of power supply sag, which feels like compression, squish, and sustain to the player. This control makes the sag amount user-adjustable.
- Hum—This is a control that is added to most of the Helix models. Preamp tube heaters in tube amps will leak a little bit of 60 cycle hum into the audio signal. When this hum mixes with the distorted audio signal, a non-musical distortion is created at low levels. To some players, this low-level, non-harmonic distortion adds a bit of realism to the amp model. The best way to put it is that sometimes the model sounds more "wrong" without the hum. However, if you don't like it, you can just turn it down.
- Ripple—This is a control that is added to most of the Helix models. Power amp circuits will sometimes let a little bit of rectified 120Hz hum (that the power supply filter caps can't quite fully remove) into the audio signal. When the power supply is being pushed hard, more of this ripple can get through the audio path. Much like the hum, this provides a bit of non-musical distortion to the power amp at distorted settings. To some people, this sounds like harmonic complexity that is enjoyable and realistic. Other players just don't like it and turn it off.
- Bias—This control is in most Helix models. It adjusts the bias of the tubes in the power amp, causing a change in tonality and the distortion characteristic.
- Bias X—This is the most difficult parameter to describe in Helix models, so hang on. All tube amps need to bias the power amp tubes. This is usually achieved by applying a negative voltage to the input audio signal. (Cathode bias works differently, but that's a story for a different time.) However, when the power tubes are distorting, free electrons can form around the input grid and cause a shift in the bias voltage. This shift only happens during the moments when distortion is occurring. This shift causes a tonal and texture change much like adjusting the bias control. However, once the tubes leave the distorted state, the free electrons dissipate and the bias returns to normal. Another way to put it (less accurately) is that this is a level/envelope controlled bias shift. This behavior is modeled in all Helix amps, and the Bias X control allows users to control the amount of bias shift that is happening. It is a very subtle change, so please don't expect high drama from this knob.
Grammatico GSG factory presets to check out:
- FACTORY 1—04B [013] Grammatico GSG
- FACTORY 1—13A [048] Grammatico JNC. Preset created by John Cordy
- FACTORY 1—13B [049] Screams JNC. Preset created by John Cordy
Amp/Preamp > Line 6 Elmsley, Line 6 Original
"The Line 6 Elmsley is a new Line 6 original amplifier that employs a parallel distortion topology that layers distinct saturation characteristics across the lower and upper registers. The Elmsley features a smooth and present bottom end with some exceptional sparkle and definition all through the midrange and above. The result is an amplifier that is dazzling across the full spectrum, and the amplifier deals with pedals in spades.
"The other new key feature of The Elmsley's power amp section is the Negative Feedback (NFB) parameter, where the amount of feedback within the power section's response can be dialed anywhere from wild and unhinged, tight and punchy, and anything in between. As with many amplifier designs, the presence and depth controls are part of this negative feedback circuit and functions to control the brilliance and resonance of the power amp, respectively. As the NFB param is reduced, the presence and depth controls' influences are also influenced, and they become effectively deactivated when the NFB knob is at zero. These interactions allow the player to create countless tonal variations to suit their needs.”
—Sam Hwang, Sound Designer
Line 6 Elmsley factory preset to check out:
- FACTORY 1—04C [014] Line 6 Elmsley. Turn Distortion > Minotaur off to hear more of the character of the amp. Press the NFB switch to instantly adjust with your feet
Amp/Preamp > Agua Sledge, based on* the Aguilar Tone Hammer
Agua Sledge factory presets to check out:
- FACTORY 1—10D [039] BAS:Agua Sledge
- FACTORY 1—11C [042] BAS:Hire Me!
New Cabs in 3.60
New Guitar Cabs
Cab > 1x12 Blue Bell (Single, Dual), captured from* the 1×12″ Vox® AC-15 Blue Alnico
Cab > 1x12 Open Cream (Single, Dual), captured from* a custom 1x12" open back cabinet G12M-65
Cab > 1x12 Open Cast (Single, Dual), captured from* a custom 1x12" open back cabinet EVM12L
Cab > 2x12 Silver Bell (Single, Dual), captured from* the 2×12″ Vox® AC-30TB Silver Alnico
Cab > 2x12 Match H30 (Single, Dual), captured from* the 2x12" Matchless® DC-30 custom G12H-30
Cab > 2x12 Match G25 (Single, Dual), captured from* the 2x12" Matchless® DC-30 custom G12M-25
Cab > 4x12 Greenback 20 (Single, Dual), captured from* the 4×12″ Marshall® Basketweave G12M-20
- Mic—Select from up to 12 mics:
- 57 Dynamic—Shure® SM57
- 421 Dynamic—Sennheiser® MD 421-U
- 7 Dynamic—Shure SM7
- 906 Dynamic—Sennheiser e906
- 30 Dynamic—Heil Sound® PR 30
- 121 Ribbon—Royer® R-121
- 160 Ribbon—Beyerdynamic® M 160
- 4038 Ribbon—Coles 4038
- 84 Ribbon—AEA R84
- 414 Cond—AKG® C414 XLS
- 47 Cond FET—Neumann® U47 FET
- 67 Cond—Neumann U67
- Position—Sets the lateral location of the mic in relation to the speaker cone. Choose from Center ~ Cap Edge ~ Edge. Cap Edge may appear in a different location depending on the selected cab
- Distance—Sets the distance of the mic from the speaker cone. Choose from 1.00" to 12.00" in 1/4" increments
- Angle—Sets the angle of the mic. 0 degrees is pointing directly at the speaker, 45 degrees is pointing off-axis
- Low Cut—Applies a low cut (high pass) filter, letting you remove all audio below a certain frequency. May be useful in removing undesirable low end rumble
- High Cut—Applies a high cut (low pass) filter, letting you remove all audio above a certain frequency. May be useful in removing high end harshness
- Level—Sets the overall level of the cab
- Pan (Dual only)—Moves the signal left or right across the stereo sound field. For example, if you're running a stereo playback system with two or more speakers, panning the first cab to Left 100 and the second cab to Right 100 can make your tone sound notably wider. Press the knob to return to Center
- Delay (Dual only)—Although the new cabs in 3.60 perfectly line up with one another, there may be situations where you want to delay one side very slightly, to perhaps impart a bit of phase incoherence or at higher values, to increase the apparent stereo spread. A little goes a long way here
New Bass Cabs
Cab > 1x12 Epicenter (Single, Dual), captured from* the 1x12" Epifani® Ultralight series cabinet
Cab > 4x10 Ampeg Pro (Single, Dual), captured from* the 4x10" Ampeg® PR-410HLF
- Mic—Select from up to 12 mics:
- 57 Dynamic—Shure SM57
- 421 Dynamic—Sennheiser MD 421-U
- 7 Dynamic—Shure SM7
- 88 Dynamic—Beyerdynamic M88TG
- 52 Dynamic—Shure Beta 52A
- 112 Dynamic—AKG D112
- D6 Dynamic—Audix D6
- 40 Dynamic—Heil Sound PR 40
- 4038 Ribbon—Coles 4038
- 414 Cond—AKG C414 TLII
- 47 Cond FET—Neumann U47 FET
- 67 Cond—Neumann U67
- All other parameters the same as for guitar cabs (see above)
New Effects in 3.60
Helix Floor, Helix Rack, Helix LT, Helix Native, HX Effects, HX Stomp, HX Stomp XL
Distortion > Dark Dove Fuzz (Mono, Stereo), based on* the Electro-Harmonix® Russian Big Muff
- Sustain—Sets the amount of distortion
- Tone—Sets the overall tonal balance of the distortion
- Level—Sets the overall level of the block
Modulation > Triple Rotary (Stereo only), inspired by* the Yamaha® RA-200 rotary speaker (famously implemented by Pink Floyd's David Gilmour).
"The Line 6 Triple Rotary is inspired by the Yamaha RA-200 Rotary speaker. The original RA-200 was a combo solid state amplifier designed to be used with organs much like other rotary speakers. However; the RA-200 unit was unique compared to the traditional rotary speakers, which typically have rotating horns and a rotating drum over a woofer, the Yamaha designs had midrange speakers which rotated vertically on top of a traditional non-rotating speaker cabinet.
"To make the model more versatile, we made this effect to behave more as a stereo effect rather than modeling the whole cabinet, and suggest using the effect in combination with a cabinet model if recording direct or listening through FRFR systems."
—Sam Hwang, Sound Designer
- Speed—Sets whether the speaker reflects the Slow Speed or Fast Speed
- Slow Speed—Sets the rate for the Slow Speed. Press the knob to toggle between a static rate (0.0 ~ 10.0) or note values for syncing with Tap Tempo and incoming MIDI clock
- Fast Speed—Sets the rate for the Fast Speed. Press the knob to toggle between a static rate (0.0 ~ 10.0) or note values for syncing with Tap Tempo and incoming MIDI clock
- Ramp Time—Adjusts how fast switching from Slow Speed to Fast Speed and back takes place
- Mix—Controls the wet/dry mix of the rotary effect. When set to 0%, no rotary effect is heard; when set to 100%, no dry signal is heard
- Level—Controls the overall output level of the block
- Drive—Controls the amount of drive into the speaker's power amp
- Headroom—Adds up to 12.0dB of additional headroom
- Low Cut—Applies a low cut (high pass) filter to the speakers, letting you remove the effected signal below a certain frequency
- High Cut—Applies a high cut (low pass) filter to the speakers, letting you remove the effected signal above a certain frequency
- Wobble—Models how evenly the rotating speaker and its ballast weight are balanced about the axis. At zero, the speaker and ballast are perfectly balanced, and as the wobble control is increased the rotation of the speakers becomes more eccentric.
- Separation—The separation of the stereo field. Practically, this simulates moving the two listening points further apart as the separation knob is increased
- Rotor Drift—Adjusts how close the three rotor motors are in sync with each other in speed. As each of the rotors were belt driven, there are often some differences in belt or motor wear, and it creates some subtle modulation effects between the three rotors
- Rotor 2 Lvl—Sets the individual volume of the second rotor
- Rotor 3 Lvl—Sets the individual volume of the third rotor
*NOTE: All product names used in this document are trademarks of their respective owners and neither Yamaha Guitar Group nor Line 6 are associated or affiliated with them. These trademarks appear solely to identify products whose tones and sounds were studied by Line 6 during sound model development.
Changes and Improvements in 3.60
- As 3.60 adds a second Grammatico amp, the three existing Grammatico LaGrange amp models have been renamed to "GrammaticoLG Nrm," "GrammaticoLG Brt," and "GrammaticoLG Jmp"
- A few 3.50 factory presets have been updated to utilize 3.60 cabs where appropriate
Bug Fixes in 3.60
- After a long period of time with tonestack parameters set a certain way, the Amp > Moo)))n amp models could stop processing audio—FIXED
- Helix Floor/Rack/LT only: The 8 TEMPLATES setlist preset numbers were offset by one—FIXED
- Helix Native only: Loading an Amp+Cab > Bass model could sometimes crash the plugin—FIXED
Get Download
Helix Native
Helix Native
Helix Native 3.52 Release Notes
Bug Fixes in 3.52
- Issue with Native not launching with SD card inserted.
Get Download
Helix Native
Helix Native
Helix Native 3.51 Release Notes
Bug Fixes in 3.51
- Modulation > FlexoVibe and 4-Voice Chorus’ Rate parameters do not display a tempo sync toggle—FIXED
- When adjusting the new Cab > Dual block’s Delay parameter with a mouse wheel, HX Edit can crash—FIXED
- When using an Apple Magic Mouse 2, the scroll wheel resolution (and to a lesser extent, a 2-finger scroll on the Mac’s touchpad) is much more coarse in 3.50 than in 3.15—FIXED
- Helix Native—While sending MIDI to Helix Native while its window is closed, the DAW can crash—FIXED
- Other minor fixes and improvements
Get Download
Helix Native
Helix Native
Helix/HX 3.50 (released November 3, 2022) includes 24 new cabs running on an all new cab engine, 5 new amps, 7 new effects, new features, additional improvements, and bug fixes, and is strongly recommended for all users.
How do I update to 3.50?
Updating Helix Native
- Before updating Helix Native, it is highly recommended that you export a preset/setlist bundle. Click the gear icon in the lower left, select the Presets/IRs tab, and then click Export Bundle. Some hardware compatibility modes (HX Stomp, HX Stomp XL, HX Effects) do not have this feature as they have only one setlist. In these cases, at the top of the preset list, click the yellow EXPORT to export the setlist.
- Quit your DAW and download and install Helix Native 3.50:
- Helix Native 3.50 (macOS): https://line6.com/software/readeula.html?rid=11601
- Helix Native 3.50 (Windows): https://line6.com/software/readeula.html?rid=11600
- Open your DAW and open an instance of Helix Native.
- OPTIONAL: The only way to hear 3.50's new factory presets is to restore them. IMPORTANT! MAKE SURE YOU'VE EXPORTED A BUNDLE (OR ANY IMPORTANT SETLISTS) FIRST, AS RESTORING FACTORY SETLISTS WILL ERASE ALL YOUR WORK! Click the gear icon in the lower left, select the Presets/IRs tab, and then click Restore Factory Setlists. Click Yes.
NOTE: Presets created in 3.50 are not compatible with earlier firmware versions.
All New Cab Engine/New Cabs in 3.50
Helix Floor, Helix Rack, Helix LT, Helix Native, HX Stomp, HX Stomp XL
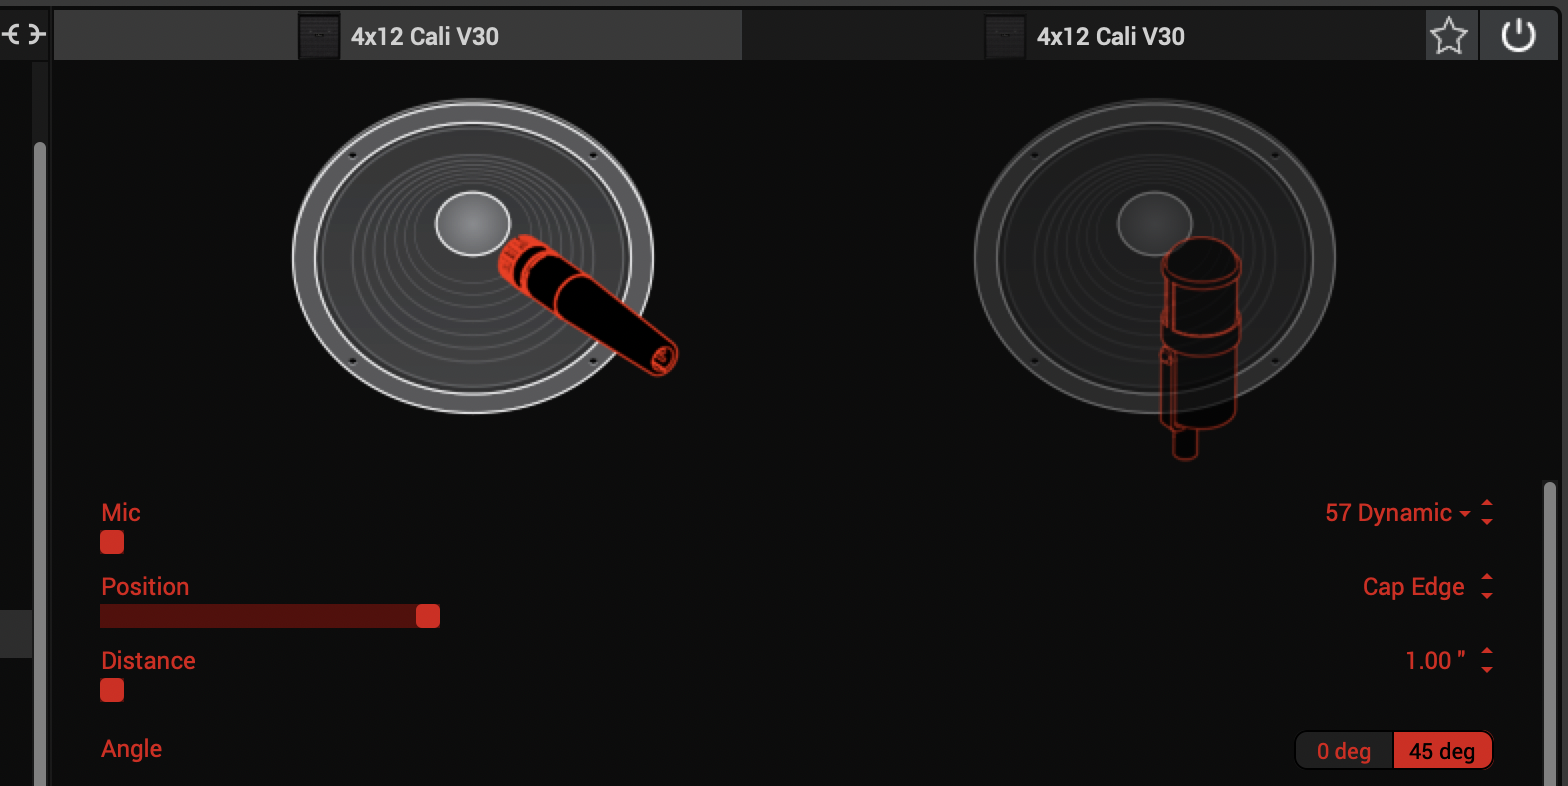
Thousands of impulses were captured with Sound Design's all new IR capture system and consolidated into 20 guitar cabs and 4 bass cabs. As such, cab subcategories have been updated:
- Single—One new cab
- Dual—Two new cabs
- Legacy Single—One older Hybrid cab
- Legacy Dual—Two older Hybrid cabs
Amp+Cab subcategories have been updated as well:
- Guitar—Guitar Amp+new cab
- Bass—Bass Amp+new cab
- Guitar+Legacy—Guitar Amp+older Hybrid cab
- Bass+Legacy—Bass Amp+older Hybrid cab
With Cab > Dual blocks, you can now also choose whether changing the first cab automatically recalls a matching cab for the second.
- From the Global Settings menu, select the Preferences page.
- Press PAGE> until you see Link Dual Cabs. When set to "On" (default), changing the first cab automatically loads a matching cab for the second. Choose this option if you want to emulate the sound of two different mics (or two of the same mic with different angles or positions) on the same cab. When set to "Off," both cabs are completely independent of one another.
- Alternatively, in HX Edit (and Helix Native), click the Link Dual Cabs icon. Off (left) and On (right):
New Guitar Cabs
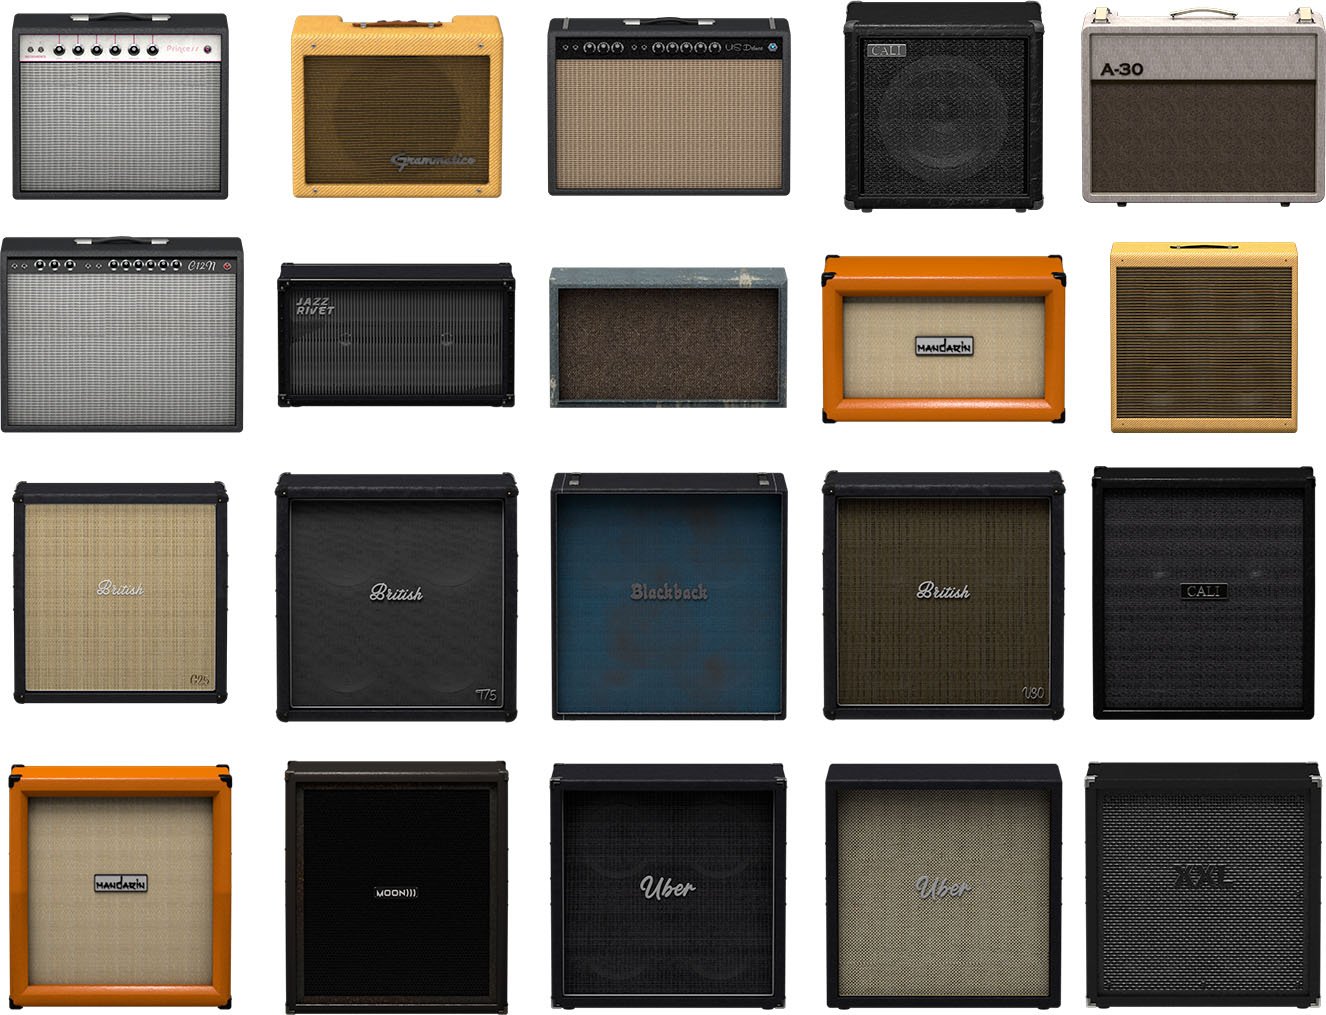
Cab > 1x10 US Princess (Single, Dual), captured from* the 1x10" Fender Princeton Eminence Copperhead
Cab > 1x12 Grammatico (Single, Dual), captured from* the 1x12" Grammatico LaGrange P12Q
Cab > 1x12 US Deluxe (Single, Dual), captured from* the 1×12″ Fender® Deluxe Oxford
Cab > 1x12 Cali EXT (Single, Dual), captured from* the 1x12" Mesa Boogie Extension Cab
Cab > 2x12 Blue Bell (Single, Dual), captured from* the 2×12″ Vox® AC-30 Fawn Blue
Cab > 2x12 Double C12N (Single, Dual), captured from* the 2×12″ Fender Twin C12N
Cab > 2x12 Jazz Rivet (Single, Dual), captured from* the 2×12″ Roland® JC-120
Cab > 2x12 Mail C12Q (Single, Dual), captured from* the 2×12″ Silvertone® 1484
Cab > 2x12 Mandarin 30 (Single, Dual), captured from* the 2x12" Orange PPC212 V30
Cab > 4x10 Tweed P10R (Single, Dual), captured from* the 4×10″ Fender Bassman® P10R
Cab > 4x12 Greenback25 (Single, Dual), captured from* the 4×12″ Marshall® Basketweave G12 M25
Cab > 4x12 1960A T75 (Single, Dual), captured from* the 4×12″ Marshall 1960A T75
Cab > 4x12 Blackback 30 (Single, Dual), captured from* the 4×12″ Park® 75 G12 H30
Cab > 4x12 Brit V30 (Single, Dual), captured from* the 4×12″ Marshall® 1960AV V30
Cab > 4x12 Cali V30 (Single, Dual), captured from* the 4×12″ MESA/Boogie® 4FB V30
Cab > 4x12 Mandarin EM (Single, Dual), captured from* the 4×12″ Orange Eminence
Cab > 4x12 MOO)))N T75 (Single, Dual), captured from* the 4x12" Sunn Cab w/G75T
Cab > 4x12 Uber T75 (Single, Dual), captured from* the 4×12″ Bogner® Uberkab T75
Cab > 4x12 Uber V30 (Single, Dual), captured from* the 4×12″ Bogner Uberkab V30
Cab > 4x12 XXL V30 (Single, Dual), captured from* the 4×12″ ENGL® XXL V30
- Mic—Select from up to 12 mics:
- 57 Dynamic—Shure® SM57
- 421 Dynamic—Sennheiser® MD 421-U
- 7 Dynamic—Shure SM7
- 906 Dynamic—Sennheiser e906
- 30 Dynamic—Heil Sound® PR 30
- 121 Ribbon—Royer® R-121
- 160 Ribbon—Beyerdynamic® M 160
- 4038 Ribbon—Coles 4038
- 84 Ribbon—AEA R84
- 414 Cond—AKG® C414 XLS
- 47 Cond FET—Neumann® U47 FET
- 67 Cond—Neumann U67
- Position—Sets the lateral location of the mic in relation to the speaker cone. Choose from Center ~ Cap Edge ~ Edge. Cap Edge may appear in a different location depending on the selected cab
- Distance—Sets the distance of the mic from the speaker cone. Choose from 1.00" to 12.00" in 1/4" increments
- Angle—Sets the angle of the mic. 0 degrees is pointing directly at the speaker, 45 degrees is pointing off-axis
- Low Cut—Applies a low cut (high pass) filter, letting you remove all audio below a certain frequency. May be useful in removing undesirable low end rumble
- High Cut—Applies a high cut (low pass) filter, letting you remove all audio above a certain frequency. May be useful in removing high end harshness
- Level—Sets the overall level of the cab
- Pan (Dual only)—Moves the signal left or right across the stereo sound field. For example, if you're running a stereo playback system with two or more speakers, panning the first cab to Left 100 and the second cab to Right 100 can make your tone sound notably wider. Press the knob to return to Center
- Delay (Dual only)—Although the new cabs in 3.50 perfectly line up with one another, there may be situations where you want to delay one side very slightly, to perhaps impart a bit of phase incoherence or at higher values, to increase the apparent stereo spread. A little goes a long way here
New Bass Cabs
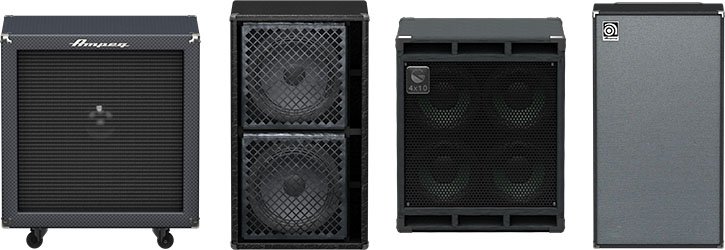
Cab > 1x15 Ampeg B-15 (Single, Dual), captured from* the 1×15″ Ampeg® B-15
Cab > 2×15 Brute (Single, Dual), captured from* the 2×15″ MESA/Boogie® 2×15 EV
Cab > 4×10 Garden (Single, Dual), captured from* the 4x10" Eden D410XLT
Cab > 8x10 SVT AV (Single, Dual), captured from* the 8×10″ Ampeg® SVT® (SVT-810AV Heritage Edition)
- Mic—Select from up to 12 mics:
- 57 Dynamic—Shure SM57
- 421 Dynamic—Sennheiser MD 421-U
- 7 Dynamic—Shure SM7
- 88 Dynamic—Beyerdynamic M88TG
- 52 Dynamic—Shure Beta 52A
- 112 Dynamic—AKG D112
- D6 Dynamic—Audix D6
- 40 Dynamic—Heil Sound PR 40
- 4038 Ribbon—Coles 4038
- 414 Cond—AKG C414 TLII
- 47 Cond FET—Neumann U47 FET
- 67 Cond—Neumann U67
- All other parameters the same as for guitar cabs (see above)
New Amps in 3.50
Helix Floor, Helix Rack, Helix LT, Helix Native, HX Stomp, HX Stomp XL
Amp/Preamp > MOO)))N T Nrm, based on* the normal channel of the Sunn Model T.
"The Moon model is based on a 1974, silver knob Sunn Model T amplifier. This is the early version with the more traditional tone stack. Though it has been repaired over the years, the circuit has every component at stock value. This specific unit has been well used, well maintained, and regularly enveloped in fog.
"This amp circuit can best be described as a Fender Tweed Bassman/Marshall JTM45 preamp mated with a very high volume, very flat, ultralinear power amp that uses 6550 tubes. The result of this configuration is a tone with a raw growl that really has a strong punch to the gut. In addition, this configuration takes pedals very well; adding a distortion or booster can turn the amp into a high gain, doom machine."
—Ben Adrian, Sound Design Manager

Amp/Preamp > MOO)))N T Brt, based on* the bright channel of the Sunn Model T
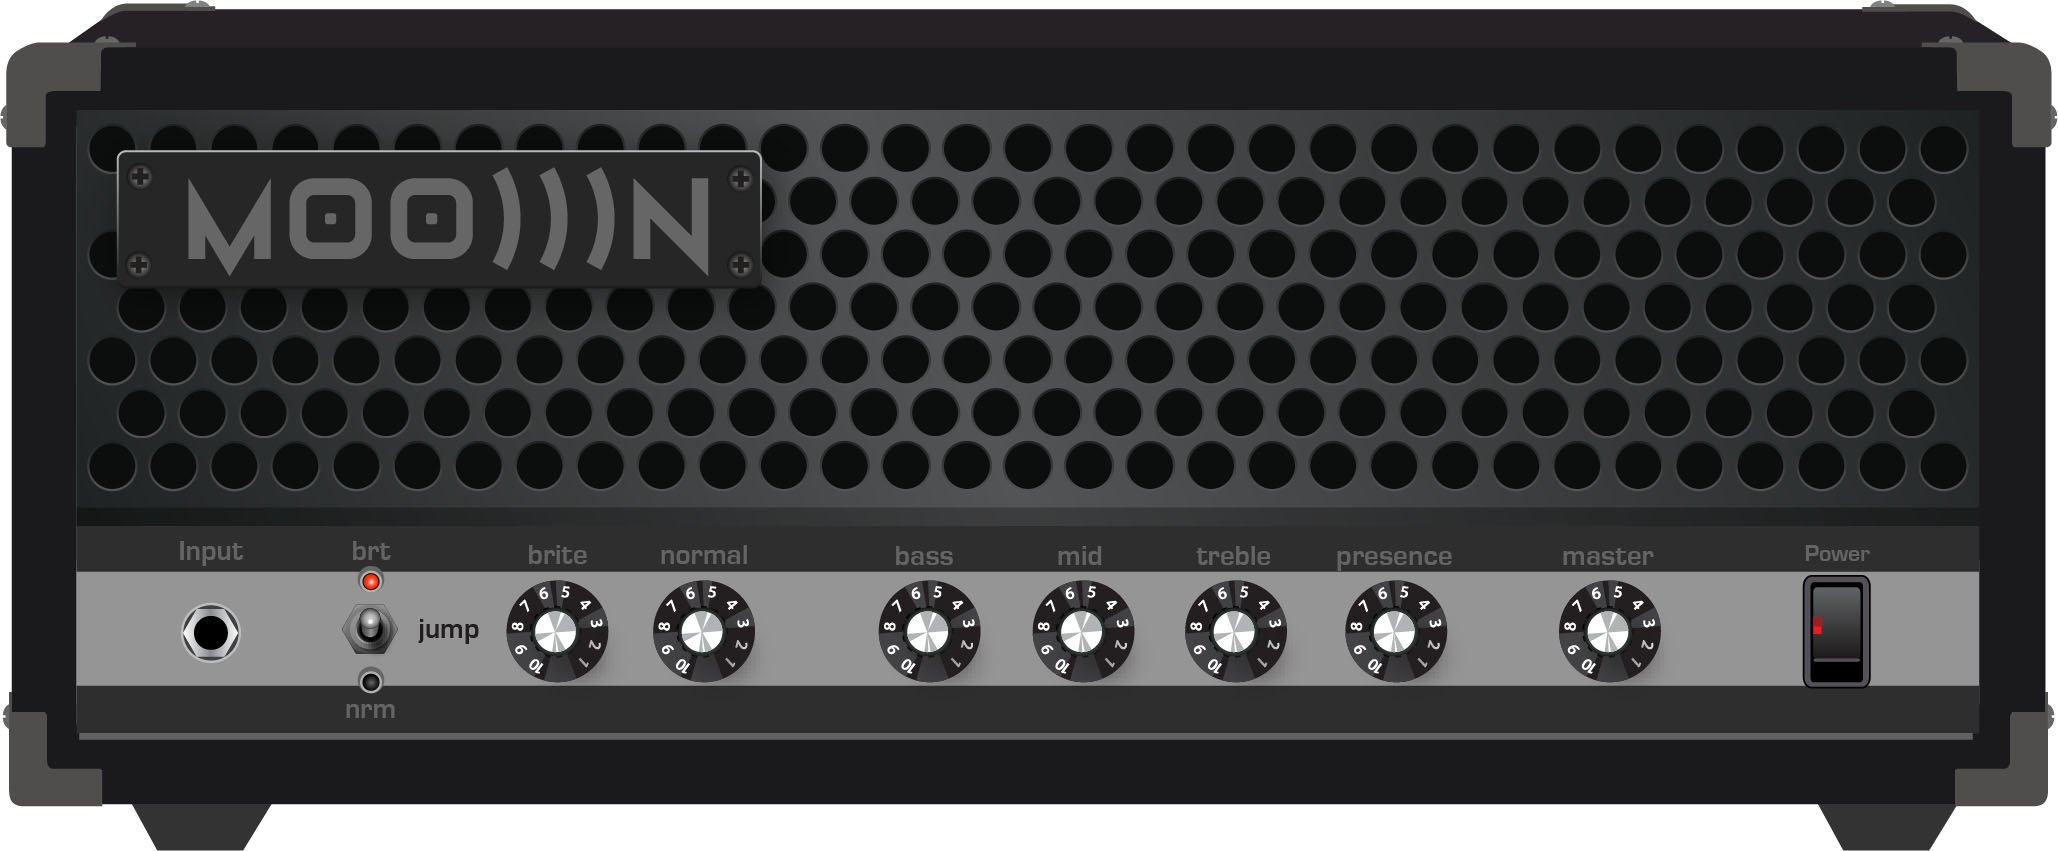
Amp/Preamp > MOO)))N T Jump, based on* the normal and bright channels jumped in the Sunn Model T

Amp/Preamp > PV VitriolCrunch, based on* the crunch channel of the Peavey Invective (Master boost off). Peavey designed this 6L6 tube-powered monster in collaboration with Misha Mansoor of Periphery, with the goal of offering no-compromise, high-gain performance and flexibility.

Amp/Preamp > PV Vitriol Lead, based on* the lead channel of the Peavey Invective (Master boost off)
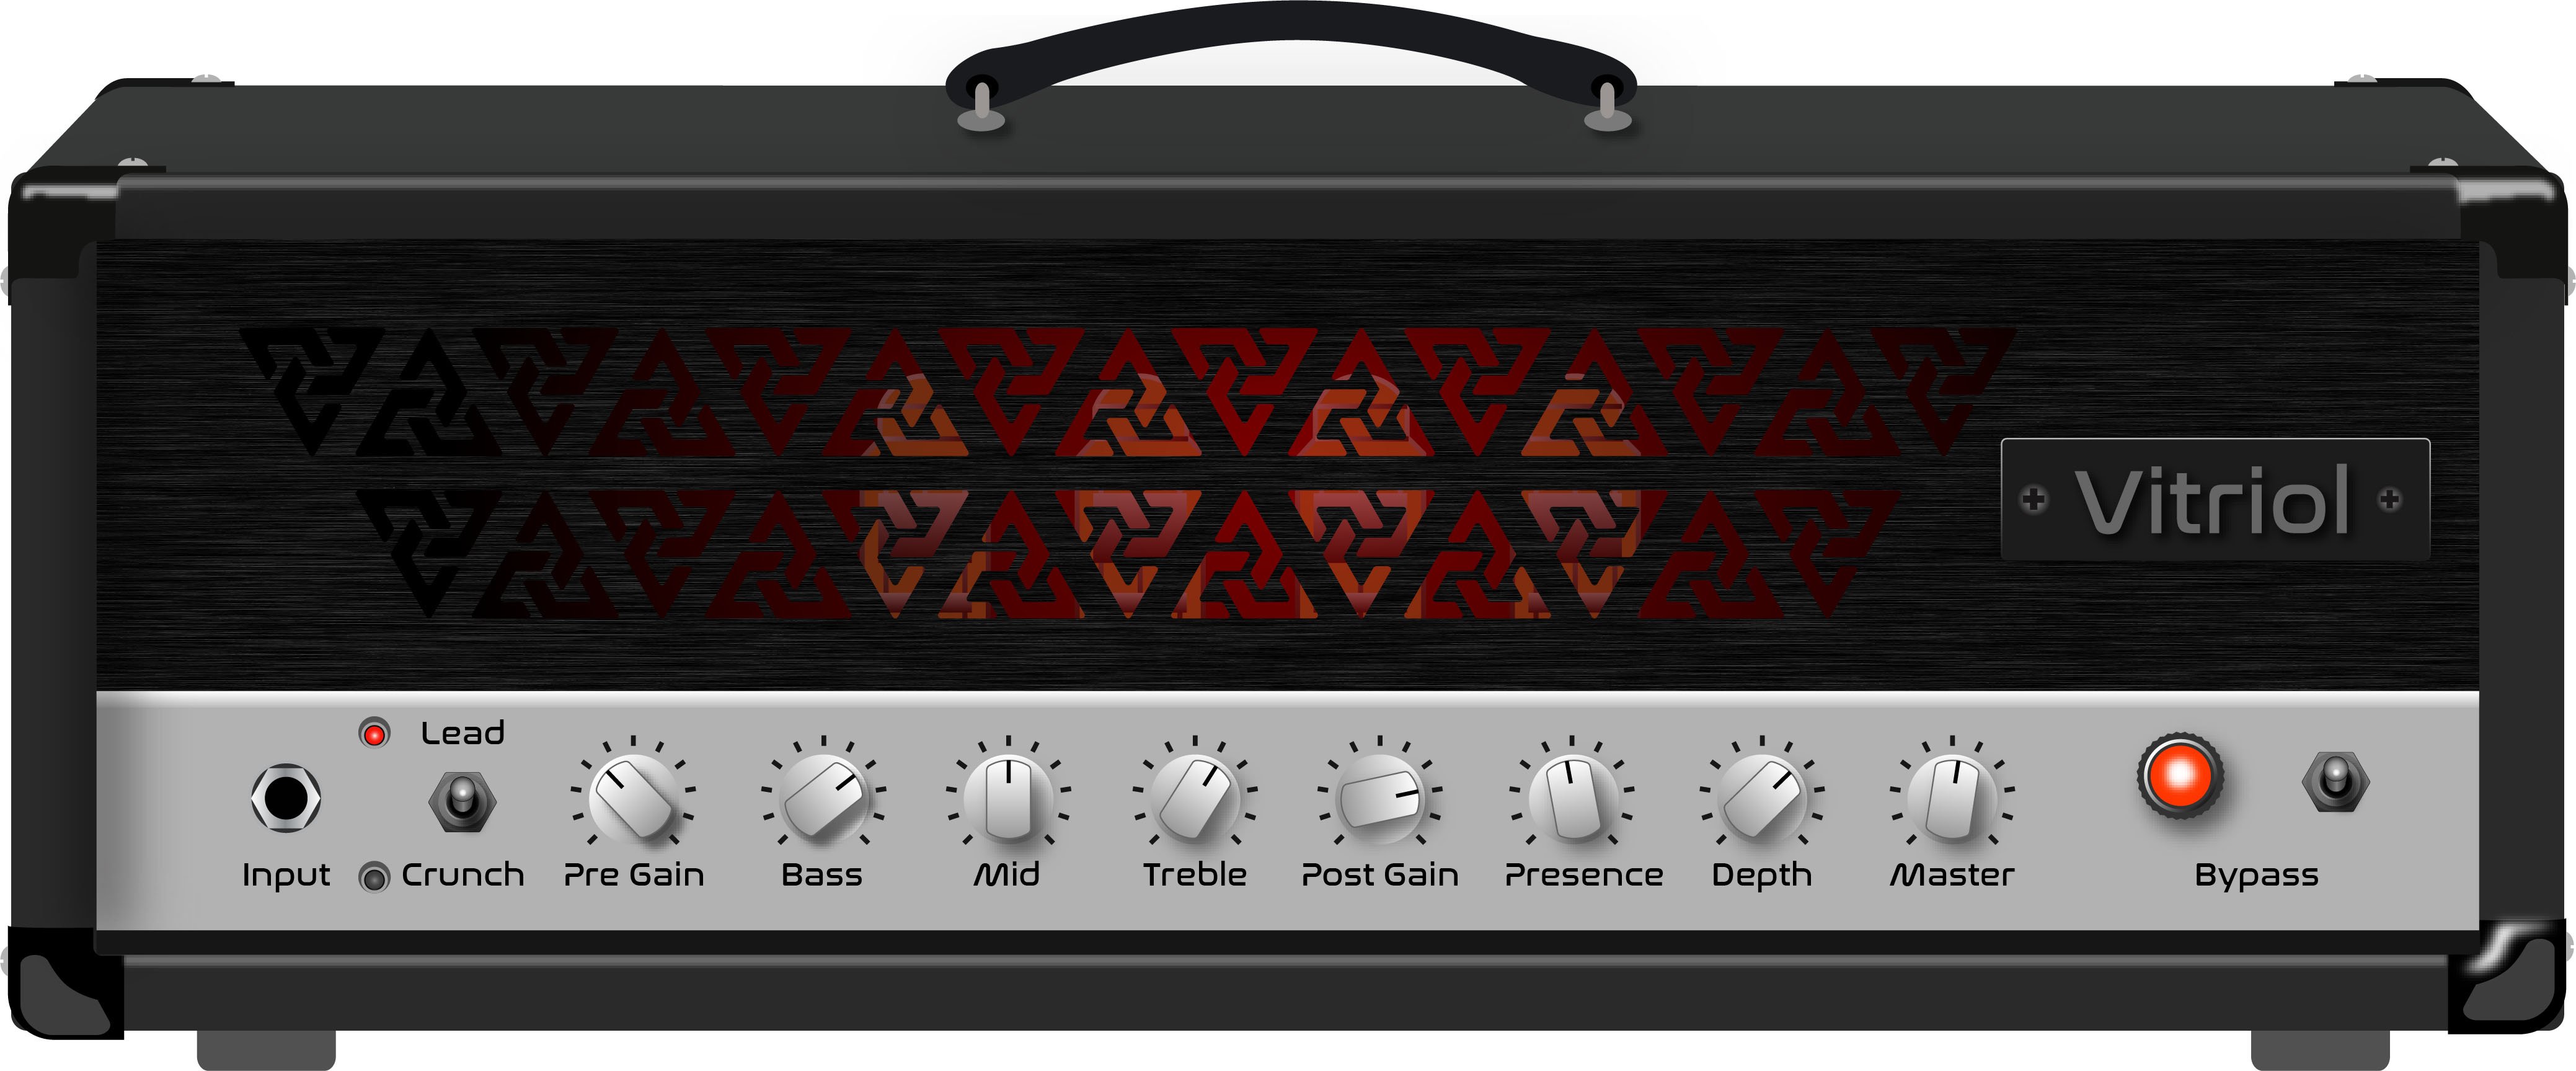
New Effects in 3.50
Helix Floor, Helix Rack, Helix LT, Helix Native, HX Effects, HX Stomp, HX Stomp XL
Distortion > Pillars OD (Mono, Stereo), based on* the Earthquaker Devices Plumes distortion
- Gain—Sets the amount of distortion
- Tone—Sets the overall tonal balance of the distortion
- Level—Sets the overall level of the block
- Mode—Chooses the type of clipping circuit—1 is LED, 2 is Clean Opamp, 3 is Asymmetrical
Distortion > Vital Dist (Mono, Stereo), based on* the Earthquaker Devices Life pedal (Amplitude side)
- Gain—Sets the amount of distortion
- Filter—Applies a high cut (or low pass) filter to the signal, letting you remove treble frequencies. At 0.0, no filter is applied
- Level—Sets the overall level of the block
- Clipping—Chooses the type of clipping circuit—Opamp, Asymmetrical, or Symmetric[al]
- Octave—Blends in a signal one octave up. At 0.0, no octave signal is heard. Works best when playing single notes
Distortion > Vital Boost (Mono, Stereo), based on* the Earthquaker Devices Life pedal (Magnitude side)
- Boost—Sets the output level of the boost circuit
Modulation > 4-Voice Chorus (Mono, Stereo), Line 6 Original

- Rate—Adjusts the speed of the chorus’ low-frequency oscillator (LFO) from slow to fast
- Depth—Adjusts the amplitude of the modulation, from mild to deep
- Voices—Determines the number of voices in the chorus (2, 3, or 4)
- Low Cut—Applies a low cut (high pass) filter to the chorus, letting you remove the effected signal below a certain frequency
- HighShelf—Applies a high cut (low pass) filter to the fills, letting you remove the effected signal above a certain frequency
- Mix—Controls the wet/dry mix of the chorus. When set to 0%, no chorus is heard; when set to 100%, no dry signal is heard
- Level—Controls the overall output level of the block
Modulation > FlexoVibe (Mono, Stereo), Line 6 Original
- Rate—Adjusts the speed of the chorus’ low-frequency oscillator (LFO) from slow to fast
- Intensity—Adjusts the amplitude of the modulation, from mild to deep
- Warp—Controls the shape of the LFO. At 0.0, the LFO waveform is a triangle; at +1.0 and -1.0, the waveforms exhibit more chaos, or "warping"
- Spread—Controls the phase offset between the two LFOs. At 0.0, no offset is heard; at 10.0, the two LFOs are separated by 180°. Generally sounds best somewhere in the middle
- Mix—Controls the wet/dry mix of the FlexoVibe effect. When set to 0%, no effect is heard; when set to 100%, no dry signal is heard
- Level—Controls the overall output level of the block
Reverb > Dynamic Ambience (Mono, Stereo), Line 6 Original ambience reverb. At less extreme settings can be used to "open up" the sound of your amp without applying a notable reverb effect. Also utilizes less DSP than other Dynamic reverbs.
- Room Size—Sets the size of the hall (8, 10, or 12 meters)
- Predelay—Determines the amount of delay heard before the signal enters the hall. Can sometimes result in more definition between the dry and effected signals
- Damping—Determines the frequency above which the reverb will be absorbed. For example, if your hall is full of people wearing fake ocelot jumpsuits, more high frequencies would be absorbed than if the room were empty
- Diffusion—Sets the amount of smearing between discrete echoes, sometimes resulting in a softer effected signal
- Shape—Controls the blend of the Early and Late reflections. Turning the knob clockwise adds more Late reflections; turning the knob counterclockwise adds more Early reflections. Press the knob to reset to "Even"
- Mix—Controls the wet/dry mix of the reverb. When set to 0%, no reverb is heard; when set to 100%, no dry signal is heard
- Low Cut—Applies a low cut (or high pass) filter to the reverb, letting you remove the effected signal below a certain frequency
- High Cut—Applies a high cut (or low pass) filter to the reverb, letting you remove the effected signal above a certain frequency
- Level—Controls the overall output level of the block
- Trails—When on, reverb decay continues to ring out after the block is bypassed
Pitch/Synth > Boctaver (Mono, Stereo), based on* the BOSS® OC-2 Octaver
- –1 Oct—Sets the level of the signal one octave down
- –2 Oct—Sets the level of the signal two octaves down
- Dry Level—Sets the level of the dry (unaffected) signal
*NOTE: All product names used in this document are trademarks of their respective owners and neither Yamaha Guitar Group nor Line 6 are associated or affiliated with them. These trademarks appear solely to identify products whose tones and sounds were studied by Line 6 during sound model development.
New Features in 3.50
IR > Dual Block
Helix Floor, Helix Rack/Control, Helix LT, HX Effects, HX Stomp, HX Stomp XL

3.50 renames the Impulse Response > Mono subcategory as "Single" and adds a new subcategory: Dual. The IR > Dual block can accommodate two 1024-point IRs, you can pan them independently, flip the polarity of either one, and even slightly delay one vs. the other to account for any phase inconsistencies between IR developers.
- [A] IR Select—Selects the IR file for the first (A) slot
- [A] Low Cut—Applies a low cut (high pass) filter to the IR, letting you remove the signal below a certain frequency
- [A] High Cut—Applies a high cut (low pass) filter to the decks, letting you remove the signal above a certain frequency
- [A] Level—Sets the level of the first (A) IR
- [A] Pan—Pans the IR left or right between stereo speakers. Press the knob to reset to Center
- [A] Polarity—Flips the polarity of the IR's waveform. If your IR block suddenly makes everything sound thin, try setting this to "Inverted" to see if it helps
- [B] IR Select—Selects the IR file for the first (A) slot
- [B] Low Cut—Applies a low cut (high pass) filter to the IR, letting you remove the signal below a certain frequency
- [B] High Cut—Applies a high cut (low pass) filter to the decks, letting you remove the signal above a certain frequency
- [B] Level—Sets the level of the first (A) IR
- [B] Pan—Pans the IR left or right between stereo speakers. Press the knob to reset to Center
- [B] Polarity—Flips the polarity of the IR's waveform. If your IR block suddenly makes everything sound thin, try setting this to "Inverted" to see if it helps
- [Both] Delay—Some IR files don't line up perfectly, especially when mixing and matching files from two different developers. This can result in phase incoherence or a thin, unfocused tone. Turning this knob clockwise delays the B side IR by a tiny bit; turning it counterclockwise delays the A side by a tiny bit. Press the knob to return Delay to "None"
- [Both] Mix—Controls the wet/dry mix of the IR block. For Cab IRs, you should leave this set to 100%, but when utilizing body resonance IRs for acoustic guitars, you may want to find the right blend between the IR and dry signal
New Cabs and IRs now use 66-80% Less DSP
Helix Floor, Helix Rack/Control, Helix LT, Helix Native, HX Effects [IRs only], HX Stomp, HX Stomp XL
Due to further improvements to Helix Core, new Cabs and 1024-point IRs use roughly 66% less DSP as in 3.15 or earlier. Even the new IR > Dual block uses less DSP than a single IR block in 3.15. 2048-point IRs use roughly 80% less DSP, although they still use a lot of memory, so they're still limited to one instance per path. NOTE: Older Hybrid cabs use the same amount of DSP as in earlier firmware.
Disable Snapshot Control over Parameter Assignments
Helix Floor, Helix Rack/Control, Helix LT, HX Effects, HX Stomp, HX Stomp XL
Prior to 3.50, when assigning a parameter to a physical control (EXP 1, footswitch, etc.) or MIDI, Snapshots are also always assigned. In 3.50, they still are, but there's an additional "Snapshot Control" parameter on the Controller Assign page that lets you bypass this behavior.
- From the Controller Assign menu, select the desired parameter and turn Knob 2 (Controller) to select any value other than "None" or "Snapshots." A second page appears.
- Press PAGE> and turn Knob 1 (Snapshot Control) to "Off." It's set to "On" by default for all parameters.
Other Changes and Improvements in 3.50
- Encoder ballistics have been drastically improved. For example, tonestack values can go from 0.0 to 10.0 with one turn
- Helix Floor/Rack/LT only—SHORTCUT: While the Model List is open, pressing [AMP] jumps to highlight the Amp category without having to scroll down to it
- Helix Floor/Rack/LT only—The Impulse Response category's name has been shortened to "IR" (now matches that of HX Stomp/XL) to accommodate a wider subcategory column in the model list as well as accommodate longer IR names in the inspector header
Bug Fixes in 3.50
- Reverb > Shimmer's Pitch parameter was inconsistent between hardware and HX Edit—FIXED
- Reverb > Dynamic Room's Mot Rate value range was inconsistent between hardware and HX Edit—FIXED
- Delay > Stereo > ADT's Mod Rate value range was inconsistent between hardware and HX Edit—FIXED
- Delay > Tesselator and Ratchet's Operation is set to "Mute All," the signal would be muted even when bypassed—FIXED
- When Global Settings > Preferences > Snapshot Edits is set to "Discard," holding FS12 (SAVE+EXIT) while in Pedal Edit mode did not always save edited parameters when controlled by snapshots—FIXED
- After loading a preset containing a Command Center > Instant > Ext Amp command, EXP Pedal 1 could sometimes stop functioning properly—FIXED
- When a snapshot is reloaded, a duplicate MIDI PC message was not sent—FIXED
- When many Command Center commands are assigned, snapshot names could sometimes disappear—FIXED
- While in tuner view, attempting to restore globals could sometimes cause Helix to crash—FIXED
- When assigning block bypass to an expression pedal, Behavior > "Heel Down" or "Toe Down" could sometimes revert to "Toggle"—FIXED
- HX Stomp/HX Stomp XL only—Upon receiving MIDI CC73, changing views was not functioning as expected—FIXED
- HX Stomp/HX Stomp XL only—Overly long favorite names could result in graphical glitches—FIXED
- HX Stomp XL only—After changing presets using footswitches, capacitive sensing could become disabled until pressing a stomp switch—FIXED
- HX Stomp XL only—When a Command Center > Snapshot Up or Down command is assigned to Footswitch 7 or 8, an extra Snapshot Up/Down message could occur—FIXED
- HX Edit only—Copying and pasting an IR with more than 31 characters in the name would truncate the IR's name—FIXED
- HX Stomp w/ HX Edit only—After restoring from a 3.01 backup, if path B exists, blocks move 1 position to the right—FIXED
- Many other minor fixes and improvements
Known Issues in 3.50
- In some cases, the Input block's Variax Tone Knob setting is not recalled across preset changes
- In some cases, sending MIDI CC49-59 (footswitch emulation control) to engage stomp switches assigned to snapshot commands can result in inconsistent behavior. Instead, send Helix CC69 messages (values 0-7) to recall snapshots
- In rare cases, attempting to fill all 128 user IR locations can result in a "Failed to get impulse names" -8207 error and the device will appear to be frozen on "Transferring data." In the meantime, load 127 or fewer IRs at a time
- If Global Settings > Footswitches > Stomp Select is set to "Press" or "Touch+Press," engaging multiple block bypasses assigned to the same switch (set to momentary) can sometimes appear to lag
- In the Command Center, any MIDI notes assigned to a footswitch can sometimes unexpectedly trigger upon snapshot changes.
Get Download
Helix Native
Helix Native
Helix/HX 3.50 (released November 3, 2022) includes 24 new cabs running on an all new cab engine, 5 new amps, 7 new effects, new features, additional improvements, and bug fixes, and is strongly recommended for all users.
How do I update to 3.50?
Updating Helix Native
- Before updating Helix Native, it is highly recommended that you export a preset/setlist bundle. Click the gear icon in the lower left, select the Presets/IRs tab, and then click Export Bundle. Some hardware compatibility modes (HX Stomp, HX Stomp XL, HX Effects) do not have this feature as they have only one setlist. In these cases, at the top of the preset list, click the yellow EXPORT to export the setlist.
- Quit your DAW and download and install Helix Native 3.50:
- Helix Native 3.50 (macOS): https://line6.com/software/readeula.html?rid=11601
- Helix Native 3.50 (Windows): https://line6.com/software/readeula.html?rid=11600
- Open your DAW and open an instance of Helix Native.
- OPTIONAL: The only way to hear 3.50's new factory presets is to restore them. IMPORTANT! MAKE SURE YOU'VE EXPORTED A BUNDLE (OR ANY IMPORTANT SETLISTS) FIRST, AS RESTORING FACTORY SETLISTS WILL ERASE ALL YOUR WORK! Click the gear icon in the lower left, select the Presets/IRs tab, and then click Restore Factory Setlists. Click Yes.
NOTE: Presets created in 3.50 are not compatible with earlier firmware versions.
All New Cab Engine/New Cabs in 3.50
Helix Floor, Helix Rack, Helix LT, Helix Native, HX Stomp, HX Stomp XL
Thousands of impulses were captured with Sound Design's all new IR capture system and consolidated into 20 guitar cabs and 4 bass cabs. As such, cab subcategories have been updated:
- Single—One new cab
- Dual—Two new cabs
- Legacy Single—One older Hybrid cab
- Legacy Dual—Two older Hybrid cabs
Amp+Cab subcategories have been updated as well:
- Guitar—Guitar Amp+new cab
- Bass—Bass Amp+new cab
- Guitar+Legacy—Guitar Amp+older Hybrid cab
- Bass+Legacy—Bass Amp+older Hybrid cab
With Cab > Dual blocks, you can now also choose whether changing the first cab automatically recalls a matching cab for the second.
- From the Global Settings menu, select the Preferences page.
- Press PAGE> until you see Link Dual Cabs. When set to "On" (default), changing the first cab automatically loads a matching cab for the second. Choose this option if you want to emulate the sound of two different mics (or two of the same mic with different angles or positions) on the same cab. When set to "Off," both cabs are completely independent of one another.
- Alternatively, in HX Edit (and Helix Native), click the Link Dual Cabs icon. Off (left) and On (right):
New Guitar Cabs
Cab > 1x10 US Princess (Single, Dual), captured from* the 1x10" Fender Princeton Eminence Copperhead
Cab > 1x12 Grammatico (Single, Dual), captured from* the 1x12" Grammatico LaGrange P12Q
Cab > 1x12 US Deluxe (Single, Dual), captured from* the 1×12″ Fender® Deluxe Oxford
Cab > 1x12 Cali EXT (Single, Dual), captured from* the 1x12" Mesa Boogie Extension Cab
Cab > 2x12 Blue Bell (Single, Dual), captured from* the 2×12″ Vox® AC-30 Fawn Blue
Cab > 2x12 Double C12N (Single, Dual), captured from* the 2×12″ Fender Twin C12N
Cab > 2x12 Jazz Rivet (Single, Dual), captured from* the 2×12″ Roland® JC-120
Cab > 2x12 Mail C12Q (Single, Dual), captured from* the 2×12″ Silvertone® 1484
Cab > 2x12 Mandarin 30 (Single, Dual), captured from* the 2x12" Orange PPC212 V30
Cab > 4x10 Tweed P10R (Single, Dual), captured from* the 4×10″ Fender Bassman® P10R
Cab > 4x12 Greenback25 (Single, Dual), captured from* the 4×12″ Marshall® Basketweave G12 M25
Cab > 4x12 1960A T75 (Single, Dual), captured from* the 4×12″ Marshall 1960A T75
Cab > 4x12 Blackback 30 (Single, Dual), captured from* the 4×12″ Park® 75 G12 H30
Cab > 4x12 Brit V30 (Single, Dual), captured from* the 4×12″ Marshall® 1960AV V30
Cab > 4x12 Cali V30 (Single, Dual), captured from* the 4×12″ MESA/Boogie® 4FB V30
Cab > 4x12 Mandarin EM (Single, Dual), captured from* the 4×12″ Orange Eminence
Cab > 4x12 MOO)))N T75 (Single, Dual), captured from* the 4x12" Sunn Cab w/G75T
Cab > 4x12 Uber T75 (Single, Dual), captured from* the 4×12″ Bogner® Uberkab T75
Cab > 4x12 Uber V30 (Single, Dual), captured from* the 4×12″ Bogner Uberkab V30
Cab > 4x12 XXL V30 (Single, Dual), captured from* the 4×12″ ENGL® XXL V30
- Mic—Select from up to 12 mics:
- 57 Dynamic—Shure® SM57
- 421 Dynamic—Sennheiser® MD 421-U
- 7 Dynamic—Shure SM7
- 906 Dynamic—Sennheiser e906
- 30 Dynamic—Heil Sound® PR 30
- 121 Ribbon—Royer® R-121
- 160 Ribbon—Beyerdynamic® M 160
- 4038 Ribbon—Coles 4038
- 84 Ribbon—AEA R84
- 414 Cond—AKG® C414 XLS
- 47 Cond FET—Neumann® U47 FET
- 67 Cond—Neumann U67
- Position—Sets the lateral location of the mic in relation to the speaker cone. Choose from Center ~ Cap Edge ~ Edge. Cap Edge may appear in a different location depending on the selected cab
- Distance—Sets the distance of the mic from the speaker cone. Choose from 1.00" to 12.00" in 1/4" increments
- Angle—Sets the angle of the mic. 0 degrees is pointing directly at the speaker, 45 degrees is pointing off-axis
- Low Cut—Applies a low cut (high pass) filter, letting you remove all audio below a certain frequency. May be useful in removing undesirable low end rumble
- High Cut—Applies a high cut (low pass) filter, letting you remove all audio above a certain frequency. May be useful in removing high end harshness
- Level—Sets the overall level of the cab
- Pan (Dual only)—Moves the signal left or right across the stereo sound field. For example, if you're running a stereo playback system with two or more speakers, panning the first cab to Left 100 and the second cab to Right 100 can make your tone sound notably wider. Press the knob to return to Center
- Delay (Dual only)—Although the new cabs in 3.50 perfectly line up with one another, there may be situations where you want to delay one side very slightly, to perhaps impart a bit of phase incoherence or at higher values, to increase the apparent stereo spread. A little goes a long way here
New Bass Cabs
Cab > 1x15 Ampeg B-15 (Single, Dual), captured from* the 1×15″ Ampeg® B-15
Cab > 2×15 Brute (Single, Dual), captured from* the 2×15″ MESA/Boogie® 2×15 EV
Cab > 4×10 Garden (Single, Dual), captured from* the 4x10" Eden D410XLT
Cab > 8x10 SVT AV (Single, Dual), captured from* the 8×10″ Ampeg® SVT® (SVT-810AV Heritage Edition)
- Mic—Select from up to 12 mics:
- 57 Dynamic—Shure SM57
- 421 Dynamic—Sennheiser MD 421-U
- 7 Dynamic—Shure SM7
- 88 Dynamic—Beyerdynamic M88TG
- 52 Dynamic—Shure Beta 52A
- 112 Dynamic—AKG D112
- D6 Dynamic—Audix D6
- 40 Dynamic—Heil Sound PR 40
- 4038 Ribbon—Coles 4038
- 414 Cond—AKG C414 TLII
- 47 Cond FET—Neumann U47 FET
- 67 Cond—Neumann U67
- All other parameters the same as for guitar cabs (see above)
New Amps in 3.50
Helix Floor, Helix Rack, Helix LT, Helix Native, HX Stomp, HX Stomp XL
Amp/Preamp > MOO)))N T Nrm, based on* the normal channel of the Sunn Model T.
"The Moon model is based on a 1974, silver knob Sunn Model T amplifier. This is the early version with the more traditional tone stack. Though it has been repaired over the years, the circuit has every component at stock value. This specific unit has been well used, well maintained, and regularly enveloped in fog.
"This amp circuit can best be described as a Fender Tweed Bassman/Marshall JTM45 preamp mated with a very high volume, very flat, ultralinear power amp that uses 6550 tubes. The result of this configuration is a tone with a raw growl that really has a strong punch to the gut. In addition, this configuration takes pedals very well; adding a distortion or booster can turn the amp into a high gain, doom machine."
—Ben Adrian, Sound Design Manager
Amp/Preamp > MOO)))N T Brt, based on* the bright channel of the Sunn Model T
Amp/Preamp > MOO)))N T Jump, based on* the normal and bright channels jumped in the Sunn Model T
Amp/Preamp > PV VitriolCrunch, based on* the crunch channel of the Peavey Invective (Master boost off). Peavey designed this 6L6 tube-powered monster in collaboration with Misha Mansoor of Periphery, with the goal of offering no-compromise, high-gain performance and flexibility.
Amp/Preamp > PV Vitriol Lead, based on* the lead channel of the Peavey Invective (Master boost off)
New Effects in 3.50
Helix Floor, Helix Rack, Helix LT, Helix Native, HX Effects, HX Stomp, HX Stomp XL
Distortion > Pillars OD (Mono, Stereo), based on* the Earthquaker Devices Plumes distortion
- Gain—Sets the amount of distortion
- Tone—Sets the overall tonal balance of the distortion
- Level—Sets the overall level of the block
- Mode—Chooses the type of clipping circuit—1 is LED, 2 is Clean Opamp, 3 is Asymmetrical
Distortion > Vital Dist (Mono, Stereo), based on* the Earthquaker Devices Life pedal (Amplitude side)
- Gain—Sets the amount of distortion
- Filter—Applies a high cut (or low pass) filter to the signal, letting you remove treble frequencies. At 0.0, no filter is applied
- Level—Sets the overall level of the block
- Clipping—Chooses the type of clipping circuit—Opamp, Asymmetrical, or Symmetric[al]
- Octave—Blends in a signal one octave up. At 0.0, no octave signal is heard. Works best when playing single notes
Distortion > Vital Boost (Mono, Stereo), based on* the Earthquaker Devices Life pedal (Magnitude side)
- Boost—Sets the output level of the boost circuit
Modulation > 4-Voice Chorus (Mono, Stereo), Line 6 Original
- Rate—Adjusts the speed of the chorus’ low-frequency oscillator (LFO) from slow to fast
- Depth—Adjusts the amplitude of the modulation, from mild to deep
- Voices—Determines the number of voices in the chorus (2, 3, or 4)
- Low Cut—Applies a low cut (high pass) filter to the chorus, letting you remove the effected signal below a certain frequency
- HighShelf—Applies a high cut (low pass) filter to the fills, letting you remove the effected signal above a certain frequency
- Mix—Controls the wet/dry mix of the chorus. When set to 0%, no chorus is heard; when set to 100%, no dry signal is heard
- Level—Controls the overall output level of the block
Modulation > FlexoVibe (Mono, Stereo), Line 6 Original
- Rate—Adjusts the speed of the chorus’ low-frequency oscillator (LFO) from slow to fast
- Intensity—Adjusts the amplitude of the modulation, from mild to deep
- Warp—Controls the shape of the LFO. At 0.0, the LFO waveform is a triangle; at +1.0 and -1.0, the waveforms exhibit more chaos, or "warping"
- Spread—Controls the phase offset between the two LFOs. At 0.0, no offset is heard; at 10.0, the two LFOs are separated by 180°. Generally sounds best somewhere in the middle
- Mix—Controls the wet/dry mix of the FlexoVibe effect. When set to 0%, no effect is heard; when set to 100%, no dry signal is heard
- Level—Controls the overall output level of the block
Reverb > Dynamic Ambience (Mono, Stereo), Line 6 Original ambience reverb. At less extreme settings can be used to "open up" the sound of your amp without applying a notable reverb effect. Also utilizes less DSP than other Dynamic reverbs.
- Room Size—Sets the size of the hall (8, 10, or 12 meters)
- Predelay—Determines the amount of delay heard before the signal enters the hall. Can sometimes result in more definition between the dry and effected signals
- Damping—Determines the frequency above which the reverb will be absorbed. For example, if your hall is full of people wearing fake ocelot jumpsuits, more high frequencies would be absorbed than if the room were empty
- Diffusion—Sets the amount of smearing between discrete echoes, sometimes resulting in a softer effected signal
- Shape—Controls the blend of the Early and Late reflections. Turning the knob clockwise adds more Late reflections; turning the knob counterclockwise adds more Early reflections. Press the knob to reset to "Even"
- Mix—Controls the wet/dry mix of the reverb. When set to 0%, no reverb is heard; when set to 100%, no dry signal is heard
- Low Cut—Applies a low cut (or high pass) filter to the reverb, letting you remove the effected signal below a certain frequency
- High Cut—Applies a high cut (or low pass) filter to the reverb, letting you remove the effected signal above a certain frequency
- Level—Controls the overall output level of the block
- Trails—When on, reverb decay continues to ring out after the block is bypassed
Pitch/Synth > Boctaver (Mono, Stereo), based on* the BOSS® OC-2 Octaver
- –1 Oct—Sets the level of the signal one octave down
- –2 Oct—Sets the level of the signal two octaves down
- Dry Level—Sets the level of the dry (unaffected) signal
*NOTE: All product names used in this document are trademarks of their respective owners and neither Yamaha Guitar Group nor Line 6 are associated or affiliated with them. These trademarks appear solely to identify products whose tones and sounds were studied by Line 6 during sound model development.
New Features in 3.50
IR > Dual Block
Helix Floor, Helix Rack/Control, Helix LT, HX Effects, HX Stomp, HX Stomp XL
3.50 renames the Impulse Response > Mono subcategory as "Single" and adds a new subcategory: Dual. The IR > Dual block can accommodate two 1024-point IRs, you can pan them independently, flip the polarity of either one, and even slightly delay one vs. the other to account for any phase inconsistencies between IR developers.
- [A] IR Select—Selects the IR file for the first (A) slot
- [A] Low Cut—Applies a low cut (high pass) filter to the IR, letting you remove the signal below a certain frequency
- [A] High Cut—Applies a high cut (low pass) filter to the decks, letting you remove the signal above a certain frequency
- [A] Level—Sets the level of the first (A) IR
- [A] Pan—Pans the IR left or right between stereo speakers. Press the knob to reset to Center
- [A] Polarity—Flips the polarity of the IR's waveform. If your IR block suddenly makes everything sound thin, try setting this to "Inverted" to see if it helps
- [B] IR Select—Selects the IR file for the first (A) slot
- [B] Low Cut—Applies a low cut (high pass) filter to the IR, letting you remove the signal below a certain frequency
- [B] High Cut—Applies a high cut (low pass) filter to the decks, letting you remove the signal above a certain frequency
- [B] Level—Sets the level of the first (A) IR
- [B] Pan—Pans the IR left or right between stereo speakers. Press the knob to reset to Center
- [B] Polarity—Flips the polarity of the IR's waveform. If your IR block suddenly makes everything sound thin, try setting this to "Inverted" to see if it helps
- [Both] Delay—Some IR files don't line up perfectly, especially when mixing and matching files from two different developers. This can result in phase incoherence or a thin, unfocused tone. Turning this knob clockwise delays the B side IR by a tiny bit; turning it counterclockwise delays the A side by a tiny bit. Press the knob to return Delay to "None"
- [Both] Mix—Controls the wet/dry mix of the IR block. For Cab IRs, you should leave this set to 100%, but when utilizing body resonance IRs for acoustic guitars, you may want to find the right blend between the IR and dry signal
New Cabs and IRs now use 66-80% Less DSP
Helix Floor, Helix Rack/Control, Helix LT, Helix Native, HX Effects [IRs only], HX Stomp, HX Stomp XL
Due to further improvements to Helix Core, new Cabs and 1024-point IRs use roughly 66% less DSP as in 3.15 or earlier. Even the new IR > Dual block uses less DSP than a single IR block in 3.15. 2048-point IRs use roughly 80% less DSP, although they still use a lot of memory, so they're still limited to one instance per path. NOTE: Older Hybrid cabs use the same amount of DSP as in earlier firmware.
Disable Snapshot Control over Parameter Assignments
Helix Floor, Helix Rack/Control, Helix LT, HX Effects, HX Stomp, HX Stomp XL
Prior to 3.50, when assigning a parameter to a physical control (EXP 1, footswitch, etc.) or MIDI, Snapshots are also always assigned. In 3.50, they still are, but there's an additional "Snapshot Control" parameter on the Controller Assign page that lets you bypass this behavior.
- From the Controller Assign menu, select the desired parameter and turn Knob 2 (Controller) to select any value other than "None" or "Snapshots." A second page appears.
- Press PAGE> and turn Knob 1 (Snapshot Control) to "Off." It's set to "On" by default for all parameters.
Other Changes and Improvements in 3.50
- Encoder ballistics have been drastically improved. For example, tonestack values can go from 0.0 to 10.0 with one turn
- Helix Floor/Rack/LT only—SHORTCUT: While the Model List is open, pressing [AMP] jumps to highlight the Amp category without having to scroll down to it
- Helix Floor/Rack/LT only—The Impulse Response category's name has been shortened to "IR" (now matches that of HX Stomp/XL) to accommodate a wider subcategory column in the model list as well as accommodate longer IR names in the inspector header
Bug Fixes in 3.50
- Reverb > Shimmer's Pitch parameter was inconsistent between hardware and HX Edit—FIXED
- Reverb > Dynamic Room's Mot Rate value range was inconsistent between hardware and HX Edit—FIXED
- Delay > Stereo > ADT's Mod Rate value range was inconsistent between hardware and HX Edit—FIXED
- Delay > Tesselator and Ratchet's Operation is set to "Mute All," the signal would be muted even when bypassed—FIXED
- When Global Settings > Preferences > Snapshot Edits is set to "Discard," holding FS12 (SAVE+EXIT) while in Pedal Edit mode did not always save edited parameters when controlled by snapshots—FIXED
- After loading a preset containing a Command Center > Instant > Ext Amp command, EXP Pedal 1 could sometimes stop functioning properly—FIXED
- When a snapshot is reloaded, a duplicate MIDI PC message was not sent—FIXED
- When many Command Center commands are assigned, snapshot names could sometimes disappear—FIXED
- While in tuner view, attempting to restore globals could sometimes cause Helix to crash—FIXED
- When assigning block bypass to an expression pedal, Behavior > "Heel Down" or "Toe Down" could sometimes revert to "Toggle"—FIXED
- HX Stomp/HX Stomp XL only—Upon receiving MIDI CC73, changing views was not functioning as expected—FIXED
- HX Stomp/HX Stomp XL only—Overly long favorite names could result in graphical glitches—FIXED
- HX Stomp XL only—After changing presets using footswitches, capacitive sensing could become disabled until pressing a stomp switch—FIXED
- HX Stomp XL only—When a Command Center > Snapshot Up or Down command is assigned to Footswitch 7 or 8, an extra Snapshot Up/Down message could occur—FIXED
- HX Edit only—Copying and pasting an IR with more than 31 characters in the name would truncate the IR's name—FIXED
- HX Stomp w/ HX Edit only—After restoring from a 3.01 backup, if path B exists, blocks move 1 position to the right—FIXED
- Many other minor fixes and improvements
Known Issues in 3.50
- In some cases, the Input block's Variax Tone Knob setting is not recalled across preset changes
- In some cases, sending MIDI CC49-59 (footswitch emulation control) to engage stomp switches assigned to snapshot commands can result in inconsistent behavior. Instead, send Helix CC69 messages (values 0-7) to recall snapshots
- In rare cases, attempting to fill all 128 user IR locations can result in a "Failed to get impulse names" -8207 error and the device will appear to be frozen on "Transferring data." In the meantime, load 127 or fewer IRs at a time
- If Global Settings > Footswitches > Stomp Select is set to "Press" or "Touch+Press," engaging multiple block bypasses assigned to the same switch (set to momentary) can sometimes appear to lag
- In the Command Center, any MIDI notes assigned to a footswitch can sometimes unexpectedly trigger upon snapshot changes.
Get Download
Helix Native
Helix Native
Helix Native 3.15 (released February 8, 2022) includes a new Line 6 original amp, 10 new Helix effects, 18 additional Legacy effects, new features, additional improvements, and bug fixes, and is recommended for all users.
How do I update to 3.15?
Before updating Helix Native, it is highly recommended that you export a bundle and/or export all of your setlists. This is done by going to Settings (the gear icon in the bottom left of the window), the Presets/IRs tab, and clicking Export Bundle. Some hardware compatibility modes (HX Stomp, HX Stomp XL, HX Effects) do not have this feature as they only have one setlist. In these modes, the setlist or presets will need to be exported instead of a bundle.
New Amp in 3.15
Helix Floor, Helix Rack, Helix LT, Helix Native, HX Stomp, HX Stomp XL
Amp/Preamp > Line 6 Ventoux, Line 6 Original.
"The amp model name is Ventoux, which is a mountain in the south of France that is a legendary cycling climb. I did it in 2018 and it was awesome and very hard.
This model comes from a physical amp idea I had a while back. I was going to build it as a tube amp first. There are only so many hours in a day, though. The idea was to create a “coveted boutique amp” that had a different origin story. Most coveted boutique amps come from modified black panel Fenders or modified Marshall circuits. I wanted to do the same thing, but base it on the early 70s Orange circuits and the mid-wattage Fender Tweed circuits.
Ventoux has a unique topology. In an indirect way, every knob is kind of a gain/drive control. The tone controls adjust the character and/or amount of the overdrive in those frequencies. This might be seen as complicated by some, but I find it exciting and full of possibilities."
—Ben Adrian, Sound Design Manager
- Drive—Controls the amount of amp drive
- HP Filter—Higher values result in tighter distortions and thinner cleans; lower values result in looser distortions and warmer cleans
- Mid—Allows for more character than most. At lower values it's like the scooped sounds of traditional 60s Fender amps; at higher values it's flatter, like the 50s tweed amps that have very little tone-shaping in the circuits. Plus, a full-up mid sound will get a nice crunch when Drive is up
- Presence/Depth—You may have noticed this amp was lacking regular bass and treble controls. That is accounted for with Depth and Presence controls; bass and treble for the power amp. These actually occur in the circuit just before phase inverter, but they really need the whole power amp to function. They also affect the character of the power amp distortion
- Ch Vol—Sets the overall level of the Amp block
- Master—Ventoux's Master volume exists in an "impossible" place for a physical amp. Generally, you'll want to leave this at 10.0, like a vintage amp with no master volume. However, a variety of textures can be had by reducing the level
New Helix Effects in 3.15
Helix Floor, Helix Rack, Helix LT, Helix Native, HX Effects, HX Stomp, HX Stomp XL
Dynamics > Ampeg Opto Comp (Mono, Stereo), based on* the Ampeg Opto Comp compressor pedal.
- Compress—This is actually a ratio control, which controls the amount of compression. At 0.0, the ratio is 1:1; at 5.0, the ratio is at 3:1, and at 10.0, the ratio is at 10:1
- Release—Controls how long it takes for the compressor to stop reducing gain. At 0.0, the release is 75 ms; at 10.0, the release is around 600 ms
- Mix—Controls the wet/dry mix of the compressor. When set to 0%, no compressed signal is heard; when set to 100%, no dry signal is heard
- Level—Sets the overall level of the block

Modulation > Ampeg Liquifier (Mono, Stereo), based on* the Ampeg Liquifier chorus pedal.
- Rate—Adjusts the speed of the chorus’ low-frequency oscillator (LFO) from slow to fast
- Depth—Adjusts the amplitude of the modulation, from mild to deep
- Mix—Controls the wet/dry mix of the chorus. When set to 0%, no chorus is heard; when set to 100%, no dry signal is heard
- Type—Liquifier is actually two choruses in one, hence the "Dual" default. If you'd prefer it to behave more like a traditional chorus pedal, choose "Single"
- Headroom—Some mod pedals' internal signal paths exhibit a bit of grit, especially when placed after a high-gain amp block. Negative values increase the perceived amount of grit; positive values clean things up a bit. At 0dB, the model behaves like the original pedal
- Level—Sets the overall level of the block
Delay > Heliosphere (Mono, Stereo), Line 6 Original delay with reverb injected into the feedback loop.
- Time—Sets the delay time. Press the knob to toggle between ms/Sec and note values
- Feedback—Controls the overall number of repeats. To hear only one repeat, set to 0%
- Rate—Controls the rate or speed of modulation
- Depth—Controls the depth or amount of modulation
- Mix—Controls the wet/dry mix of the delay. When set to 0%, no delay is heard; when set to 100%, no dry signal is heard
- Level—Sets the overall level of the block
- Scale—For stereo delays, the Time parameter sets the left side. The right side's time is always some percentage of the left's time, and is determined by the Scale parameter. For example, if Time is set to 500ms, and Scale is set to 70%, the left delay is 500ms and the right delay is 350ms (or 70% of 500ms). When scale is set to 100%, left and right delays are the same
- Rev Mix—Controls the wet/dry mix of the reverb inside the delay's feedback loop. When set to 0%, no reverb is heard
- Rev Decay—Sets the decay of the reverb
- Headroom—Some delay pedals' internal signal paths exhibit a bit of grit, especially when placed after a high-gain amp block. Negative values increase the perceived amount of grit; positive values clean things up a bit. At 0dB, the model behaves like the original pedal
- Trails—When set to "Off," delay repeats are instantly muted when the block is bypassed. When set to "On," delay repeats continue to decay naturally when the block is bypassed or a different snapshot is selected
Delay > ADT (Mono, Stereo), Line 6 Original double-tracking tape emulation.
- Delay 1, Delay 2—Sets the delay time for each deck. Delay 1 can go up to 20ms and Delay 2 can go up to 200ms
- WowFlutr1, WowFlutr2—Determines how much warbly tape sound is heard for each deck
- Saturate1, Saturate2—Adds analog tape saturation and at high enough settings, distortion. At lower settings, it's great for simply warming up a tone
- Deck 1 Vol, Deck 2 Vol—Sets the level of each deck independently. Deck 2 is a bit lower than Deck 1 by default
- Deck 2 Pol—Flips the polarity of deck 2
- Mod Rate—Controls the rate or speed of modulation applied to Deck 2
- Mod Depth—Controls the depth or amount of modulation applied to Deck 2
- Level—Sets the overall level of the block
- TapeSpeed—Changes both the rate of the modulation applied by the WowFluttr control and the filtering response of the analog tape emulation
- Texture—Adjusts the amount of the NAB tape EQ in the simulated tape path. When Saturation is set to 0.0, the texture is invisible. When Saturation is turned up, the texture will affect the tightness (or looseness) of the distortion
- Low Cut—Applies a low cut (high pass) filter to the decks, letting you remove the effected signal below a certain frequency
- High Cut—Applies a high cut (low pass) filter to the decks, letting you remove the effected signal above a certain frequency
- Deck 1 Pan, Deck 2 Pan—Pans each deck left and right
- EnvThresh—Sets the level above which engages the envelope. When on, picking harder can impart very slight pitch fluctuations by tweaking Deck 2's delay. Subtle, but fun
- Trails—When set to "Off," delay repeats are instantly muted when the block is bypassed. When set to "On," delay repeats continue to decay naturally when the block is bypassed or a different snapshot is selected
Delay > Crisscross (Mono, Stereo), Line 6 Original dual delay with cross-feedback between the two delay lines.
- Time A, Time B—Sets the delay time for each of the two delay lines. Press the knob to toggle between ms/Sec and note values
- Feedbk A, Feedback B—Controls the number of repeats for each delay line. To hear only one repeat, set to 0%
- Pan A, Pan B—To achieve the widest stereo field, set Pan A to L100 and Pan B to R100
- Mix—Controls the wet/dry mix of the delay. When set to 0%, no delay is heard; when set to 100%, no dry signal is heard
- Level—Sets the overall level of the block
- Crossfeed—Controls the amount of the A delay line fed back into the B delay line and vice versa
- Headroom—Some delay pedals' internal signal paths exhibit a bit of grit, especially when placed after a high-gain amp block. Negative values increase the perceived amount of grit; positive values clean things up a bit. At 0dB, the model behaves like the original pedal
- Mod Rate—Controls the rate or speed of modulation
- Mod Depth—Controls the depth or amount of modulation
- Shape—Sets the modulation's wave shape (Sine or Triangle)
- Phase—Determines the modulation's phase relationship between the two delay lines. At 0°, the delay lines modulate together; at 180°, modulation is inverted from one another
- Bit Depth—Lowers the bit depth of the delay repeats for a grungier sound. For more transparent results, set to "24 bits"
- Sample Rate—Lowers the sample rate of the delay repeats for a grungier sound. For more transparent results, set to "48kHz"
- Low Cut—Applies a low cut (high pass) filter to the repeats, letting you remove the effected signal below a certain frequency
- High Cut—Applies a high cut (low pass) filter to the repeats, letting you remove the effected signal above a certain frequency
- Trails—When set to "Off," delay repeats are instantly muted when the block is bypassed. When set to "On," delay repeats continue to decay naturally when the block is bypassed or a different snapshot is selected
Delay > Tesselator (Mono, Stereo), Line 6 Original. Tesselator is part morphing delay, part loop sampler, part drone machine... it's stellar for creating rhythmic pads, textures, or pitch/filter ramp effects to play over and has been placed in the Delay category so you can run multiple instances at once. Once audio is captured and repeating, you can effectively transition/morph between two states—First and Last, each with its own time, speed/pitch, HP filter, and LP filter—by applying increasing amounts to each repeat until the target settings are reached.
- Assign Tesselator to a stomp footswitch. It's bypassed by default.
- Play a chord and while it's ringing, press the Tesselator switch. Audio captured BEFORE the switch press is repeated and manipulated by the following parameters:
- First—Determines the length of the first step in the sequence, that is, the length of repeated audio when first engaged. Press the knob to toggle between ms and note values
- Last—Determines the length of the last step in the sequence. If shorter than the First step's time, the sequence will get shorter; if longer than the First step's time, the sequence will get longer. If First and Last are the same time, the sequence length remains constant (Ex. 1 below). Press the knob to toggle between ms and note values
- Steps—Determines how many steps there are in the sequence (1 ~ 50). For example, if your first step is 100ms and your last step is 500ms, each successive step in the sequence will lengthen from 100ms to 500ms. The more steps you have, the longer it takes to reach the last step and therefore, the longer it takes to alter the sequence's characteristics
- Direction—Determines the direction of the steps:
- Forward: Each step plays back normally (Ex. 2a below)
- Reverse: Each step plays back in reverse (Ex. 2b below)
- Fwd/Rev: Steps alternate between forward and reverse (Ex. 2c below)
- Boomerang—When off, the last step in the sequence repeats indefinitely. When on, all steps play forward, then backward, then forward again, etc. (Ex. 3a below)
- Operation—Determines what happens to your signal when Tesselator is turned on (remember, it's bypassed by default)
- "Mute All"—When Tesselator is on, THE ENTIRE PATH IS MUTED
- "Dry Kill"—When Tesselator is on, only the effected signal is heard. TIP: With Tesselator on a parallel path, assign a second stomp switch to toggle between Mute All and Dry Kill. This lets you leave the block enabled and bring the effected signal in and out by switching between the two values
- "Normal" (default)—When Tesselator is on, both the dry and effected signals are heard
- Ramp—Determines whether any speed/pitch changes across the sequence reference a static or semitone value
- "Speed" (default)—Sets the target speed of the last step. Use the Speed parameter to set the specific value (0% ~ 200% speed)
- "Pitch"—Sets the target pitch of the last step. Use the Pitch parameter to set the value (-12 ~ +12 semitones; see Ex. 3c below)
- Speed—Sets the target speed for the last step. For example, if set to "200%," the last step's pitch will be twice as high as the first step and if set to "0%," the last step will appear to stop completely, almost like a glitchy tape stop effect. Disabled unless Ramp is set to "Speed"
- Pitch—Sets the target pitch for the last step. For example, if set to "-12", the last step will be an octave lower than the first step. Disabled unless Ramp is set to "Pitch" (see Ex. 3c below)
- HP Filter—Very different from Helix's traditional Low Cut and High Cut filters. Sets the high-pass (low cut) filter target for the last step. For example, if set to a higher value, each successive step will filter out more bass until the last step of the sequence
- LP Filter—Very different from Helix's traditional Low Cut and High Cut filters. Sets the low-pass (high cut) filter target for the last step. For example, if set to a lower value, each successive step will filter out more treble until the last step of the sequence (Ex. 3b below)
- FX Level—Controls the level of the effected signal
- Level—Controls the overall output level of the block
Woohoo! More charts and diagrams!
Tesselator is capable of hundreds of unique sounds, and it's impossible to illustrate them all, but here are a few examples:
Example 1: If Knob 1 (First) and Knob 2 (Last) are set to the same value (say, 1/4 note), the same length of audio repeats until Tesselator is bypassed. In this case, it acts very much like Delay > Ratchet, except the audio is captured BEFORE the stomp press, not after.
Example 2: If Knob 2 (Last) is set to a shorter time than Knob 1 (First), steps in the sequence progressively get shorter (Ex. 2a). If Last is set to a longer time than First, steps in the sequence progressively get longer. The last step is repeated indefinitely until Tesselator is bypassed. Setting Direction to "Reverse" (Ex. 2b) reverses all steps; setting Direction to "Fwd/Rev" (Ex. 2c) alternates between forward and reversed steps.
Example 3: Turning Boomerang to "On" plays the entire step sequence forward, then backward, then forward again, etc. (Ex. 3a) Decreasing LP Filter to a lower value progressively darkens each step in the sequence (Ex. 3b). Increasing HP Filter to a higher value progressively thins out each step in the sequence. Setting Ramp to "Pitch" and Pitch to a value other than "0" will change the pitch of each step until it lands on the target pitch at the last step. For example, if Pitch is set to "+5" and you play an E note, the last note in the sequence will be an A, or 5 steps higher (Ex. 3c). If you want the last A note to repeat indefinitely instead of stepping back down to E, turn Boomerang back to "Off."
TIP: You can change all of these parameters while Tesselator is... tessellating, to create evolving, engaging soundscapes. Run it into Pitch > Dual Pitch and Reverb > Shimmer and prepare to waste hours in drone land.
Delay > Ratchet (Mono, Stereo), Line 6 Original buffer sampler/delay. Used to capture and loop a short snippet of audio (whose length is determined by the Time parameter) while the block is enabled. Great for rhythmic stutter effects. You could almost consider Ratchet a simplified version of Tesselator, where the audio is captured AFTER the footswitch press, not before.
- Assign Ratchet to a stomp footswitch. It's bypassed by default.
- While playing, press the Ratchet switch. Audio captured AFTER the switch press is repeated for as long as the block is enabled. For this reason, it may be best to make the switch momentary, and only step on the Ratchet switch when you change chords, almost like a rhythmic sustain pedal.
- FX Level—Controls the level of the looped audio
- Level—Controls the overall output level of the block
- Time—Predetermines the length of the audio to be recorded and looped. To loop an entire 4/4 bar, choose "1/1"; to stutter your playing, start with "1/16" or "1/32"
- Operation—Determines what happens to your signal when Ratchet is turned on (remember, it's bypassed by default)
- "Mute All"—When Ratchet is on, THE ENTIRE PATH IS MUTED
- "Dry Kill"—When Ratchet is on, only the effected signal is heard. TIP: With Ratchet on a parallel path, assign a second stomp switch to toggle between Mute All and Dry Kill. This lets you leave the block enabled and bring the effected signal in and out by switching between the two values
- "Normal" (default)—When Ratchet is on, both the dry and effected signals are heard

Reverb > Dynamic Plate (Mono, Stereo), Line 6 Original plate reverb typically found in high-end studio rack reverbs.
- Decay—Sets the decay of the reverb (0.1 sec ~ 45.0 sec, or Infinity)
- Predelay—Determines the amount of delay heard before the signal enters the plate. Can sometimes result in more definition between the dry and effected signals
- Damping—Determines the frequency above which the reverb will be absorbed. For example, if your hall is full of people wearing fake ocelot jumpsuits, more high frequencies would be absorbed than if the room were empty
- Mot Rate—Motion Rate, or how fast the echoes' intensity changes, due to changes in plate tension or temperature
- MotRange—Motion Range, or how much the internal delays change. Similar to the modulation control on older tank reverbs
- Mix—Controls the wet/dry mix of the reverb. When set to 0%, no reverb is heard; when set to 100%, no dry signal is heard
- Low Freq—Sets the frequency below which the Low Gain parameter is applied
- Low Gain—Sets the reverb time for frequencies below the Low Freq value. Values below 0.0dB mean the bass frequencies decay faster than the treble frequencies; values above 0.0dB mean the bass frequencies decay slower than the treble frequencies
- Low Cut—Applies a low cut (or high pass) filter to the reverb, letting you remove the effected signal below a certain frequency
- High Cut—Applies a high cut (or low pass) filter to the reverb, letting you remove the effected signal above a certain frequency
- Level—Controls the overall output level of the block
- Trails—When set to "Off," the reverb decay is instantly muted when the block is bypassed. When set to "On," the reverb continues to decay naturally when the block is bypassed or a different snapshot is selected
Reverb > Dynamic Room (Mono, Stereo), Line 6 Original room reverb typically found in high-end studio rack reverbs.
- Decay—Sets the decay of the reverb (0.1 sec ~ 3.0 sec)
- Predelay—Determines the amount of delay heard before the signal enters the room. Can sometimes result in more definition between the dry and effected signals
- Damping—Determines the frequency above which the reverb will be absorbed. For example, if your room is full of people wearing foam high school mascot costumes, more high frequencies would be absorbed than if the room were empty
- Diffusion—Sets the amount of smearing between discrete echoes, sometimes resulting in a softer effected signal
- Mot Rate—Motion Rate, or how quickly the room's shape may be changing, due to people moving, doors opening or closing, etc.
- Mix—Controls the wet/dry mix of the reverb. When set to 0%, no reverb is heard; when set to 100%, no dry signal is heard
- Low Freq—Sets the frequency below which the Low Gain parameter is applied
- Low Gain—Sets the reverb time for frequencies below the Low Freq value. Values below 0.0dB mean the bass frequencies decay faster than the treble frequencies; values above 0.0dB mean the bass frequencies decay slower than the treble frequencies
- Low Cut—Applies a low cut (or high pass) filter to the reverb, letting you remove the effected signal below a certain frequency
- High Cut—Applies a high cut (or low pass) filter to the reverb, letting you remove the effected signal above a certain frequency
- EarlyReflc—Sets the amount of early reflective room sound
- Level—Controls the overall output level of the block
- Trails—When set to "Off," the reverb decay is instantly muted when the block is bypassed. When set to "On," the reverb continues to decay naturally when the block is bypassed or a different snapshot is selected
Reverb > Shimmer (Mono, Stereo), Line 6 Original shimmer reverb. We originally planned to release Shimmer as two distinctly different reverbs—Luster and Sheen—but combining them into a single model and letting you seamlessly switch back and forth via a footswitch or snapshots seemed cooler.
- Type—Determines the type of shimmer effect applied. TIP: Assign Type to a footswitch (or snapshots) to try both within the same preset
- "Luster"—More of a traditional, reverb pedal-type shimmer effect with tighter definition in the lustery bits
- "Sheen" (default)—More of a lush, studio plugin-type shimmer effect with a massive, sheeny bloom
- Pitch 1—Sets the interval of the first pitchshifter. Set to "Oct Up" for more traditional shimmer sounds; set to "Oct Down" for something a bit creepier. Note that Pitch 1 and Pitch 2 have 0.1 semitone resolution between -1and +1
- Pitch 2—Sets the interval of the second pitchshifter
- Intensity—Controls the mix between the pitchshifted and non-pitchshifted reverb
- Feedback—Controls the number of times the pitchshifting recirculates through the reverb
- Pitch Blend—Controls how much of Pitch 1 is heard vs. Pitch 2 (set to "Even" by default)
- Mix—Controls the wet/dry mix of the reverb. When set to 0%, no reverb is heard; when set to 100%, no dry signal is heard
- Decay—Sets the decay of the reverb (0.1 sec ~ 45.0 sec or Infinity)
- Predelay—Determines the amount of delay heard before the signal enters the room. Can sometimes result in more definition between the dry and effected signals
- Room Size—Sets the size of the room (10, 20, or 30 meters)
- Damping—Determines the frequency above which the reverb will be absorbed
- Diffusion—Sets the amount of smearing between discrete echoes, sometimes resulting in a softer effected signal
- Motion—Sets the amount of randomization, which can be helpful to minimize any metallic artifacts common in static reverbs. At higher values, can impart a bit of modulation to the effected signal
- Low Cut—Applies a low cut (or high pass) filter to the reverb, letting you remove the effected signal below a certain frequency
- High Cut—Applies a high cut (or low pass) filter to the reverb, letting you remove the effected signal above a certain frequency
- Level—Controls the overall output level of the block
- Trails—When set to "Off," the reverb decay is instantly muted when the block is bypassed. When set to "On," the reverb continues to decay naturally when the block is bypassed or a different snapshot is selected
*NOTE: All product names used in this document are trademarks of their respective owners and neither Yamaha Guitar Group nor Line 6 are associated or affiliated with them. These trademarks appear solely to identify products whose tones and sounds were studied by Line 6 during sound model development.
New Legacy Effects in 3.15
Helix Floor, Helix Rack, Helix LT, Helix Native, HX Effects, HX Stomp, HX Stomp XL
18 additional effects—most from the FX Junkie model pack for POD Farm 2.5—have been added to the Legacy subcategory in their respective effects categories. Don't sleep on these!
- Distortion > Bronze Master (Legacy), based on* the Maestro® Bass Brassmaster. Originally designed for bass, but equally cool on guitar, the Maestro® Bass Brassmaster is considered by many to be the Holy Grail of bass distortion units, an ultra-rare bird designed in the early 70’s for Maestro® by synth genius Tom Oberheim. NOTE: The Blend parameter is not like overall distortion Mix; instead, it sets how much of the filtered signal passes through the clipping/octave circuitry
- Distortion > Killer Z (Legacy), based on* the BOSS® Metal Zone MT-2. Equipped with a dual gain circuit, the MT-2 provides amazing sustain plus heavy mids and lows similar to a stack of overdriven amps. We’ve simplified the EQ controls a bit to make the Killer Z model, but you’ll still find the sought after flavor of the MT-2 style sound
- Modulation > Tape Eater (Legacy), Line 6 Original. If you’ve ever had a cassette player eat a tape before you’ll know what we’re talking about. Try this with a slow speed setting and a 100% wet mix
- Modulation > Warble-Matic (Legacy), Line 6 Original. This effect is reminiscent of the Sweeper model, but when used subtly it can produce a nice mild phasey sound or with Depth maxed out you can simulate the sound of an alien spacecraft landing in one of those old 50’s sci-fi movies
- Modulation > Random S&H (Legacy), Line 6 Original. This has a similar effect as the old Oberheim® Voltage Controlled Filter. It creates changes in tone by randomly emphasizing certain frequencies. Try pressing the Speed knob to lock it to tempo and playing single chords to that tempo
- Modulation > Sweeper (Legacy), Line 6 Original. Imagine having 2 wah pedals on steroids separated in a stereo field that are pulsating in opposite positions and you’re close to what you’ll hear here. Use the Q and Freq parameters to set the character of the sweep and adjust Depth to go from subtle to full on freak out. Any resemblance to guitar tracks heard in a particular genre of B films is strictly coincidental
- Delay > Phaze Eko (Legacy), Line 6 Original. Starting with the basic tone of our EP-1 tape delay emulation, they’ve added something very much like a Uni-Vibe to the delay repeats. The result is an echo unit that gives you unique new creative possibilities for adjusting the tone of your delays with a beautiful, burbling texture
- Delay > Bubble Echo (Legacy), Line 6 Original. Bubble Echo has a sample-and-hold filter on the repeats. It takes a filter sweep (like the one on Sweep Echo), chops it up into little bits, and rearranges them semi-randomly, so that it sounds like sudden little bits of wah pedal randomly sprinkled about
- Pitch/Synth > Synth Lead (Legacy), Line 6 Original. These are styled after popular analog monophonic synth lead sounds from Moog, ARP and Sequential Circuits
- Pitch/Synth > String Theory (Legacy), Line 6 Original. This emulates classic synth string sounds like those found in the ARP Solina String Ensemble and the Elka® Synthex. The harder you pick, the brighter the sound. We somehow had two separate effects called "Synth String"—one from POD Farm 2.5 and the other from FM4, which was already added to Helix/HX in 1.50. Renamed the POD Farm version "String Theory" to avoid confusion
- Pitch/Synth > Synth FX (Legacy), Line 6 Original. These sounds aren’t really designed to be musical. These are more “special effects” sounds. You’ll hear a lot of these kinds of sounds in movie soundtracks
- Pitch/Synth > Buzz Wave (Legacy), Line 6 Original. These are cool combinations of saw and square waves with fast vibrato. The 8 different Wave parameters offer different vibrato speeds and different pitches
- Pitch/Synth > Rez Synth (Legacy), Line 6 Original. These are all sweeping low pass filter effects with the resonance set high. Resonance is a peak at the frequency of the low pass filter
- Pitch/Synth > Saturn 5 Ring Mod (Legacy), Line 6 Original. Ring modulators take two signals (one supplied by your guitar, the other supplied by the effect) then adds and subtracts similar frequencies. Electro-Harmonix® makes a ring modulator pedal called the Frequency Analyzer that is a popular guitar effect. The only limiting factor is that the pitch of the signal provided by the effect is constant. Meaning you have to play only in the key of that pitch to be musical
- Pitch/Synth > Double Bass (Legacy), Line 6 Original. This effect has two oscillators that track the pitch of your guitar—one square wave tuned one octave down, and one saw tooth wave two octaves down
- Pitch/Synth > Seismik Synth (Legacy), Line 6 Original. This effect has an oscillator that tracks the pitch of your guitar. You can choose between 8 different wave shapes which give you different “flavors”—all of them one or two octaves down from the original pitch
- Pitch/Synth > Analog Synth (Legacy), Line 6 Original. These are great for funky synth guitar (or bass) lines. These sounds were made popular by Moog and ARP
- Pitch/Synth > Synth Harmony (Legacy), Line 6 Original. If you loved those big synth leads from 70’s era prog bands then you’ll love this effect. There are two synth waves at work here. Your first two parameters allow you to choose a pitch interval of your original note played. The Wave parameter works differently from what you’d expect with the other synth models; here it controls the gain of the saw wave, while the square wave gain remains constant
New Features in 3.15
Apple Silicon Support
Helix Native
The Helix Native VST/AU/AAX plug-in now natively supports M1 and newer Apple computers without Rosetta. NOTE: HX Edit software has worked with M1 Macs from day one.
Other Changes and Improvements in 3.15
- The max delay time for several Delay > Legacy models has been increased from 2 seconds to 2.5 seconds
- Numerous additional minor improvements to Delay > Legacy models
- Delay > Multitap 6 has been optimized to use less than half the DSP as in pre-3.15 builds
Bug Fixes in 3.15
- Amp/Preamp > Das Benzin Lead channel output was set to -36dB instead of -24dB—FIXED
- Amp/Preamp > Voltage Queen's Master volume only affected one side of the push/pull power amp—FIXED
- Distortion > Ampeg Scrambler's oversampling wasn't fully implemented—FIXED
- IR names with more than 54 characters couldn't be copied or exported
Known Issues in 3.15
- Copy/pasted blocks retain their favorited status after overwriting an existing favorite
- Delay > Ducked Delay's ducking is inactive is DynAttack is maxed out at 2.000s
- After changing a different delay's Time parameter from ms to note values, selecting Delay > Tesselator causes its Knob 1 parameter label changes from "First" to "Time 1"
- Tesselator and Ratchet's Mute All function mutes the entire path whether the block is active or bypassed.
Get Download
Helix Native
Helix Native
Helix Native 3.15 (released February 8, 2022) includes a new Line 6 original amp, 10 new Helix effects, 18 additional Legacy effects, new features, additional improvements, and bug fixes, and is recommended for all users.
How do I update to 3.15?
Before updating Helix Native, it is highly recommended that you export a bundle and/or export all of your setlists. This is done by going to Settings (the gear icon in the bottom left of the window), the Presets/IRs tab, and clicking Export Bundle. Some hardware compatibility modes (HX Stomp, HX Stomp XL, HX Effects) do not have this feature as they only have one setlist. In these modes, the setlist or presets will need to be exported instead of a bundle.
New Amp in 3.15
Helix Floor, Helix Rack, Helix LT, Helix Native, HX Stomp, HX Stomp XL
Amp/Preamp > Line 6 Ventoux, Line 6 Original.
"The amp model name is Ventoux, which is a mountain in the south of France that is a legendary cycling climb. I did it in 2018 and it was awesome and very hard.
This model comes from a physical amp idea I had a while back. I was going to build it as a tube amp first. There are only so many hours in a day, though. The idea was to create a “coveted boutique amp” that had a different origin story. Most coveted boutique amps come from modified black panel Fenders or modified Marshall circuits. I wanted to do the same thing, but base it on the early 70s Orange circuits and the mid-wattage Fender Tweed circuits.
Ventoux has a unique topology. In an indirect way, every knob is kind of a gain/drive control. The tone controls adjust the character and/or amount of the overdrive in those frequencies. This might be seen as complicated by some, but I find it exciting and full of possibilities."
—Ben Adrian, Sound Design Manager
- Drive—Controls the amount of amp drive
- HP Filter—Higher values result in tighter distortions and thinner cleans; lower values result in looser distortions and warmer cleans
- Mid—Allows for more character than most. At lower values it's like the scooped sounds of traditional 60s Fender amps; at higher values it's flatter, like the 50s tweed amps that have very little tone-shaping in the circuits. Plus, a full-up mid sound will get a nice crunch when Drive is up
- Presence/Depth—You may have noticed this amp was lacking regular bass and treble controls. That is accounted for with Depth and Presence controls; bass and treble for the power amp. These actually occur in the circuit just before phase inverter, but they really need the whole power amp to function. They also affect the character of the power amp distortion
- Ch Vol—Sets the overall level of the Amp block
- Master—Ventoux's Master volume exists in an "impossible" place for a physical amp. Generally, you'll want to leave this at 10.0, like a vintage amp with no master volume. However, a variety of textures can be had by reducing the level
New Helix Effects in 3.15
Helix Floor, Helix Rack, Helix LT, Helix Native, HX Effects, HX Stomp, HX Stomp XL
Dynamics > Ampeg Opto Comp (Mono, Stereo), based on* the Ampeg Opto Comp compressor pedal.
- Compress—This is actually a ratio control, which controls the amount of compression. At 0.0, the ratio is 1:1; at 5.0, the ratio is at 3:1, and at 10.0, the ratio is at 10:1
- Release—Controls how long it takes for the compressor to stop reducing gain. At 0.0, the release is 75 ms; at 10.0, the release is around 600 ms
- Mix—Controls the wet/dry mix of the compressor. When set to 0%, no compressed signal is heard; when set to 100%, no dry signal is heard
- Level—Sets the overall level of the block
Modulation > Ampeg Liquifier (Mono, Stereo), based on* the Ampeg Liquifier chorus pedal.
- Rate—Adjusts the speed of the chorus’ low-frequency oscillator (LFO) from slow to fast
- Depth—Adjusts the amplitude of the modulation, from mild to deep
- Mix—Controls the wet/dry mix of the chorus. When set to 0%, no chorus is heard; when set to 100%, no dry signal is heard
- Type—Liquifier is actually two choruses in one, hence the "Dual" default. If you'd prefer it to behave more like a traditional chorus pedal, choose "Single"
- Headroom—Some mod pedals' internal signal paths exhibit a bit of grit, especially when placed after a high-gain amp block. Negative values increase the perceived amount of grit; positive values clean things up a bit. At 0dB, the model behaves like the original pedal
- Level—Sets the overall level of the block
Delay > Heliosphere (Mono, Stereo), Line 6 Original delay with reverb injected into the feedback loop.
- Time—Sets the delay time. Press the knob to toggle between ms/Sec and note values
- Feedback—Controls the overall number of repeats. To hear only one repeat, set to 0%
- Rate—Controls the rate or speed of modulation
- Depth—Controls the depth or amount of modulation
- Mix—Controls the wet/dry mix of the delay. When set to 0%, no delay is heard; when set to 100%, no dry signal is heard
- Level—Sets the overall level of the block
- Scale—For stereo delays, the Time parameter sets the left side. The right side's time is always some percentage of the left's time, and is determined by the Scale parameter. For example, if Time is set to 500ms, and Scale is set to 70%, the left delay is 500ms and the right delay is 350ms (or 70% of 500ms). When scale is set to 100%, left and right delays are the same
- Rev Mix—Controls the wet/dry mix of the reverb inside the delay's feedback loop. When set to 0%, no reverb is heard
- Rev Decay—Sets the decay of the reverb
- Headroom—Some delay pedals' internal signal paths exhibit a bit of grit, especially when placed after a high-gain amp block. Negative values increase the perceived amount of grit; positive values clean things up a bit. At 0dB, the model behaves like the original pedal
- Trails—When set to "Off," delay repeats are instantly muted when the block is bypassed. When set to "On," delay repeats continue to decay naturally when the block is bypassed or a different snapshot is selected
Delay > ADT (Mono, Stereo), Line 6 Original double-tracking tape emulation.
- Delay 1, Delay 2—Sets the delay time for each deck. Delay 1 can go up to 20ms and Delay 2 can go up to 200ms
- WowFlutr1, WowFlutr2—Determines how much warbly tape sound is heard for each deck
- Saturate1, Saturate2—Adds analog tape saturation and at high enough settings, distortion. At lower settings, it's great for simply warming up a tone
- Deck 1 Vol, Deck 2 Vol—Sets the level of each deck independently. Deck 2 is a bit lower than Deck 1 by default
- Deck 2 Pol—Flips the polarity of deck 2
- Mod Rate—Controls the rate or speed of modulation applied to Deck 2
- Mod Depth—Controls the depth or amount of modulation applied to Deck 2
- Level—Sets the overall level of the block
- TapeSpeed—Changes both the rate of the modulation applied by the WowFluttr control and the filtering response of the analog tape emulation
- Texture—Adjusts the amount of the NAB tape EQ in the simulated tape path. When Saturation is set to 0.0, the texture is invisible. When Saturation is turned up, the texture will affect the tightness (or looseness) of the distortion
- Low Cut—Applies a low cut (high pass) filter to the decks, letting you remove the effected signal below a certain frequency
- High Cut—Applies a high cut (low pass) filter to the decks, letting you remove the effected signal above a certain frequency
- Deck 1 Pan, Deck 2 Pan—Pans each deck left and right
- EnvThresh—Sets the level above which engages the envelope. When on, picking harder can impart very slight pitch fluctuations by tweaking Deck 2's delay. Subtle, but fun
- Trails—When set to "Off," delay repeats are instantly muted when the block is bypassed. When set to "On," delay repeats continue to decay naturally when the block is bypassed or a different snapshot is selected
Delay > Crisscross (Mono, Stereo), Line 6 Original dual delay with cross-feedback between the two delay lines.
- Time A, Time B—Sets the delay time for each of the two delay lines. Press the knob to toggle between ms/Sec and note values
- Feedbk A, Feedback B—Controls the number of repeats for each delay line. To hear only one repeat, set to 0%
- Pan A, Pan B—To achieve the widest stereo field, set Pan A to L100 and Pan B to R100
- Mix—Controls the wet/dry mix of the delay. When set to 0%, no delay is heard; when set to 100%, no dry signal is heard
- Level—Sets the overall level of the block
- Crossfeed—Controls the amount of the A delay line fed back into the B delay line and vice versa
- Headroom—Some delay pedals' internal signal paths exhibit a bit of grit, especially when placed after a high-gain amp block. Negative values increase the perceived amount of grit; positive values clean things up a bit. At 0dB, the model behaves like the original pedal
- Mod Rate—Controls the rate or speed of modulation
- Mod Depth—Controls the depth or amount of modulation
- Shape—Sets the modulation's wave shape (Sine or Triangle)
- Phase—Determines the modulation's phase relationship between the two delay lines. At 0°, the delay lines modulate together; at 180°, modulation is inverted from one another
- Bit Depth—Lowers the bit depth of the delay repeats for a grungier sound. For more transparent results, set to "24 bits"
- Sample Rate—Lowers the sample rate of the delay repeats for a grungier sound. For more transparent results, set to "48kHz"
- Low Cut—Applies a low cut (high pass) filter to the repeats, letting you remove the effected signal below a certain frequency
- High Cut—Applies a high cut (low pass) filter to the repeats, letting you remove the effected signal above a certain frequency
- Trails—When set to "Off," delay repeats are instantly muted when the block is bypassed. When set to "On," delay repeats continue to decay naturally when the block is bypassed or a different snapshot is selected
Delay > Tesselator (Mono, Stereo), Line 6 Original. Tesselator is part morphing delay, part loop sampler, part drone machine... it's stellar for creating rhythmic pads, textures, or pitch/filter ramp effects to play over and has been placed in the Delay category so you can run multiple instances at once. Once audio is captured and repeating, you can effectively transition/morph between two states—First and Last, each with its own time, speed/pitch, HP filter, and LP filter—by applying increasing amounts to each repeat until the target settings are reached.
- Assign Tesselator to a stomp footswitch. It's bypassed by default.
- Play a chord and while it's ringing, press the Tesselator switch. Audio captured BEFORE the switch press is repeated and manipulated by the following parameters:
- First—Determines the length of the first step in the sequence, that is, the length of repeated audio when first engaged. Press the knob to toggle between ms and note values
- Last—Determines the length of the last step in the sequence. If shorter than the First step's time, the sequence will get shorter; if longer than the First step's time, the sequence will get longer. If First and Last are the same time, the sequence length remains constant (Ex. 1 below). Press the knob to toggle between ms and note values
- Steps—Determines how many steps there are in the sequence (1 ~ 50). For example, if your first step is 100ms and your last step is 500ms, each successive step in the sequence will lengthen from 100ms to 500ms. The more steps you have, the longer it takes to reach the last step and therefore, the longer it takes to alter the sequence's characteristics
- Direction—Determines the direction of the steps:
- Forward: Each step plays back normally (Ex. 2a below)
- Reverse: Each step plays back in reverse (Ex. 2b below)
- Fwd/Rev: Steps alternate between forward and reverse (Ex. 2c below)
- Boomerang—When off, the last step in the sequence repeats indefinitely. When on, all steps play forward, then backward, then forward again, etc. (Ex. 3a below)
- Operation—Determines what happens to your signal when Tesselator is turned on (remember, it's bypassed by default)
- "Mute All"—When Tesselator is on, THE ENTIRE PATH IS MUTED
- "Dry Kill"—When Tesselator is on, only the effected signal is heard. TIP: With Tesselator on a parallel path, assign a second stomp switch to toggle between Mute All and Dry Kill. This lets you leave the block enabled and bring the effected signal in and out by switching between the two values
- "Normal" (default)—When Tesselator is on, both the dry and effected signals are heard
- Ramp—Determines whether any speed/pitch changes across the sequence reference a static or semitone value
- "Speed" (default)—Sets the target speed of the last step. Use the Speed parameter to set the specific value (0% ~ 200% speed)
- "Pitch"—Sets the target pitch of the last step. Use the Pitch parameter to set the value (-12 ~ +12 semitones; see Ex. 3c below)
- Speed—Sets the target speed for the last step. For example, if set to "200%," the last step's pitch will be twice as high as the first step and if set to "0%," the last step will appear to stop completely, almost like a glitchy tape stop effect. Disabled unless Ramp is set to "Speed"
- Pitch—Sets the target pitch for the last step. For example, if set to "-12", the last step will be an octave lower than the first step. Disabled unless Ramp is set to "Pitch" (see Ex. 3c below)
- HP Filter—Very different from Helix's traditional Low Cut and High Cut filters. Sets the high-pass (low cut) filter target for the last step. For example, if set to a higher value, each successive step will filter out more bass until the last step of the sequence
- LP Filter—Very different from Helix's traditional Low Cut and High Cut filters. Sets the low-pass (high cut) filter target for the last step. For example, if set to a lower value, each successive step will filter out more treble until the last step of the sequence (Ex. 3b below)
- FX Level—Controls the level of the effected signal
- Level—Controls the overall output level of the block
Woohoo! More charts and diagrams!
Tesselator is capable of hundreds of unique sounds, and it's impossible to illustrate them all, but here are a few examples:
Example 1: If Knob 1 (First) and Knob 2 (Last) are set to the same value (say, 1/4 note), the same length of audio repeats until Tesselator is bypassed. In this case, it acts very much like Delay > Ratchet, except the audio is captured BEFORE the stomp press, not after.
Example 2: If Knob 2 (Last) is set to a shorter time than Knob 1 (First), steps in the sequence progressively get shorter (Ex. 2a). If Last is set to a longer time than First, steps in the sequence progressively get longer. The last step is repeated indefinitely until Tesselator is bypassed. Setting Direction to "Reverse" (Ex. 2b) reverses all steps; setting Direction to "Fwd/Rev" (Ex. 2c) alternates between forward and reversed steps.
Example 3: Turning Boomerang to "On" plays the entire step sequence forward, then backward, then forward again, etc. (Ex. 3a) Decreasing LP Filter to a lower value progressively darkens each step in the sequence (Ex. 3b). Increasing HP Filter to a higher value progressively thins out each step in the sequence. Setting Ramp to "Pitch" and Pitch to a value other than "0" will change the pitch of each step until it lands on the target pitch at the last step. For example, if Pitch is set to "+5" and you play an E note, the last note in the sequence will be an A, or 5 steps higher (Ex. 3c). If you want the last A note to repeat indefinitely instead of stepping back down to E, turn Boomerang back to "Off."
TIP: You can change all of these parameters while Tesselator is... tessellating, to create evolving, engaging soundscapes. Run it into Pitch > Dual Pitch and Reverb > Shimmer and prepare to waste hours in drone land.
Delay > Ratchet (Mono, Stereo), Line 6 Original buffer sampler/delay. Used to capture and loop a short snippet of audio (whose length is determined by the Time parameter) while the block is enabled. Great for rhythmic stutter effects. You could almost consider Ratchet a simplified version of Tesselator, where the audio is captured AFTER the footswitch press, not before.
- Assign Ratchet to a stomp footswitch. It's bypassed by default.
- While playing, press the Ratchet switch. Audio captured AFTER the switch press is repeated for as long as the block is enabled. For this reason, it may be best to make the switch momentary, and only step on the Ratchet switch when you change chords, almost like a rhythmic sustain pedal.
- FX Level—Controls the level of the looped audio
- Level—Controls the overall output level of the block
- Time—Predetermines the length of the audio to be recorded and looped. To loop an entire 4/4 bar, choose "1/1"; to stutter your playing, start with "1/16" or "1/32"
- Operation—Determines what happens to your signal when Ratchet is turned on (remember, it's bypassed by default)
- "Mute All"—When Ratchet is on, THE ENTIRE PATH IS MUTED
- "Dry Kill"—When Ratchet is on, only the effected signal is heard. TIP: With Ratchet on a parallel path, assign a second stomp switch to toggle between Mute All and Dry Kill. This lets you leave the block enabled and bring the effected signal in and out by switching between the two values
- "Normal" (default)—When Ratchet is on, both the dry and effected signals are heard
Reverb > Dynamic Plate (Mono, Stereo), Line 6 Original plate reverb typically found in high-end studio rack reverbs.
- Decay—Sets the decay of the reverb (0.1 sec ~ 45.0 sec, or Infinity)
- Predelay—Determines the amount of delay heard before the signal enters the plate. Can sometimes result in more definition between the dry and effected signals
- Damping—Determines the frequency above which the reverb will be absorbed. For example, if your hall is full of people wearing fake ocelot jumpsuits, more high frequencies would be absorbed than if the room were empty
- Mot Rate—Motion Rate, or how fast the echoes' intensity changes, due to changes in plate tension or temperature
- MotRange—Motion Range, or how much the internal delays change. Similar to the modulation control on older tank reverbs
- Mix—Controls the wet/dry mix of the reverb. When set to 0%, no reverb is heard; when set to 100%, no dry signal is heard
- Low Freq—Sets the frequency below which the Low Gain parameter is applied
- Low Gain—Sets the reverb time for frequencies below the Low Freq value. Values below 0.0dB mean the bass frequencies decay faster than the treble frequencies; values above 0.0dB mean the bass frequencies decay slower than the treble frequencies
- Low Cut—Applies a low cut (or high pass) filter to the reverb, letting you remove the effected signal below a certain frequency
- High Cut—Applies a high cut (or low pass) filter to the reverb, letting you remove the effected signal above a certain frequency
- Level—Controls the overall output level of the block
- Trails—When set to "Off," the reverb decay is instantly muted when the block is bypassed. When set to "On," the reverb continues to decay naturally when the block is bypassed or a different snapshot is selected
Reverb > Dynamic Room (Mono, Stereo), Line 6 Original room reverb typically found in high-end studio rack reverbs.
- Decay—Sets the decay of the reverb (0.1 sec ~ 3.0 sec)
- Predelay—Determines the amount of delay heard before the signal enters the room. Can sometimes result in more definition between the dry and effected signals
- Damping—Determines the frequency above which the reverb will be absorbed. For example, if your room is full of people wearing foam high school mascot costumes, more high frequencies would be absorbed than if the room were empty
- Diffusion—Sets the amount of smearing between discrete echoes, sometimes resulting in a softer effected signal
- Mot Rate—Motion Rate, or how quickly the room's shape may be changing, due to people moving, doors opening or closing, etc.
- Mix—Controls the wet/dry mix of the reverb. When set to 0%, no reverb is heard; when set to 100%, no dry signal is heard
- Low Freq—Sets the frequency below which the Low Gain parameter is applied
- Low Gain—Sets the reverb time for frequencies below the Low Freq value. Values below 0.0dB mean the bass frequencies decay faster than the treble frequencies; values above 0.0dB mean the bass frequencies decay slower than the treble frequencies
- Low Cut—Applies a low cut (or high pass) filter to the reverb, letting you remove the effected signal below a certain frequency
- High Cut—Applies a high cut (or low pass) filter to the reverb, letting you remove the effected signal above a certain frequency
- EarlyReflc—Sets the amount of early reflective room sound
- Level—Controls the overall output level of the block
- Trails—When set to "Off," the reverb decay is instantly muted when the block is bypassed. When set to "On," the reverb continues to decay naturally when the block is bypassed or a different snapshot is selected
Reverb > Shimmer (Mono, Stereo), Line 6 Original shimmer reverb. We originally planned to release Shimmer as two distinctly different reverbs—Luster and Sheen—but combining them into a single model and letting you seamlessly switch back and forth via a footswitch or snapshots seemed cooler.
- Type—Determines the type of shimmer effect applied. TIP: Assign Type to a footswitch (or snapshots) to try both within the same preset
- "Luster"—More of a traditional, reverb pedal-type shimmer effect with tighter definition in the lustery bits
- "Sheen" (default)—More of a lush, studio plugin-type shimmer effect with a massive, sheeny bloom
- Pitch 1—Sets the interval of the first pitchshifter. Set to "Oct Up" for more traditional shimmer sounds; set to "Oct Down" for something a bit creepier. Note that Pitch 1 and Pitch 2 have 0.1 semitone resolution between -1and +1
- Pitch 2—Sets the interval of the second pitchshifter
- Intensity—Controls the mix between the pitchshifted and non-pitchshifted reverb
- Feedback—Controls the number of times the pitchshifting recirculates through the reverb
- Pitch Blend—Controls how much of Pitch 1 is heard vs. Pitch 2 (set to "Even" by default)
- Mix—Controls the wet/dry mix of the reverb. When set to 0%, no reverb is heard; when set to 100%, no dry signal is heard
- Decay—Sets the decay of the reverb (0.1 sec ~ 45.0 sec or Infinity)
- Predelay—Determines the amount of delay heard before the signal enters the room. Can sometimes result in more definition between the dry and effected signals
- Room Size—Sets the size of the room (10, 20, or 30 meters)
- Damping—Determines the frequency above which the reverb will be absorbed
- Diffusion—Sets the amount of smearing between discrete echoes, sometimes resulting in a softer effected signal
- Motion—Sets the amount of randomization, which can be helpful to minimize any metallic artifacts common in static reverbs. At higher values, can impart a bit of modulation to the effected signal
- Low Cut—Applies a low cut (or high pass) filter to the reverb, letting you remove the effected signal below a certain frequency
- High Cut—Applies a high cut (or low pass) filter to the reverb, letting you remove the effected signal above a certain frequency
- Level—Controls the overall output level of the block
- Trails—When set to "Off," the reverb decay is instantly muted when the block is bypassed. When set to "On," the reverb continues to decay naturally when the block is bypassed or a different snapshot is selected
*NOTE: All product names used in this document are trademarks of their respective owners and neither Yamaha Guitar Group nor Line 6 are associated or affiliated with them. These trademarks appear solely to identify products whose tones and sounds were studied by Line 6 during sound model development.
New Legacy Effects in 3.15
Helix Floor, Helix Rack, Helix LT, Helix Native, HX Effects, HX Stomp, HX Stomp XL
18 additional effects—most from the FX Junkie model pack for POD Farm 2.5—have been added to the Legacy subcategory in their respective effects categories. Don't sleep on these!
- Distortion > Bronze Master (Legacy), based on* the Maestro® Bass Brassmaster. Originally designed for bass, but equally cool on guitar, the Maestro® Bass Brassmaster is considered by many to be the Holy Grail of bass distortion units, an ultra-rare bird designed in the early 70’s for Maestro® by synth genius Tom Oberheim. NOTE: The Blend parameter is not like overall distortion Mix; instead, it sets how much of the filtered signal passes through the clipping/octave circuitry
- Distortion > Killer Z (Legacy), based on* the BOSS® Metal Zone MT-2. Equipped with a dual gain circuit, the MT-2 provides amazing sustain plus heavy mids and lows similar to a stack of overdriven amps. We’ve simplified the EQ controls a bit to make the Killer Z model, but you’ll still find the sought after flavor of the MT-2 style sound
- Modulation > Tape Eater (Legacy), Line 6 Original. If you’ve ever had a cassette player eat a tape before you’ll know what we’re talking about. Try this with a slow speed setting and a 100% wet mix
- Modulation > Warble-Matic (Legacy), Line 6 Original. This effect is reminiscent of the Sweeper model, but when used subtly it can produce a nice mild phasey sound or with Depth maxed out you can simulate the sound of an alien spacecraft landing in one of those old 50’s sci-fi movies
- Modulation > Random S&H (Legacy), Line 6 Original. This has a similar effect as the old Oberheim® Voltage Controlled Filter. It creates changes in tone by randomly emphasizing certain frequencies. Try pressing the Speed knob to lock it to tempo and playing single chords to that tempo
- Modulation > Sweeper (Legacy), Line 6 Original. Imagine having 2 wah pedals on steroids separated in a stereo field that are pulsating in opposite positions and you’re close to what you’ll hear here. Use the Q and Freq parameters to set the character of the sweep and adjust Depth to go from subtle to full on freak out. Any resemblance to guitar tracks heard in a particular genre of B films is strictly coincidental
- Delay > Phaze Eko (Legacy), Line 6 Original. Starting with the basic tone of our EP-1 tape delay emulation, they’ve added something very much like a Uni-Vibe to the delay repeats. The result is an echo unit that gives you unique new creative possibilities for adjusting the tone of your delays with a beautiful, burbling texture
- Delay > Bubble Echo (Legacy), Line 6 Original. Bubble Echo has a sample-and-hold filter on the repeats. It takes a filter sweep (like the one on Sweep Echo), chops it up into little bits, and rearranges them semi-randomly, so that it sounds like sudden little bits of wah pedal randomly sprinkled about
- Pitch/Synth > Synth Lead (Legacy), Line 6 Original. These are styled after popular analog monophonic synth lead sounds from Moog, ARP and Sequential Circuits
- Pitch/Synth > String Theory (Legacy), Line 6 Original. This emulates classic synth string sounds like those found in the ARP Solina String Ensemble and the Elka® Synthex. The harder you pick, the brighter the sound. We somehow had two separate effects called "Synth String"—one from POD Farm 2.5 and the other from FM4, which was already added to Helix/HX in 1.50. Renamed the POD Farm version "String Theory" to avoid confusion
- Pitch/Synth > Synth FX (Legacy), Line 6 Original. These sounds aren’t really designed to be musical. These are more “special effects” sounds. You’ll hear a lot of these kinds of sounds in movie soundtracks
- Pitch/Synth > Buzz Wave (Legacy), Line 6 Original. These are cool combinations of saw and square waves with fast vibrato. The 8 different Wave parameters offer different vibrato speeds and different pitches
- Pitch/Synth > Rez Synth (Legacy), Line 6 Original. These are all sweeping low pass filter effects with the resonance set high. Resonance is a peak at the frequency of the low pass filter
- Pitch/Synth > Saturn 5 Ring Mod (Legacy), Line 6 Original. Ring modulators take two signals (one supplied by your guitar, the other supplied by the effect) then adds and subtracts similar frequencies. Electro-Harmonix® makes a ring modulator pedal called the Frequency Analyzer that is a popular guitar effect. The only limiting factor is that the pitch of the signal provided by the effect is constant. Meaning you have to play only in the key of that pitch to be musical
- Pitch/Synth > Double Bass (Legacy), Line 6 Original. This effect has two oscillators that track the pitch of your guitar—one square wave tuned one octave down, and one saw tooth wave two octaves down
- Pitch/Synth > Seismik Synth (Legacy), Line 6 Original. This effect has an oscillator that tracks the pitch of your guitar. You can choose between 8 different wave shapes which give you different “flavors”—all of them one or two octaves down from the original pitch
- Pitch/Synth > Analog Synth (Legacy), Line 6 Original. These are great for funky synth guitar (or bass) lines. These sounds were made popular by Moog and ARP
- Pitch/Synth > Synth Harmony (Legacy), Line 6 Original. If you loved those big synth leads from 70’s era prog bands then you’ll love this effect. There are two synth waves at work here. Your first two parameters allow you to choose a pitch interval of your original note played. The Wave parameter works differently from what you’d expect with the other synth models; here it controls the gain of the saw wave, while the square wave gain remains constant
New Features in 3.15
Apple Silicon Support
Helix Native
The Helix Native VST/AU/AAX plug-in now natively supports M1 and newer Apple computers without Rosetta. NOTE: HX Edit software has worked with M1 Macs from day one.
Other Changes and Improvements in 3.15
- The max delay time for several Delay > Legacy models has been increased from 2 seconds to 2.5 seconds
- Numerous additional minor improvements to Delay > Legacy models
- Delay > Multitap 6 has been optimized to use less than half the DSP as in pre-3.15 builds
Bug Fixes in 3.15
- Amp/Preamp > Das Benzin Lead channel output was set to -36dB instead of -24dB—FIXED
- Amp/Preamp > Voltage Queen's Master volume only affected one side of the push/pull power amp—FIXED
- Distortion > Ampeg Scrambler's oversampling wasn't fully implemented—FIXED
- IR names with more than 54 characters couldn't be copied or exported
Known Issues in 3.15
- Copy/pasted blocks retain their favorited status after overwriting an existing favorite
- Delay > Ducked Delay's ducking is inactive is DynAttack is maxed out at 2.000s
- After changing a different delay's Time parameter from ms to note values, selecting Delay > Tesselator causes its Knob 1 parameter label changes from "First" to "Time 1"
- Tesselator and Ratchet's Mute All function mutes the entire path whether the block is active or bypassed.
Helix Native
Helix Native
Helix Native 3.11 contains several stability and performance improvements as well as bug fixes. Updating is highly recommended.
Bug Fixes:
- Improved stability and performance on macOS Big Sur.
- Other minor improvements and bug fixes.
Get Download
Helix Native
Helix Native
Helix Native 3.11 contains several stability and performance improvements as well as bug fixes. Updating is highly recommended.
Bug Fixes:
- Improved stability and performance on macOS Big Sur.
- Other minor improvements and bug fixes.
Helix Native
Helix Native
Helix/HX 3.10 includes a new amp, new effects, new features, improvements, and bug fixes and is recommended for all users.
How do I update to 3.10?
Did you happen to update HX Edit to 3.01 (released on Feb 2, 2021)? If so, just connect Helix/HX to your computer via USB and launch HX Edit. The software will walk you through the entire procedure, including updating HX Edit 3.01 to 3.10, and backing everything up to your computer.
What if I didn't update HX Edit to 3.01? What if I don't remember? What's going on? Where am I?
That's fine, just make ABSOLUTELY SURE you install HX Edit 3.10 BEFORE you install 3.10 firmware and make ABSOLUTELY SURE you back everything up! Here's the link:
- macOS: https://line6.com/software/readeula.html?rid=10457
- Windows: https://line6.com/software/readeula.html?rid=10459
Anything else I should know?
Yes. If you run into any odd behavior, before running to the internet to complain, perform a factory reset and restore your backup. (Backing up is part of the update process). This should solve any issues. Here's how to perform a factory reset. IMPORTANT: MAKE SURE YOU HAVE A BACKUP FIRST, AS THIS WILL ERASE ALL YOUR WORK!
- Helix Floor/LT: While holding footswitches 9 & 10 (bottom row, 2 middle switches), turn on Helix Floor/LT
- Helix Rack: While holding knobs 5 & 6 (2 furthest right knobs below the screen), turn on Helix Rack
- HX Effects: While holding footswitches 6 & TAP (2 furthest right switches on the bottom row), turn on HX Effects
- HX Stomp: While holding footswitches 2 & 3, turn on HX Stomp
- HX Stomp XL: While holding footswitches C & D, turn on HX Stomp
New Amp in 3.10
Helix Floor, Helix Rack, Helix LT, Helix Native, HX Stomp, HX Stomp XL

- Mandarin Rocker, based on* the Orange® Rockerverb 100 MKIII. NOTE: We decided to slightly alter the model so that at lower settings, the Drive knob's taper exhibits a smoother transition into distortion.
New Effects in 3.10
Helix Floor, Helix Rack, Helix LT, Helix Native, HX Effects, HX Stomp, HX Stomp XL

- Distortion > Ratatouille Dist (Mono, Stereo), based on* the 1984 Pro Co RAT. Turns out our Vermin Dist model was broken. Sorry! We were going to replace it completely but a bunch of people had presets with the old version. On top of that, we found out our RAT's LM308 chip had crapped out since we modeled it last so we decided to get it into perfect working order and start from scratch
- Gain—Sets the amount of distortion
- Filter—Sets the amount of high cut (low pass) filter applied to the distortion; basically letting more treble through (lower values) or filtering it out (higher values)
- Level—Sets the overall level of the block
- Modulation > Retro Reel (Mono), Line 6 Original effect that simulates playing a signal back from an analog tape machine. This signal can be distorted, filtered to sound older or more lo-fi, and modulated with wow and flutter. TIP: Helix Native users should definitely try Retro Reel on all sorts of tracks—vocals, drums, keyboards, strings, busses, you name it.
- Wow Fluttr—Determines how much warbly tape sound is heard
- Saturation—Adds analog tape saturation and at high enough settings, distortion. At lower settings, it's great for simply warming up a tone
- Low Cut—Determines the frequency of the Low Cut (High Pass) filter. At higher settings, can provide a lo-fi effect
- High Cut—Determines the frequency of the High Cut (Low Pass) filter. At lower settings, can provide the natural high-end roll-off of old tape
- Tape Speed—Changes both the rate of the modulation applied by the Wow Fluttr control and the filtering response of the analog tape emulation
- Level—Sets the overall level of the block
- Texture—Adjusts the amount of the NAB tape EQ in the simulated tape path. When Saturation is set to 0.0, the texture is invisible. When Saturation is turned up, the texture will affect the tightness (or looseness) of the distortion
- Delay > Euclidean Delay (Mono, Stereo), Line 6 Original delay based on Euclidean algorithms. Creates multitap patterns by setting the length of the pattern (Steps) and the number of taps (Fill) in the pattern. The Euclidean algorithm spaces taps as evenly as possible throughout the pattern, resulting in rhythms from traditional to highly complex. Settle in because this one'll require diagrams and charts and whatnot. TIP: Add two Euclidean Delays in parallel (with different settings) for interesting polyrhythm patterns. When using a stereo playback system, try panning Paths A and B in the Mixer to L100 and R100.
- Step Time—Sets the time between steps. The total delay time is Time x Steps, so [Time: 1/16 x Steps: 8] is a 1/2-note. Press the knob to toggle between ms/sec and note values
- Feedback—Controls the overall number of repeats heard for the entire sequence. If you want to hear all fills in the sequence only once, set to 0%
- Steps—Determines the number of steps in the sequence (1-16; see diagram below)
- Fill—The number of active taps, whose spacing is set by Euclidean algorithms (1-16, see diagram below). If Fill is higher than Steps, the extra taps are ignored
- Rotate—Rotates all fills forward by the same amount (0-15; see diagram below). Used If you like the sound of a repeat pattern but want the fills and gaps shifted forward
- Mix—Controls the wet/dry mix of the delay. When set to 0%, no delay is heard; when set to 100%, no dry signal is heard
- Low Cut—Applies a low cut (high pass) filter to the fills, letting you remove the effected signal below a certain frequency
- High Cut—Applies a high cut (low pass) filter to the fills, letting you remove the effected signal above a certain frequency
- Level—Controls the overall output level of the block
- Trails—When on, delay repeats continue to ring out after the block is bypassed
I was told there'd be no math!
Sorry. If you'd like to read more about Euclidean rhythms, check this out: https://splice.com/blog/euclidean-rhythms/ Or if you'd like to know more about Euclidean math, see ya' in a semester or two! https://en.wikipedia.org/wiki/Euclidean_algorithm
- Reverb > Dynamic Hall (Mono, Stereo), Line 6 Original hall reverb
- Decay—Sets the decay of the reverb (0.1 sec ~ 45.0 sec, or Infinity)
- Predelay—Determines the amount of delay heard before the signal enters the hall. Can sometimes result in more definition between the dry and effected signals
- Room Size—Sets the size of the hall (10, 20, or 30 meters). NOTE: This parameter actually changes the algorithm so you'll hear a small bump when changing it. Therefore, we don't recommend assigning Room Size to snapshots or other controllers
- Diffusion—Sets the amount of smearing between discrete echoes, sometimes resulting in a softer effected signal
- Damping—Determines the frequency above which the reverb will be absorbed. For example, if your hall is full of people wearing fake ocelot jumpsuits, more high frequencies would be absorbed than if the room were empty
- Mix—Controls the wet/dry mix of the reverb. When set to 0%, no reverb is heard; when set to 100%, no dry signal is heard
- Motion—Sets the amount of randomization, which can be helpful to minimize any metallic artifacts common in extremely static reverbs. At higher values, can impart a bit of modulation to the effected signal
- Low Freq—Sets the frequency below which the Low Gain parameter is applied
- Low Gain—Sets the reverb time for frequencies below the Low Freq value. Values below 0.0dB mean the bass frequencies decay faster than the treble frequencies; values above 0.0dB mean the bass frequencies decay slower than the treble frequencies
- Low Cut—Applies a low cut (or high pass) filter to the reverb, letting you remove the effected signal below a certain frequency
- High Cut—Applies a high cut (or low pass) filter to the reverb, letting you remove the effected signal above a certain frequency
- Level—Controls the overall output level of the block
- Trails—When on, reverb decay continues to ring out after the block is bypassed
- Reverb > Hot Springs (Mono, Stereo), Line 6 Original spring reverb
- Dwell—Adjusts the strength of the signal sent into the spring tank. Higher values result in a longer decay
- Spring Count—Sets how many springs are in the tank (1, 2, or 3, and numerous values in between)
- Drip—Adjusts the intensity of the spring reverb, or how much "ploink" you might hear
- Low Cut—Applies a low cut (or high pass) filter to the reverb, letting you remove the effected signal below a certain frequency
- High Cut—Applies a high cut (or low pass) filter to the reverb, letting you remove the effected signal above a certain frequency
- Mix—Controls the wet/dry mix of the reverb. When set to 0%, no reverb is heard; when set to 100%, no dry signal is heard
- Level—Controls the overall output level of the block
- Trails—When on, reverb decay continues to ring out after the block is bypassed
*NOTE: All product names used in this document are trademarks of their respective owners and neither Yamaha Guitar Group nor Line 6 are associated or affiliated with them. These trademarks appear solely to identify products whose tones and sounds were studied by Line 6 during sound model development.
New Features in 3.10
Increased Oversampling Throughout
Helix Floor, Helix Rack/Control, Helix LT, Helix Native, HX Effects, HX Stomp, HX Stomp XL
Oversampling has been increased across the board, resulting in higher fidelity, fewer aliasing artifacts, and smoother decay trails, especially when running multiple distortion stages or with higher gain tones. Many people might not notice a difference, but those highly sensitive to aliasing will appreciate 3.0's smoother response. Amp and effects models have been optimized to accommodate these improvements without increasing DSP usage.
Customizable Stomp Switches
HX Stomp, HX Stomp XL [Feature already in Helix Floor, Helix Rack/Control, Helix LT, and HX Effects]
As long as something is assigned to a stomp switch (bypass one or more blocks, toggle parameter Min/Max, or Command Center command), switches in Stomp Footswitch Mode can now have custom labels and colors. This is especially helpful when multiple blocks, controls, or commands are assigned to the same switch; it doesn't have to read "MULTIPLE (X)" anymore.
- Touch a stomp mode footswitch to select it and from either the Bypass Assign or Command Center menu, press PAGE> and then Customize.
- Use the Upper Knob and Knob 2 (Character) to name the stomp.
- Press PAGE> and turn Knob 3 (Switch LED) to choose a custom color. When set to "Auto" (the default), the switch reflects its assignment (Delays are green, Filters are purple, Commands are white, etc.)
- When finished, press <PAGE and Knob 3 (OK).
Customizable Snapshot Switches
HX Stomp, HX Stomp XL [Feature already in Helix Floor, Helix Rack/Control, Helix LT, and HX Effects]
Switches in Snapshot Footswitch Mode can now have custom labels and colors.
- From Play View, press the Upper Knob to open the Preset List.
- Turn Knob 2 (Snapshot) to select the snapshot you want to rename and press ACTION.
- Press Rename Snapshot.
- Use the Upper Knob and Knob 2 (Character) to name the stomp.
- Press PAGE> and turn Knob 3 (Switch LED) to choose a custom color. When set to "Auto" (the default), the switch is white
- When finished, press <PAGE and Knob 3 (OK).
Tuner Trails
Helix Floor, Helix Rack/Control, Helix LT, HX Effects, HX Stomp, HX Stomp XL
The Tuner screen has a new "Trails" parameter. When set to "On," delay repeats and reverbs' decay continue to ring out and even the Looper keeps running when the tuner is engaged. No more awkward "everyone's staring at me because my B string went wonky."
Expanded 3.0 Models
Helix Floor, Helix Rack/Control, Helix LT, Helix Native, HX Effects, HX Stomp, HX Stomp XL
3.0 added a boatload of new creative effects and after collecting feedback from users, we've added new parameters to some of them to help expand their flexibility and fun factor. IMPORTANT! These new parameters won't show up in your existing presets; they'll only appear if you remove the block (or change the model and reload it). Also, if you've saved any of the following models' defaults, they will need to be re-tweaked and saved again.
- Delay > Poly Sustain
- Auto EQ— Determines how much compensation EQ is applied to the sustained signal. If the sustained signal sounds too harsh when pitched up (or dull when pitched down), adjust this setting to taste. The higher the value, the more EQ is applied at the shift end points; when set to 0.0, no compensation EQ is applied
- Operation—Determines what happens to your signal when Poly Sustain is turned on (remember, it's bypassed by default)
- "Mute All"—When Poly Sustain is on, THE ENTIRE PATH IS MUTED
- "Dry Kill"—When Poly Sustain is on, only the sustained signal is heard. TIP: With Poly Sustain on a parallel path, assign a second stomp switch to toggle between Mute All and Dry Kill. This lets you leave the block enabled and bring the sustained signal in and out by switching between the two values
- "Normal" (default)—When Poly Sustain is on, both the dry and sustained signals are heard. This is how Poly Sustain behaved in Firmware 3.0; that is, you're able to jam on top of the sustained drone
- Delay > Glitch Delay
- Pitch—Determines the likelihood of repeats changing pitch, based on the new Interval 1 and Interval 2 settings (In 3.0, the repeats were fixed to an octave below and above). Was called "Octaves" in 3.0
- Interval 1—Sets the pitch of some repeats, the likelihood of which is determined by the Pitch parameter (from an octave down to an octave up)
- Interval 2—Sets the pitch of other repeats, the likelihood of which is determined by the Pitch parameter (from an octave down to an octave up)
- Low Cut—Applies a low cut (or high pass) filter to the slices, letting you remove the effected signal below a certain frequency
- High Cut—Applies a high cut (or low pass) filter to the slices, letting you remove the effected signal above a certain frequency
- Level—Controls the overall output level of the block
- Looper > Shuffling Looper
- Pitch—Determines the likelihood of your slices changing pitch, based on the new Interval 1 and Interval 2 settings (In 3.0, the repeats were fixed to an octave below and above). Was called "Octaves" in 3.0
- Interval 1—Sets the pitch of some slices, the likelihood of which is determined by the Pitch parameter (from an octave down to an octave up)
- Interval 2—Sets the pitch of other slices, the likelihood of which is determined by the Pitch parameter (from an octave down to an octave up)
- Pitch/Synth > 12 String
- PluckType—Optimizes the 12 String emulation for specific types of playing styles. We've also improved the onset detection and 12 String now uses less DSP
Instant Command Wait Time
Helix Floor, Helix Rack/Control, Helix LT, HX Effects, HX Stomp, HX Stomp XL
On the Command Center page, Instant commands (lightning bolt icon) have a new "Wait Time" parameter, letting you delay certain events by up to 1000ms. This is to help Helix/HX control older MIDI gear that may behave incorrectly when receiving multiple commands very close together. Unless you specifically need to delay a message, leave this set to "0 ms."
New and Improved MIDI Implementation
Helix Floor, Helix Rack/Control, Helix LT, HX Effects, HX Stomp, HX Stomp XL
Switches in Snapshot Footswitch Mode can now have custom labels and colors.
- MIDI Snapshot changes on CC69 that are received during preset loads will now be buffered and executed once the preset load is finished. This means that you can send a MIDI Snapshot change immediately after a PC message to effectively load a preset with a different Snapshot than it was saved with.
- Bank/Preset/Snapshot Up and Down messages how properly work via incoming FS1/FS7 emulation MIDI messages
- FS1/2/3 emulation MIDI messages can now be momentary for HX Stomp (values 64-127=footswitch press; values 0-63=footswitch release)
- Also, footswitch emulation MIDI messages now work while in preset or snapshot footswitch mode
- New MIDI message (Helix Floor/Rack/LT/HX Stomp XL): CC71 engages the MODE switch
- New MIDI message: CC 72, value 64-127 increments preset, value 0-63 decrements preset
- New MIDI message (Helix LT, HX Stomp, HX Stomp XL): CC 73 toggles between Play and Edit views
Other Changes and Improvements in 3.10
- HX Edit now adds support for macOS 11 Big Sur
- Helix Floor and Rack/Control only: The scribble strip above FS6 (MODE) now displays which mode is currently active—Preset or Stomp. You can still hold FS6 to engage hands-free Pedal Edit mode
- On the Controller Assign page, turning Knob 2 (Controller) no longer resets the Min Value and Max Value
Bug Fixes in 3.10
- Pressing the Bank Down switch would skip banks in certain situations–FIXED
- When Tuner View is active while Spillover is engaged, changing presets can sometimes cause audio output to stop—FIXED
- The tuner screen and gain reduction meters could sometimes appear laggy—FIXED
- Many other minor fixes and improvements
Known Issues in 3.10
- Helix Native's performance can be laggy in new M1-based Apple computers
-
As Delay > Poly Sustain, Delay > Glitch Delay, Pitch/Synth > 12 String, and Looper > Shuffling Looper models have been updated, any existing user defaults for these models will need to be re-tweaked and saved again
-
Variax Model min and max sliders do not automatically update when a Variax is connected
-
After importing a .WAV file into the current 'Empty' slot of an Impulse Response block, all audio output can stop
-
Helix Floor/Rack/LT and HX Stomp only—Sending more than one MIDI program change messages one after another can sometimes cause HX Edit to lose connection
-
Helix Floor/Rack/LT only—Clearing a Split block on Path 2 does not automatically remove its bypass assignment
-
Helix LT only—FS1 and FS7 do not transmit Command Center messages
-
HX Stomp and XL only—Quickly scrolling across the signal flow view immediately after booting can sometimes cause HX Stomp/XL to freeze
-
HX Stomp and XL only—In rare cases, after restoring a 3.01 backup, parallel presets' blocks may be shifted one position to the right
-
Impulse responses with names consisting of more than 54 characters cannot be copied or exported
Get Download
Helix Native
Helix Native
Helix/HX 3.10 includes a new amp, new effects, new features, improvements, and bug fixes and is recommended for all users.
How do I update to 3.10?
Did you happen to update HX Edit to 3.01 (released on Feb 2, 2021)? If so, just connect Helix/HX to your computer via USB and launch HX Edit. The software will walk you through the entire procedure, including updating HX Edit 3.01 to 3.10, and backing everything up to your computer.
What if I didn't update HX Edit to 3.01? What if I don't remember? What's going on? Where am I?
That's fine, just make ABSOLUTELY SURE you install HX Edit 3.10 BEFORE you install 3.10 firmware and make ABSOLUTELY SURE you back everything up! Here's the link:
- macOS: https://line6.com/software/readeula.html?rid=10457
- Windows: https://line6.com/software/readeula.html?rid=10459
Anything else I should know?
Yes. If you run into any odd behavior, before running to the internet to complain, perform a factory reset and restore your backup. (Backing up is part of the update process). This should solve any issues. Here's how to perform a factory reset. IMPORTANT: MAKE SURE YOU HAVE A BACKUP FIRST, AS THIS WILL ERASE ALL YOUR WORK!
- Helix Floor/LT: While holding footswitches 9 & 10 (bottom row, 2 middle switches), turn on Helix Floor/LT
- Helix Rack: While holding knobs 5 & 6 (2 furthest right knobs below the screen), turn on Helix Rack
- HX Effects: While holding footswitches 6 & TAP (2 furthest right switches on the bottom row), turn on HX Effects
- HX Stomp: While holding footswitches 2 & 3, turn on HX Stomp
- HX Stomp XL: While holding footswitches C & D, turn on HX Stomp
New Amp in 3.10
Helix Floor, Helix Rack, Helix LT, Helix Native, HX Stomp, HX Stomp XL
- Mandarin Rocker, based on* the Orange® Rockerverb 100 MKIII. NOTE: We decided to slightly alter the model so that at lower settings, the Drive knob's taper exhibits a smoother transition into distortion.
New Effects in 3.10
Helix Floor, Helix Rack, Helix LT, Helix Native, HX Effects, HX Stomp, HX Stomp XL
- Distortion > Ratatouille Dist (Mono, Stereo), based on* the 1984 Pro Co RAT. Turns out our Vermin Dist model was broken. Sorry! We were going to replace it completely but a bunch of people had presets with the old version. On top of that, we found out our RAT's LM308 chip had crapped out since we modeled it last so we decided to get it into perfect working order and start from scratch
- Gain—Sets the amount of distortion
- Filter—Sets the amount of high cut (low pass) filter applied to the distortion; basically letting more treble through (lower values) or filtering it out (higher values)
- Level—Sets the overall level of the block
- Modulation > Retro Reel (Mono), Line 6 Original effect that simulates playing a signal back from an analog tape machine. This signal can be distorted, filtered to sound older or more lo-fi, and modulated with wow and flutter. TIP: Helix Native users should definitely try Retro Reel on all sorts of tracks—vocals, drums, keyboards, strings, busses, you name it.
- Wow Fluttr—Determines how much warbly tape sound is heard
- Saturation—Adds analog tape saturation and at high enough settings, distortion. At lower settings, it's great for simply warming up a tone
- Low Cut—Determines the frequency of the Low Cut (High Pass) filter. At higher settings, can provide a lo-fi effect
- High Cut—Determines the frequency of the High Cut (Low Pass) filter. At lower settings, can provide the natural high-end roll-off of old tape
- Tape Speed—Changes both the rate of the modulation applied by the Wow Fluttr control and the filtering response of the analog tape emulation
- Level—Sets the overall level of the block
- Texture—Adjusts the amount of the NAB tape EQ in the simulated tape path. When Saturation is set to 0.0, the texture is invisible. When Saturation is turned up, the texture will affect the tightness (or looseness) of the distortion
- Delay > Euclidean Delay (Mono, Stereo), Line 6 Original delay based on Euclidean algorithms. Creates multitap patterns by setting the length of the pattern (Steps) and the number of taps (Fill) in the pattern. The Euclidean algorithm spaces taps as evenly as possible throughout the pattern, resulting in rhythms from traditional to highly complex. Settle in because this one'll require diagrams and charts and whatnot. TIP: Add two Euclidean Delays in parallel (with different settings) for interesting polyrhythm patterns. When using a stereo playback system, try panning Paths A and B in the Mixer to L100 and R100.
- Step Time—Sets the time between steps. The total delay time is Time x Steps, so [Time: 1/16 x Steps: 8] is a 1/2-note. Press the knob to toggle between ms/sec and note values
- Feedback—Controls the overall number of repeats heard for the entire sequence. If you want to hear all fills in the sequence only once, set to 0%
- Steps—Determines the number of steps in the sequence (1-16; see diagram below)
- Fill—The number of active taps, whose spacing is set by Euclidean algorithms (1-16, see diagram below). If Fill is higher than Steps, the extra taps are ignored
- Rotate—Rotates all fills forward by the same amount (0-15; see diagram below). Used If you like the sound of a repeat pattern but want the fills and gaps shifted forward
- Mix—Controls the wet/dry mix of the delay. When set to 0%, no delay is heard; when set to 100%, no dry signal is heard
- Low Cut—Applies a low cut (high pass) filter to the fills, letting you remove the effected signal below a certain frequency
- High Cut—Applies a high cut (low pass) filter to the fills, letting you remove the effected signal above a certain frequency
- Level—Controls the overall output level of the block
- Trails—When on, delay repeats continue to ring out after the block is bypassed
I was told there'd be no math!
Sorry. If you'd like to read more about Euclidean rhythms, check this out: https://splice.com/blog/euclidean-rhythms/ Or if you'd like to know more about Euclidean math, see ya' in a semester or two! https://en.wikipedia.org/wiki/Euclidean_algorithm
- Reverb > Dynamic Hall (Mono, Stereo), Line 6 Original hall reverb
- Decay—Sets the decay of the reverb (0.1 sec ~ 45.0 sec, or Infinity)
- Predelay—Determines the amount of delay heard before the signal enters the hall. Can sometimes result in more definition between the dry and effected signals
- Room Size—Sets the size of the hall (10, 20, or 30 meters). NOTE: This parameter actually changes the algorithm so you'll hear a small bump when changing it. Therefore, we don't recommend assigning Room Size to snapshots or other controllers
- Diffusion—Sets the amount of smearing between discrete echoes, sometimes resulting in a softer effected signal
- Damping—Determines the frequency above which the reverb will be absorbed. For example, if your hall is full of people wearing fake ocelot jumpsuits, more high frequencies would be absorbed than if the room were empty
- Mix—Controls the wet/dry mix of the reverb. When set to 0%, no reverb is heard; when set to 100%, no dry signal is heard
- Motion—Sets the amount of randomization, which can be helpful to minimize any metallic artifacts common in extremely static reverbs. At higher values, can impart a bit of modulation to the effected signal
- Low Freq—Sets the frequency below which the Low Gain parameter is applied
- Low Gain—Sets the reverb time for frequencies below the Low Freq value. Values below 0.0dB mean the bass frequencies decay faster than the treble frequencies; values above 0.0dB mean the bass frequencies decay slower than the treble frequencies
- Low Cut—Applies a low cut (or high pass) filter to the reverb, letting you remove the effected signal below a certain frequency
- High Cut—Applies a high cut (or low pass) filter to the reverb, letting you remove the effected signal above a certain frequency
- Level—Controls the overall output level of the block
- Trails—When on, reverb decay continues to ring out after the block is bypassed
- Reverb > Hot Springs (Mono, Stereo), Line 6 Original spring reverb
- Dwell—Adjusts the strength of the signal sent into the spring tank. Higher values result in a longer decay
- Spring Count—Sets how many springs are in the tank (1, 2, or 3, and numerous values in between)
- Drip—Adjusts the intensity of the spring reverb, or how much "ploink" you might hear
- Low Cut—Applies a low cut (or high pass) filter to the reverb, letting you remove the effected signal below a certain frequency
- High Cut—Applies a high cut (or low pass) filter to the reverb, letting you remove the effected signal above a certain frequency
- Mix—Controls the wet/dry mix of the reverb. When set to 0%, no reverb is heard; when set to 100%, no dry signal is heard
- Level—Controls the overall output level of the block
- Trails—When on, reverb decay continues to ring out after the block is bypassed
*NOTE: All product names used in this document are trademarks of their respective owners and neither Yamaha Guitar Group nor Line 6 are associated or affiliated with them. These trademarks appear solely to identify products whose tones and sounds were studied by Line 6 during sound model development.
New Features in 3.10
Increased Oversampling Throughout
Helix Floor, Helix Rack/Control, Helix LT, Helix Native, HX Effects, HX Stomp, HX Stomp XL
Oversampling has been increased across the board, resulting in higher fidelity, fewer aliasing artifacts, and smoother decay trails, especially when running multiple distortion stages or with higher gain tones. Many people might not notice a difference, but those highly sensitive to aliasing will appreciate 3.0's smoother response. Amp and effects models have been optimized to accommodate these improvements without increasing DSP usage.
Customizable Stomp Switches
HX Stomp, HX Stomp XL [Feature already in Helix Floor, Helix Rack/Control, Helix LT, and HX Effects]
As long as something is assigned to a stomp switch (bypass one or more blocks, toggle parameter Min/Max, or Command Center command), switches in Stomp Footswitch Mode can now have custom labels and colors. This is especially helpful when multiple blocks, controls, or commands are assigned to the same switch; it doesn't have to read "MULTIPLE (X)" anymore.
- Touch a stomp mode footswitch to select it and from either the Bypass Assign or Command Center menu, press PAGE> and then Customize.
- Use the Upper Knob and Knob 2 (Character) to name the stomp.
- Press PAGE> and turn Knob 3 (Switch LED) to choose a custom color. When set to "Auto" (the default), the switch reflects its assignment (Delays are green, Filters are purple, Commands are white, etc.)
- When finished, press <PAGE and Knob 3 (OK).
Customizable Snapshot Switches
HX Stomp, HX Stomp XL [Feature already in Helix Floor, Helix Rack/Control, Helix LT, and HX Effects]
Switches in Snapshot Footswitch Mode can now have custom labels and colors.
- From Play View, press the Upper Knob to open the Preset List.
- Turn Knob 2 (Snapshot) to select the snapshot you want to rename and press ACTION.
- Press Rename Snapshot.
- Use the Upper Knob and Knob 2 (Character) to name the stomp.
- Press PAGE> and turn Knob 3 (Switch LED) to choose a custom color. When set to "Auto" (the default), the switch is white
- When finished, press <PAGE and Knob 3 (OK).
Tuner Trails
Helix Floor, Helix Rack/Control, Helix LT, HX Effects, HX Stomp, HX Stomp XL
The Tuner screen has a new "Trails" parameter. When set to "On," delay repeats and reverbs' decay continue to ring out and even the Looper keeps running when the tuner is engaged. No more awkward "everyone's staring at me because my B string went wonky."
Expanded 3.0 Models
Helix Floor, Helix Rack/Control, Helix LT, Helix Native, HX Effects, HX Stomp, HX Stomp XL
3.0 added a boatload of new creative effects and after collecting feedback from users, we've added new parameters to some of them to help expand their flexibility and fun factor. IMPORTANT! These new parameters won't show up in your existing presets; they'll only appear if you remove the block (or change the model and reload it). Also, if you've saved any of the following models' defaults, they will need to be re-tweaked and saved again.
- Delay > Poly Sustain
- Auto EQ— Determines how much compensation EQ is applied to the sustained signal. If the sustained signal sounds too harsh when pitched up (or dull when pitched down), adjust this setting to taste. The higher the value, the more EQ is applied at the shift end points; when set to 0.0, no compensation EQ is applied
- Operation—Determines what happens to your signal when Poly Sustain is turned on (remember, it's bypassed by default)
- "Mute All"—When Poly Sustain is on, THE ENTIRE PATH IS MUTED
- "Dry Kill"—When Poly Sustain is on, only the sustained signal is heard. TIP: With Poly Sustain on a parallel path, assign a second stomp switch to toggle between Mute All and Dry Kill. This lets you leave the block enabled and bring the sustained signal in and out by switching between the two values
- "Normal" (default)—When Poly Sustain is on, both the dry and sustained signals are heard. This is how Poly Sustain behaved in Firmware 3.0; that is, you're able to jam on top of the sustained drone
- Delay > Glitch Delay
- Pitch—Determines the likelihood of repeats changing pitch, based on the new Interval 1 and Interval 2 settings (In 3.0, the repeats were fixed to an octave below and above). Was called "Octaves" in 3.0
- Interval 1—Sets the pitch of some repeats, the likelihood of which is determined by the Pitch parameter (from an octave down to an octave up)
- Interval 2—Sets the pitch of other repeats, the likelihood of which is determined by the Pitch parameter (from an octave down to an octave up)
- Low Cut—Applies a low cut (or high pass) filter to the slices, letting you remove the effected signal below a certain frequency
- High Cut—Applies a high cut (or low pass) filter to the slices, letting you remove the effected signal above a certain frequency
- Level—Controls the overall output level of the block
- Looper > Shuffling Looper
- Pitch—Determines the likelihood of your slices changing pitch, based on the new Interval 1 and Interval 2 settings (In 3.0, the repeats were fixed to an octave below and above). Was called "Octaves" in 3.0
- Interval 1—Sets the pitch of some slices, the likelihood of which is determined by the Pitch parameter (from an octave down to an octave up)
- Interval 2—Sets the pitch of other slices, the likelihood of which is determined by the Pitch parameter (from an octave down to an octave up)
- Pitch/Synth > 12 String
- PluckType—Optimizes the 12 String emulation for specific types of playing styles. We've also improved the onset detection and 12 String now uses less DSP
Instant Command Wait Time
Helix Floor, Helix Rack/Control, Helix LT, HX Effects, HX Stomp, HX Stomp XL
On the Command Center page, Instant commands (lightning bolt icon) have a new "Wait Time" parameter, letting you delay certain events by up to 1000ms. This is to help Helix/HX control older MIDI gear that may behave incorrectly when receiving multiple commands very close together. Unless you specifically need to delay a message, leave this set to "0 ms."
New and Improved MIDI Implementation
Helix Floor, Helix Rack/Control, Helix LT, HX Effects, HX Stomp, HX Stomp XL
Switches in Snapshot Footswitch Mode can now have custom labels and colors.
- MIDI Snapshot changes on CC69 that are received during preset loads will now be buffered and executed once the preset load is finished. This means that you can send a MIDI Snapshot change immediately after a PC message to effectively load a preset with a different Snapshot than it was saved with.
- Bank/Preset/Snapshot Up and Down messages how properly work via incoming FS1/FS7 emulation MIDI messages
- FS1/2/3 emulation MIDI messages can now be momentary for HX Stomp (values 64-127=footswitch press; values 0-63=footswitch release)
- Also, footswitch emulation MIDI messages now work while in preset or snapshot footswitch mode
- New MIDI message (Helix Floor/Rack/LT/HX Stomp XL): CC71 engages the MODE switch
- New MIDI message: CC 72, value 64-127 increments preset, value 0-63 decrements preset
- New MIDI message (Helix LT, HX Stomp, HX Stomp XL): CC 73 toggles between Play and Edit views
Other Changes and Improvements in 3.10
- HX Edit now adds support for macOS 11 Big Sur
- Helix Floor and Rack/Control only: The scribble strip above FS6 (MODE) now displays which mode is currently active—Preset or Stomp. You can still hold FS6 to engage hands-free Pedal Edit mode
- On the Controller Assign page, turning Knob 2 (Controller) no longer resets the Min Value and Max Value
Bug Fixes in 3.10
- Pressing the Bank Down switch would skip banks in certain situations–FIXED
- When Tuner View is active while Spillover is engaged, changing presets can sometimes cause audio output to stop—FIXED
- The tuner screen and gain reduction meters could sometimes appear laggy—FIXED
- Many other minor fixes and improvements
Known Issues in 3.10
- Helix Native's performance can be laggy in new M1-based Apple computers
-
As Delay > Poly Sustain, Delay > Glitch Delay, Pitch/Synth > 12 String, and Looper > Shuffling Looper models have been updated, any existing user defaults for these models will need to be re-tweaked and saved again
-
Variax Model min and max sliders do not automatically update when a Variax is connected
-
After importing a .WAV file into the current 'Empty' slot of an Impulse Response block, all audio output can stop
-
Helix Floor/Rack/LT and HX Stomp only—Sending more than one MIDI program change messages one after another can sometimes cause HX Edit to lose connection
-
Helix Floor/Rack/LT only—Clearing a Split block on Path 2 does not automatically remove its bypass assignment
-
Helix LT only—FS1 and FS7 do not transmit Command Center messages
-
HX Stomp and XL only—Quickly scrolling across the signal flow view immediately after booting can sometimes cause HX Stomp/XL to freeze
-
HX Stomp and XL only—In rare cases, after restoring a 3.01 backup, parallel presets' blocks may be shifted one position to the right
-
Impulse responses with names consisting of more than 54 characters cannot be copied or exported
Helix Native
Helix Native
The Helix 3.01 update addresses potential severely corrupted audio output. Due to this, we recommend updating your Helix family device as soon as possible. This issue may also be experienced on Helix Native, an update for Native will be available in the very near future.
New Amps
Helix Floor, Helix Rack, Helix LT, Helix Native, HX Stomp
- US Princess, based on* the Fender® Princeton Reverb
- Das Benzin Mega, based on* the Mega channel of the Diezel VH4
- Das Benzin Lead, based on* the Lead channel of the Diezel VH4
New Cabs
Helix Floor, Helix Rack, Helix LT, Helix Native, HX Stomp
- 1x10 US Princess, based on* the Fender® Princeton Reverb cab
- 1x12 US Princess, based on* the Fender® Princeton Reverb with a 12" Alnico Blue driver
New Effects
Helix Floor, Helix Rack, Helix LT, Helix Native, HX Effects, HX Stomp
- Distortion > Horizon Drive (Mono, Stereo), based on* the Horizon Devices Precision Drive. Includes an extra Gate Range parameter that, when set to "Extended," drops the gate's threshold down to -90dB
- Distortion > Swedish Chainsaw (Mono, Stereo), based on* the BOSS® HM-2 Heavy Metal Distortion (Made in Japan black label)
- Distortion > Pocket Fuzz (Mono, Stereo), inspired by* the Jordan Boss Tone fuzz
- Distortion > Bighorn Fuzz (Mono, Stereo), based on* the 1973 Electro-Harmonix® Ram's Head Big Muff Pi
- Distortion > Ballistic Fuzz (Mono, Stereo), based on* the Euthymia ICBM fuzz
- Dynamics > Horizon Gate (Mono, Stereo), based on* the Horizon Devices Precision Drive's gate circuit. Includes an extra Gate Range parameter that, when set to "Extended," drops the gate's threshold down to -90dB. Works best before an amp
- EQ > Acoustic Sim (Mono, Stereo), based on* the BOSS® AC-2 Acoustic Simulator. Can be used alone or in conjunction with an acoustic IR
- Modulation > Poly Detune (Mono), Line 6 Original
- Delay > Poly Sustain (Mono), Line 6 Original
- Assign Poly Sustain to a stomp footswitch. By default, Poly Sustain appears bypassed.
- First play the note or chord you wish to sustain, and then press the footswitch (on) to sustain it indefinitely. Keep playing while the note or chord loops. TIP: Some players may find it easier to change the footswitch mode to Momentary; that way, the note or chord sustains only while you hold the switch on, much like the sustain pedal on a piano.
- Press the switch again (off) and the sustained note or chord fades out.
- Interval—Sets the pitch of the sustained note or chord. TIP: This parameter is especially cool for creating massive drones to play over
- Attack—Sets the speed at which the sustained note or chord fades in
- Decay—Sets the speed at which the sustained note or chord fades out after bypassing the effect
- Mod Freq—Sets the speed of the built in modulation
- Mod Depth—Sets the depth of the built in modulation
- FX Level—Sets the level of the sustained signal
- RandDpth—Higher values increase the randomization of the section of audio being sustained, resulting in a more natural, but less predictable drone
- RandSpeed—Controls how fast the randomization wanders. Setting both RndDpth and RndSpd to high values will result in a glitch fest (not that there's anything wrong with that)
- Level—Controls the overall output level of the block
- Delay > Glitch Delay (Mono, Stereo), Line 6 Original performance delay that lets you freely manipulate the repeats' behavior in real time
- Time—Sets the delay time; press the knob to toggle between ms/sec and note values
- Delay Div—Divides the delay time into smaller increments
- Mix—Controls the wet/dry mix of the delay. When set to 0%, no delay is heard; when set to 100%, no dry signal is heard
- Feedback—Controls the overall number of repeats heard for the entire sequence
- SliceFdbk—Controls the number of repeats heard for individual slices. At higher values, you could call this "Super Chaotic Feedback"
- Shuffle—Determines the likelihood of repeats shuffling/reordering
- Octaves—Determines the likelihood of repeats playing back an octave higher or lower
- Reverse—Determines the likelihood of repeats playing backwards
- Seq Drift—Determines the likelihood of the entire sequence changing every time it loops around. When set to 0%, the same sequence loops forever. TIP: Assign this parameter to a footswitch set to toggle between a higher number and 0%. If you hear a random sequence you want to maintain, press the switch to set Seq Drift to 0%, and it'll repeat that way indefinitely
- Smoothing—Higher values apply smoothing between slices and can give a synth-pad type quality, lower values maintain transients. Or set it just high enough to avoid pops and clicks
- Trails—When on, delay repeats continue to ring out after the block is bypassed
- Pitch/Synth > Poly Pitch (Mono), Line 6 Original
- NOTE: Polyphonic pitch engines are designed for shifting complex chords with minimal artifacts, at the expense of latency (and our algorithms have lower latency than leading standalone poly pitch pedals). If you're looking to pitch individual notes (such as in a solo), monophonic pitchshifting is often preferred. See the Tracking parameter below for more information
- IMPORTANT! 3.0's new poly models are extremely DSP-intensive. Some effects can eat up roughly a quarter of all available DSP on a Helix Floor, Rack, or LT or half (!!!) of all available DSP on HX Stomp or HX Effects. You also can't run more than one on the same path/DSP. Don't say we didn't warn you...
- Interval—Sets the pitch of the effect in semitones
- Cents—Sets the pitch of the effect in cents
- ShiftTime—Determines how long it takes for the signal to ramp up or down to the set pitch when the block is enabled. Press the knob to toggle between ms/Sec and note/beat values. TIP: Want to hit the switch and have Poly Pitch dive bomb and land on the selected interval exactly one bar later? Press the knob to select note values and set ShiftTime to "1/1"
- ShiftCurve—Determines the trajectory curve of the pitch shift over time. StartSlow values are concave (slower changes to start, speeding up toward the end); StartFast values are convex (the opposite). The default is "Linear"
- ReturnTime—Determines how long it takes for the signal to return to normal pitch when the block is bypassed. Press the knob to toggle between ms/Sec and note/beat values
- ReturnCurv—Determines the trajectory curve when returning to the original pitch. StartSlow values are concave (slower changes to start, speeding up toward the end); StartFast values are convex (the opposite)
- Tracking—Determines how the poly pitch engine behaves. "X Fast" results in lower latency, ideal for faster lead lines. "X Stable" (the default) results in fewer artifacts when pitch shifting complex, sustained chords. "Fast" and "Stable" are somewhere in between. TIP: If you find yourself changing playing styles—say from fast lead lines to clean, open chords—you can assign this parameter to a footswitch (or snapshots) to optimize the balance between transparency and low latency
- Auto EQ—Determines how much compensation EQ is applied to the shifted signal. If the effected signal sounds too harsh when pitched up (or dull when pitched down), adjust this setting to taste. When set to 0.0, no compensation is applied
- Mix—Controls the wet/dry mix of the pitchshift
- Level—Controls the overall output level of the block
- Pitch/Synth > Poly Wham (Mono), Line 6 Original. Works equally well on guitar and bass, although you might want to tweak the Auto EQ parameter for your particular instrument. See Poly Pitch notes above for additional information
- Pitch/Synth > Poly Capo (Mono), Line 6 Original. Simpler version of Poly Pitch when you just want to change keys. Works equally well on guitar and bass, although you might want to tweak the Auto EQ parameter for your particular instrument. See Poly Pitch notes above for additional information
- Pitch/Synth > 12 String (Mono), Line 6 Original 12-string guitar emulation
- Volume/Pan > Stereo Imager (Stereo), Line 6 Original
- Looper > Shuffling Looper (Mono, Stereo), Line 6 Original. Part looper, part sampler, part inspiration generator, part performance instrument, the Shuffling Looper intelligently chops up your playing and gives you realtime control over reordering, octave shifting, reversing, and repeating. It's all immense fun (even on vocals, drums, and percussion), but you'll want to familiarize yourself with its controls. IMPORTANT: The Shuffling Looper does not currently respond to Command Center > HX Commands or per-function MIDI commands
- Add Looper > Shuffling Looper to a preset and assign it to a footswitch.
- Turn Knob 1 (Slices) to set the number of slices your loop will be chopped into. 8 slices is the default.
- Press the switch to begin recording. The LED lights red, indicating the loop is recording.
- At the end of your loop, press the switch. The LED lights green and the sliced loop sequence immediately plays.
- During playback, adjust the following knobs (or assign them to controllers, like expression pedals or snapshots):
- Slices—Changes the number of slices your loop will be chopped into
- SeqLength—Determines the number of slices in the sequence. This can be changed even after recording a loop
- Shuffle—Determines the likelihood of slices shuffling/reordering. At 0%, the slices never shuffle; at 100%, they're constantly reshuffling
- Octave—Determines the likelihood of slices playing back an octave higher or lower
- Reverse—Determines the likelihood of slices playing backwards
- Repeat—Determines the likelihood of slices repeating
- Smoothing—Higher values apply smoothing between slices and can give a synth-pad type quality, lower values maintain transients. Or set it just high enough to avoid pops and clicks
- Seq Drift—Determines the likelihood of the entire slice sequence changing every time it loops around. When set to 0.0, the same sequence repeats forever; when set to 10.0, the sequence changes completely every time it loops TIP: Assign this parameter to a footswitch set to toggle between a higher number and 0%. If you hear a random sequence you want to maintain, press the switch to set Seq Drift to 0%, and it'll repeat that way indefinitely
- Playback—Sets the looper's playback level
- Low Cut—Applies a low cut (or high pass) filter to the loop, letting you remove looper signal below a certain frequency
- High Cut—Applies a high cut (or low pass) filter to the loop, letting you remove looper signal above a certain frequency
- Want to change it up? While the loop is playing, press the switch to randomize its slice sequence.
- Quickly double-press the switch. Playback/recording stops and the LED lights white, indicating a loop is in memory. Press again to restart.
- While the loop is playing or stopped, press and hold the switch. The recording is deleted and the LED lights dim white.
*NOTE: All product names used in this document are trademarks of their respective owners and neither Yamaha Guitar Group nor Line 6 are associated or affiliated with them. These trademarks appear solely to identify products whose tones and sounds were studied by Line 6 during sound model development.
New Features
True Preset Spillover
Helix Floor, Helix Rack/Control, Helix LT
Despite what some might have you believe, the only digital multieffects units with true preset spillover were the DigiTech GSP1101, 2112, and 2120, and they accomplished this by dedicating one of their two DSPs to spillover and only spillover. (Basically, to hear two dynamically allocated presets with absolutely zero gap—not a global reverb smeared to cover the gap—you need enough DSP to run both of them simultaneously.) So... if you're willing to sacrifice half your DSP—that is, COMPLETELY DISABLE PATH 2—you too can have true preset spillover. IMPORTANT! Unfortunately, Looper recording or playback will not currently spill over from one preset to another. Also, note that there may be a slight hiccup when switching between two presets with different impedance values for the Guitar Input.
- In the Global Settings > Preferences menu, set Preset Spillover to "On." (SHORTCUT: Hold ACTION and press HOME.) A dialog appears, reading "Remove Path 2 to enable preset spillover?"
- Press Knob 6 (OK).
- Press HOME. Path 2 has disappeared! You may now switch presets to your heart's delight with true spillover but note that if Preset A is still spilling over into Preset B (say one of its delay blocks' feedback is making it self-oscillate), switching to Preset C will abruptly cut off Preset A.
- To return to normal operation with two paths, turn Preset Spillover back to "Off". (SHORTCUT: Hold ACTION and press HOME again.) A dialog appears, reading "The preset must be reloaded. All unsaved changes will be lost!" So if you've made changes to the preset, be sure to save it before turning Spillover off.
- Press Knob 6 (OK).
But but but... I don't wanna lose Path 2 just for spillover!
Then keep using snapshots.
Favorites
Helix Floor, Helix Rack/Control, Helix LT, Helix Native, HX Effects, HX Stomp
If you've dialed in an amp or effects block exactly the way you like it, you can now save its settings as a favorite so it can be added very quickly, complete with bypass state and footswitch assignment. Favorites appear in a new "Favorites" category and can be renamed, reordered, and cleared. TIP: If you don't want a favorite to be recalled with its footswitch assignment, add the block before you assign a switch.
- Choose one of your favorite amps or effects and tweak it exactly how you like it, with or without footswitch assignment.
- Press ACTION and then press Add to Favorites. The Favorites list appears.
- If you wish to replace an existing favorite (you get 128 total), select it and press Replace Favorite. If you wish to add a new favorite, select the location where you want to place it and press Add New Favorite.
- OPTIONAL: While the Favorites list is open, press ACTION.
- To reorder the selected favorite up or down the list, turn Reorder Favorite (on HX Effects, press Reorder Up or Reorder Down)
- To rename the selected favorite, press Rename Favorite
- To clear the selected favorite, press Clear Favorite
- To clear all favorites, press Clear All Favorites. A dialog appears. Press OK to confirm.
All right, so what?
Here's what:
- At any time, select an empty block and turn the joystick (Big Knob on HX Effects or Lower Knob on HX Stomp). All your perfectly-tweaked favorite amps and effects instantly appear, without having to open the model list at all. If you typically keep model categories on the same stomp footswitches, you could conceivably create a brand new preset with all of your favorite stuff—including all footswitch assignments—in less than 10 seconds. Creating tones has never been faster or easier. TIP: If you keep one or more external pedals connected to Helix's FX Loops, add the FX Loop blocks as favorites and then rename them after the real thing.
User Model Defaults
Helix Floor, Helix Rack/Control, Helix LT, Helix Native, HX Effects, HX Stomp
3.0 lets you save any amp, cab, or effect block's settings as default so every time you call that model up, it sounds exactly the way you want it. Or, if you want to revert it to factory default, you can do that too. NOTE: Unlike Favorites, user model defaults do not store any footswitch assignments.
- Choose any model and tweak it exactly how you like it.
- Press ACTION and then User Default. From Helix Native or HX Edit, right-click (Mac: control-click) the block icon and select "User Default"
Global Settings > Preferences > Auto Impedance
Helix Floor, Helix Rack/Control, Helix LT, HX Stomp
A new Global Settings > Preference parameter determines how the Guitar In's impedance circuit behaves when Input > In-Z is set to "Auto." When set to "First Block" (the default), the impedance circuit reflects the impedance of the first block on Path 1A, regardless of whether it's enabled or bypassed. When set to "First Enabled", the impedance circuit reflects the impedance of the first enabled block on Path 1A. Called "Auto Impedance" because "Sorry-this-took-so-long-we-love-you-Tito83" wouldn't fit.
Min/Max Value Indicators
Helix Floor, Helix Rack/Control, Helix LT, HX Stomp [Feature already in HX Effects]
Parameters assigned to controllers or snapshots now display small Min Value (below) and Max Value (above) indicators. You can now see the range of continuous controllers from the Home screen.
8 Blocks in HX Stomp
HX Stomp
HX Stomp's simultaneous block count has been increased from six to eight.
IMPORTANT! Although HX Stomp now has two additional block locations, this doesn't mean it magically has more DSP horsepower to accommodate those blocks. Don't be surprised if you're not able to fill all eight blocks with exactly what you want, especially considering the new polyphonic pitch models take up a lot more DSP. We've taken note of those who've bemoaned HX Stomp's 6 block limit, and if the same person now complains about running out of DSP with 8 blocks, we're sending hooligans to their home to administer an atomic wedgie.
NOTE: It shouldn't come as any surprise, but any presets you make in 3.0 will not be compatible with 2.92 or earlier firmware.
Command Center in HX Stomp
HX Stomp [Feature already in Helix Floor, Helix Rack/Control, Helix LT, and HX Effects]
Why would people expect a stompbox with only three footswitches to also act as a master MIDI controller? Yeah, we don't know either, but enough of you asked for it and it wasn't exceedingly difficult to add.
- Press together to open the Menu and then press Knob 3 (Command Center).
- Turn the Upper Knob to select the command source (Instant 1-6, Footswitch 1-5, or EXP 1-2).
- Turn Knob 1 (Command) to select the type of command you wish to transmit. For information on the types of commands HX Stomp transmits, see the HX Stomp 3.0 Owner's Manual.
Wait, does this mean I can use HX Stomp as both an audio interface AND a remote control for YouTube lesson videos by sending QWERTY hotkeys?
Yes.
Tuner in Helix Native
Helix Native [Feature already in Helix and HX hardware]
Helix Native now has the same needle and strobe tuner from Helix.
- Click the tuner icon.
- Choose the tuner type by selecting Coarse, Fine, or Strobe.
Gain Reduction Meters in Helix Native
Helix Native [Feature already in Helix hardware]
The following block types display a gain reduction meter in the inspector when selected:
- Dynamics > Compressor
- Dynamics > Gate
Artist Presets
IMPORTANT! Because we never want to overwrite your own presets, upgrading to 3.0 does NOT automatically make these presets visible; you will need to manually restore them. Restoring factory setlists and presets will completely overwrite your own, so make sure they're backed up first!
TIP: With Helix Floor/Rack/LT/Native, if you want to keep both your presets and the latest factory presets, back up your custom presets as setlists and after the procedure below, drag your setlists onto unused setlist locations.
- Make sure you've backed up your presets and turn off Helix/HX.
- Perform the following procedure:
- Helix Floor/LT: While holding footswitches 7 and 8 (two leftmost switches on the bottom row), turn on Helix Floor/LT. Wait for "Will restore..." to appear and let go
- Helix Rack/Control: While holding knobs 3 and 4 (two middle knobs below the screen), turn on Helix Rack. Wait for "Will restore..." to appear and let go
- Helix Native: Click the gear icon in the lower left corner, click the Presets/IRs tab, and click "Restore Factory Setlists"
Helix 3.0 includes factory presets created by the following artists:
Helix Floor, Helix Rack/Control, Helix LT, Helix Native [FACTORY 1 setlist]
- 13B-14C—Fish (Christina Aguilera)
- 14D—Jeff Waters (Annihilator)
- 15A, 15B—Richie Castellano (Blue Öyster Cult)
- 15C—Robbie Calvo
- 15D—Ryan "Fluff" Bruce (Dragged Under)
- 16A-16D—Felix Martin
- 17A—Mario Quintaro (Spotlights)
- 17B, 17C—Bumblefoot (Sons of Apollo)
- 17D, 18A—Billy Sheehan (Sons of Apollo, Winery Dogs)
- 18B—Andy Abad (Jennifer Lopez)
- 18C-19B—Misha Mansoor (Periphery)
- 19C—Duke Erikson (Garbage)
- 19D—Steve Marker (Garbage)
- 20A—Eric Avery (Garbage)
- 20B—Bill Kelliher (Mastodon)
- 20C—John Browne (Monuments)
- 20D—Olly Steele (Monuments)
- 21A—Jon Button (The Who)
- 21B—Trev Lukather (Levara)
- 21C—Steve Howe (Yes)
- 21D—Dustin Kensrue (Thrice)
- 22A—Pete Thorn
- 22B—Rhett Shull
- 22C—Jade Puget (A.F.I.)
- 22D, 23A—Jeff Schroeder (The Smashing Pumpkins)
- 23B—Graham Coxon (Blur)
- 23C, 23D—Chris Buck
- 24A—Lewis Allen (Sam Smith)
- 24B-25A—Rabea Massaad
- 25B—Soren Andersen
- 25C—Devin Townsend
- 25D—Nathan Navarro
- Vernon Reid
- 27B—Philip Bynoe
- 27C, 27D—Markus Reuter
HX Effects
- 12A-12D—Julien Baker
- 13A—Sarah "Noveller" Lipstate
- 13B, 13C—Steve Stevens
3.0 Owner's Manuals
Helix Floor, Helix Rack/Control, Helix LT, Helix Native, HX Effects, HX Stomp, HX Edit
As it's immensely expensive and complicated to translate Owner's Manuals into the many languages we're required by law to provide, Helix and HX Owner's Manuals have not been updated since 2.X. They've now been updated for 3.0:
- Helix Floor: Link available soon—watch this space
- Helix Rack/Control: Link available soon—watch this space
- Helix LT: Link available soon—watch this space
- Helix Native: Link available soon—watch this space
- HX Effects: Link available soon—watch this space
- HX Stomp: Link available soon—watch this space
- HX Edit: Link available soon—watch this space
Other Changes and Improvements
- On HX Stomp, Global Settings > Footswitches > Stomp Select now has an "Off" value. When set this way, neither touching nor pressing will change which block is in focus [value is already in Helix Floor, Rack, and LT]
- Favorites can now be restored from a backup, independently of setlists, presets, IRs, and Global Settings
- User Model Defaults can now be restored from a backup, independently of setlists, presets, IRs, and Global Settings
- Gain reduction meters now also appear for the Input block's noise gate
- Gain reduction meters and signal present indicators are now more responsive
- Parameter knob ballistics have been improved
- New splash screens for Helix Floor/Rack/LT and HX Stomp
- Parameter slider handles are thinner to accommodate new min/max value indicators
- Press-turning a knob to assign Snapshot control now requires a bit more turning to minimize accidental assignments
- Pitch/Synth > 4 OSC Generator OscFreq parameters now display single Hz resolution between 100 and 1000 Hz
Bug Fixes in 3.01
- In extremely rare cases with specific blocks in a specific order, audio could become severely corrupted–FIXED
- In certain cases, the Delay > Glitch Delay can exhibit minor pops and clicks when placed on Path 2, regardless of where its Smoothing parameter is set (that is, not the good type of glitchiness)—FIXED
- Many other minor fixes and improvements
Bug Fixes in 3.0
- When synced to external MIDI clock or retriggering via TAP, certain models with tremolo circuits' LFO set to square wave would invert the waveform–FIXED
- If Helix had been left powered on for 24 hours with the same preset active (What? Why?), its reverb blocks could become disabled until selecting another preset—FIXED
- Many other minor fixes and improvements
Known Issues in 3.01
- Distortion > Vermin Dist's resonant filter was mapped incorrectly, and is especially apparent at higher gain settings. This will be fixed in 3.10
- In the Poly Pitch models, very fast playing may exhibit some minor onset smearing. Additional improvements to the poly pitch engine are forthcoming
- The Shuffling Looper does not currently respond to Command Center > HX Commands or per-function MIDI commands
- Variax Model min and max sliders do not automatically update when a Variax is connected
- When Tuner View is active while Spillover is engaged, changing presets can sometimes cause audio output to stop
- After importing a .WAV file into the current 'Empty' slot of an Impulse Response block, all audio output can stop
- Clearing a Split block on Path 2 does not automatically remove its bypass assignment
Helix Native
Helix Native
The Helix 3.01 update addresses potential severely corrupted audio output. Due to this, we recommend updating your Helix family device as soon as possible. This issue may also be experienced on Helix Native, an update for Native will be available in the very near future.
New Amps
Helix Floor, Helix Rack, Helix LT, Helix Native, HX Stomp
- US Princess, based on* the Fender® Princeton Reverb
- Das Benzin Mega, based on* the Mega channel of the Diezel VH4
- Das Benzin Lead, based on* the Lead channel of the Diezel VH4
New Cabs
Helix Floor, Helix Rack, Helix LT, Helix Native, HX Stomp
- 1x10 US Princess, based on* the Fender® Princeton Reverb cab
- 1x12 US Princess, based on* the Fender® Princeton Reverb with a 12" Alnico Blue driver
New Effects
Helix Floor, Helix Rack, Helix LT, Helix Native, HX Effects, HX Stomp
- Distortion > Horizon Drive (Mono, Stereo), based on* the Horizon Devices Precision Drive. Includes an extra Gate Range parameter that, when set to "Extended," drops the gate's threshold down to -90dB
- Distortion > Swedish Chainsaw (Mono, Stereo), based on* the BOSS® HM-2 Heavy Metal Distortion (Made in Japan black label)
- Distortion > Pocket Fuzz (Mono, Stereo), inspired by* the Jordan Boss Tone fuzz
- Distortion > Bighorn Fuzz (Mono, Stereo), based on* the 1973 Electro-Harmonix® Ram's Head Big Muff Pi
- Distortion > Ballistic Fuzz (Mono, Stereo), based on* the Euthymia ICBM fuzz
- Dynamics > Horizon Gate (Mono, Stereo), based on* the Horizon Devices Precision Drive's gate circuit. Includes an extra Gate Range parameter that, when set to "Extended," drops the gate's threshold down to -90dB. Works best before an amp
- EQ > Acoustic Sim (Mono, Stereo), based on* the BOSS® AC-2 Acoustic Simulator. Can be used alone or in conjunction with an acoustic IR
- Modulation > Poly Detune (Mono), Line 6 Original
- Delay > Poly Sustain (Mono), Line 6 Original
- Assign Poly Sustain to a stomp footswitch. By default, Poly Sustain appears bypassed.
- First play the note or chord you wish to sustain, and then press the footswitch (on) to sustain it indefinitely. Keep playing while the note or chord loops. TIP: Some players may find it easier to change the footswitch mode to Momentary; that way, the note or chord sustains only while you hold the switch on, much like the sustain pedal on a piano.
- Press the switch again (off) and the sustained note or chord fades out.
- Interval—Sets the pitch of the sustained note or chord. TIP: This parameter is especially cool for creating massive drones to play over
- Attack—Sets the speed at which the sustained note or chord fades in
- Decay—Sets the speed at which the sustained note or chord fades out after bypassing the effect
- Mod Freq—Sets the speed of the built in modulation
- Mod Depth—Sets the depth of the built in modulation
- FX Level—Sets the level of the sustained signal
- RandDpth—Higher values increase the randomization of the section of audio being sustained, resulting in a more natural, but less predictable drone
- RandSpeed—Controls how fast the randomization wanders. Setting both RndDpth and RndSpd to high values will result in a glitch fest (not that there's anything wrong with that)
- Level—Controls the overall output level of the block
- Delay > Glitch Delay (Mono, Stereo), Line 6 Original performance delay that lets you freely manipulate the repeats' behavior in real time
- Time—Sets the delay time; press the knob to toggle between ms/sec and note values
- Delay Div—Divides the delay time into smaller increments
- Mix—Controls the wet/dry mix of the delay. When set to 0%, no delay is heard; when set to 100%, no dry signal is heard
- Feedback—Controls the overall number of repeats heard for the entire sequence
- SliceFdbk—Controls the number of repeats heard for individual slices. At higher values, you could call this "Super Chaotic Feedback"
- Shuffle—Determines the likelihood of repeats shuffling/reordering
- Octaves—Determines the likelihood of repeats playing back an octave higher or lower
- Reverse—Determines the likelihood of repeats playing backwards
- Seq Drift—Determines the likelihood of the entire sequence changing every time it loops around. When set to 0%, the same sequence loops forever. TIP: Assign this parameter to a footswitch set to toggle between a higher number and 0%. If you hear a random sequence you want to maintain, press the switch to set Seq Drift to 0%, and it'll repeat that way indefinitely
- Smoothing—Higher values apply smoothing between slices and can give a synth-pad type quality, lower values maintain transients. Or set it just high enough to avoid pops and clicks
- Trails—When on, delay repeats continue to ring out after the block is bypassed
- Pitch/Synth > Poly Pitch (Mono), Line 6 Original
- NOTE: Polyphonic pitch engines are designed for shifting complex chords with minimal artifacts, at the expense of latency (and our algorithms have lower latency than leading standalone poly pitch pedals). If you're looking to pitch individual notes (such as in a solo), monophonic pitchshifting is often preferred. See the Tracking parameter below for more information
- IMPORTANT! 3.0's new poly models are extremely DSP-intensive. Some effects can eat up roughly a quarter of all available DSP on a Helix Floor, Rack, or LT or half (!!!) of all available DSP on HX Stomp or HX Effects. You also can't run more than one on the same path/DSP. Don't say we didn't warn you...
- Interval—Sets the pitch of the effect in semitones
- Cents—Sets the pitch of the effect in cents
- ShiftTime—Determines how long it takes for the signal to ramp up or down to the set pitch when the block is enabled. Press the knob to toggle between ms/Sec and note/beat values. TIP: Want to hit the switch and have Poly Pitch dive bomb and land on the selected interval exactly one bar later? Press the knob to select note values and set ShiftTime to "1/1"
- ShiftCurve—Determines the trajectory curve of the pitch shift over time. StartSlow values are concave (slower changes to start, speeding up toward the end); StartFast values are convex (the opposite). The default is "Linear"
- ReturnTime—Determines how long it takes for the signal to return to normal pitch when the block is bypassed. Press the knob to toggle between ms/Sec and note/beat values
- ReturnCurv—Determines the trajectory curve when returning to the original pitch. StartSlow values are concave (slower changes to start, speeding up toward the end); StartFast values are convex (the opposite)
- Tracking—Determines how the poly pitch engine behaves. "X Fast" results in lower latency, ideal for faster lead lines. "X Stable" (the default) results in fewer artifacts when pitch shifting complex, sustained chords. "Fast" and "Stable" are somewhere in between. TIP: If you find yourself changing playing styles—say from fast lead lines to clean, open chords—you can assign this parameter to a footswitch (or snapshots) to optimize the balance between transparency and low latency
- Auto EQ—Determines how much compensation EQ is applied to the shifted signal. If the effected signal sounds too harsh when pitched up (or dull when pitched down), adjust this setting to taste. When set to 0.0, no compensation is applied
- Mix—Controls the wet/dry mix of the pitchshift
- Level—Controls the overall output level of the block
- Pitch/Synth > Poly Wham (Mono), Line 6 Original. Works equally well on guitar and bass, although you might want to tweak the Auto EQ parameter for your particular instrument. See Poly Pitch notes above for additional information
- Pitch/Synth > Poly Capo (Mono), Line 6 Original. Simpler version of Poly Pitch when you just want to change keys. Works equally well on guitar and bass, although you might want to tweak the Auto EQ parameter for your particular instrument. See Poly Pitch notes above for additional information
- Pitch/Synth > 12 String (Mono), Line 6 Original 12-string guitar emulation
- Volume/Pan > Stereo Imager (Stereo), Line 6 Original
- Looper > Shuffling Looper (Mono, Stereo), Line 6 Original. Part looper, part sampler, part inspiration generator, part performance instrument, the Shuffling Looper intelligently chops up your playing and gives you realtime control over reordering, octave shifting, reversing, and repeating. It's all immense fun (even on vocals, drums, and percussion), but you'll want to familiarize yourself with its controls. IMPORTANT: The Shuffling Looper does not currently respond to Command Center > HX Commands or per-function MIDI commands
- Add Looper > Shuffling Looper to a preset and assign it to a footswitch.
- Turn Knob 1 (Slices) to set the number of slices your loop will be chopped into. 8 slices is the default.
- Press the switch to begin recording. The LED lights red, indicating the loop is recording.
- At the end of your loop, press the switch. The LED lights green and the sliced loop sequence immediately plays.
- During playback, adjust the following knobs (or assign them to controllers, like expression pedals or snapshots):
- Slices—Changes the number of slices your loop will be chopped into
- SeqLength—Determines the number of slices in the sequence. This can be changed even after recording a loop
- Shuffle—Determines the likelihood of slices shuffling/reordering. At 0%, the slices never shuffle; at 100%, they're constantly reshuffling
- Octave—Determines the likelihood of slices playing back an octave higher or lower
- Reverse—Determines the likelihood of slices playing backwards
- Repeat—Determines the likelihood of slices repeating
- Smoothing—Higher values apply smoothing between slices and can give a synth-pad type quality, lower values maintain transients. Or set it just high enough to avoid pops and clicks
- Seq Drift—Determines the likelihood of the entire slice sequence changing every time it loops around. When set to 0.0, the same sequence repeats forever; when set to 10.0, the sequence changes completely every time it loops TIP: Assign this parameter to a footswitch set to toggle between a higher number and 0%. If you hear a random sequence you want to maintain, press the switch to set Seq Drift to 0%, and it'll repeat that way indefinitely
- Playback—Sets the looper's playback level
- Low Cut—Applies a low cut (or high pass) filter to the loop, letting you remove looper signal below a certain frequency
- High Cut—Applies a high cut (or low pass) filter to the loop, letting you remove looper signal above a certain frequency
- Want to change it up? While the loop is playing, press the switch to randomize its slice sequence.
- Quickly double-press the switch. Playback/recording stops and the LED lights white, indicating a loop is in memory. Press again to restart.
- While the loop is playing or stopped, press and hold the switch. The recording is deleted and the LED lights dim white.
*NOTE: All product names used in this document are trademarks of their respective owners and neither Yamaha Guitar Group nor Line 6 are associated or affiliated with them. These trademarks appear solely to identify products whose tones and sounds were studied by Line 6 during sound model development.
New Features
True Preset Spillover
Helix Floor, Helix Rack/Control, Helix LT
Despite what some might have you believe, the only digital multieffects units with true preset spillover were the DigiTech GSP1101, 2112, and 2120, and they accomplished this by dedicating one of their two DSPs to spillover and only spillover. (Basically, to hear two dynamically allocated presets with absolutely zero gap—not a global reverb smeared to cover the gap—you need enough DSP to run both of them simultaneously.) So... if you're willing to sacrifice half your DSP—that is, COMPLETELY DISABLE PATH 2—you too can have true preset spillover. IMPORTANT! Unfortunately, Looper recording or playback will not currently spill over from one preset to another. Also, note that there may be a slight hiccup when switching between two presets with different impedance values for the Guitar Input.
- In the Global Settings > Preferences menu, set Preset Spillover to "On." (SHORTCUT: Hold ACTION and press HOME.) A dialog appears, reading "Remove Path 2 to enable preset spillover?"
- Press Knob 6 (OK).
- Press HOME. Path 2 has disappeared! You may now switch presets to your heart's delight with true spillover but note that if Preset A is still spilling over into Preset B (say one of its delay blocks' feedback is making it self-oscillate), switching to Preset C will abruptly cut off Preset A.
- To return to normal operation with two paths, turn Preset Spillover back to "Off". (SHORTCUT: Hold ACTION and press HOME again.) A dialog appears, reading "The preset must be reloaded. All unsaved changes will be lost!" So if you've made changes to the preset, be sure to save it before turning Spillover off.
- Press Knob 6 (OK).
But but but... I don't wanna lose Path 2 just for spillover!
Then keep using snapshots.
Favorites
Helix Floor, Helix Rack/Control, Helix LT, Helix Native, HX Effects, HX Stomp
If you've dialed in an amp or effects block exactly the way you like it, you can now save its settings as a favorite so it can be added very quickly, complete with bypass state and footswitch assignment. Favorites appear in a new "Favorites" category and can be renamed, reordered, and cleared. TIP: If you don't want a favorite to be recalled with its footswitch assignment, add the block before you assign a switch.
- Choose one of your favorite amps or effects and tweak it exactly how you like it, with or without footswitch assignment.
- Press ACTION and then press Add to Favorites. The Favorites list appears.
- If you wish to replace an existing favorite (you get 128 total), select it and press Replace Favorite. If you wish to add a new favorite, select the location where you want to place it and press Add New Favorite.
- OPTIONAL: While the Favorites list is open, press ACTION.
- To reorder the selected favorite up or down the list, turn Reorder Favorite (on HX Effects, press Reorder Up or Reorder Down)
- To rename the selected favorite, press Rename Favorite
- To clear the selected favorite, press Clear Favorite
- To clear all favorites, press Clear All Favorites. A dialog appears. Press OK to confirm.
All right, so what?
Here's what:
- At any time, select an empty block and turn the joystick (Big Knob on HX Effects or Lower Knob on HX Stomp). All your perfectly-tweaked favorite amps and effects instantly appear, without having to open the model list at all. If you typically keep model categories on the same stomp footswitches, you could conceivably create a brand new preset with all of your favorite stuff—including all footswitch assignments—in less than 10 seconds. Creating tones has never been faster or easier. TIP: If you keep one or more external pedals connected to Helix's FX Loops, add the FX Loop blocks as favorites and then rename them after the real thing.
User Model Defaults
Helix Floor, Helix Rack/Control, Helix LT, Helix Native, HX Effects, HX Stomp
3.0 lets you save any amp, cab, or effect block's settings as default so every time you call that model up, it sounds exactly the way you want it. Or, if you want to revert it to factory default, you can do that too. NOTE: Unlike Favorites, user model defaults do not store any footswitch assignments.
- Choose any model and tweak it exactly how you like it.
- Press ACTION and then User Default. From Helix Native or HX Edit, right-click (Mac: control-click) the block icon and select "User Default"
Global Settings > Preferences > Auto Impedance
Helix Floor, Helix Rack/Control, Helix LT, HX Stomp
A new Global Settings > Preference parameter determines how the Guitar In's impedance circuit behaves when Input > In-Z is set to "Auto." When set to "First Block" (the default), the impedance circuit reflects the impedance of the first block on Path 1A, regardless of whether it's enabled or bypassed. When set to "First Enabled", the impedance circuit reflects the impedance of the first enabled block on Path 1A. Called "Auto Impedance" because "Sorry-this-took-so-long-we-love-you-Tito83" wouldn't fit.
Min/Max Value Indicators
Helix Floor, Helix Rack/Control, Helix LT, HX Stomp [Feature already in HX Effects]
Parameters assigned to controllers or snapshots now display small Min Value (below) and Max Value (above) indicators. You can now see the range of continuous controllers from the Home screen.
8 Blocks in HX Stomp
HX Stomp
HX Stomp's simultaneous block count has been increased from six to eight.
IMPORTANT! Although HX Stomp now has two additional block locations, this doesn't mean it magically has more DSP horsepower to accommodate those blocks. Don't be surprised if you're not able to fill all eight blocks with exactly what you want, especially considering the new polyphonic pitch models take up a lot more DSP. We've taken note of those who've bemoaned HX Stomp's 6 block limit, and if the same person now complains about running out of DSP with 8 blocks, we're sending hooligans to their home to administer an atomic wedgie.
NOTE: It shouldn't come as any surprise, but any presets you make in 3.0 will not be compatible with 2.92 or earlier firmware.
Command Center in HX Stomp
HX Stomp [Feature already in Helix Floor, Helix Rack/Control, Helix LT, and HX Effects]
Why would people expect a stompbox with only three footswitches to also act as a master MIDI controller? Yeah, we don't know either, but enough of you asked for it and it wasn't exceedingly difficult to add.
- Press together to open the Menu and then press Knob 3 (Command Center).
- Turn the Upper Knob to select the command source (Instant 1-6, Footswitch 1-5, or EXP 1-2).
- Turn Knob 1 (Command) to select the type of command you wish to transmit. For information on the types of commands HX Stomp transmits, see the HX Stomp 3.0 Owner's Manual.
Wait, does this mean I can use HX Stomp as both an audio interface AND a remote control for YouTube lesson videos by sending QWERTY hotkeys?
Yes.
Tuner in Helix Native
Helix Native [Feature already in Helix and HX hardware]
Helix Native now has the same needle and strobe tuner from Helix.
- Click the tuner icon.
- Choose the tuner type by selecting Coarse, Fine, or Strobe.
Gain Reduction Meters in Helix Native
Helix Native [Feature already in Helix hardware]
The following block types display a gain reduction meter in the inspector when selected:
- Dynamics > Compressor
- Dynamics > Gate
Artist Presets
IMPORTANT! Because we never want to overwrite your own presets, upgrading to 3.0 does NOT automatically make these presets visible; you will need to manually restore them. Restoring factory setlists and presets will completely overwrite your own, so make sure they're backed up first!
TIP: With Helix Floor/Rack/LT/Native, if you want to keep both your presets and the latest factory presets, back up your custom presets as setlists and after the procedure below, drag your setlists onto unused setlist locations.
- Make sure you've backed up your presets and turn off Helix/HX.
- Perform the following procedure:
- Helix Floor/LT: While holding footswitches 7 and 8 (two leftmost switches on the bottom row), turn on Helix Floor/LT. Wait for "Will restore..." to appear and let go
- Helix Rack/Control: While holding knobs 3 and 4 (two middle knobs below the screen), turn on Helix Rack. Wait for "Will restore..." to appear and let go
- Helix Native: Click the gear icon in the lower left corner, click the Presets/IRs tab, and click "Restore Factory Setlists"
Helix 3.0 includes factory presets created by the following artists:
Helix Floor, Helix Rack/Control, Helix LT, Helix Native [FACTORY 1 setlist]
- 13B-14C—Fish (Christina Aguilera)
- 14D—Jeff Waters (Annihilator)
- 15A, 15B—Richie Castellano (Blue Öyster Cult)
- 15C—Robbie Calvo
- 15D—Ryan "Fluff" Bruce (Dragged Under)
- 16A-16D—Felix Martin
- 17A—Mario Quintaro (Spotlights)
- 17B, 17C—Bumblefoot (Sons of Apollo)
- 17D, 18A—Billy Sheehan (Sons of Apollo, Winery Dogs)
- 18B—Andy Abad (Jennifer Lopez)
- 18C-19B—Misha Mansoor (Periphery)
- 19C—Duke Erikson (Garbage)
- 19D—Steve Marker (Garbage)
- 20A—Eric Avery (Garbage)
- 20B—Bill Kelliher (Mastodon)
- 20C—John Browne (Monuments)
- 20D—Olly Steele (Monuments)
- 21A—Jon Button (The Who)
- 21B—Trev Lukather (Levara)
- 21C—Steve Howe (Yes)
- 21D—Dustin Kensrue (Thrice)
- 22A—Pete Thorn
- 22B—Rhett Shull
- 22C—Jade Puget (A.F.I.)
- 22D, 23A—Jeff Schroeder (The Smashing Pumpkins)
- 23B—Graham Coxon (Blur)
- 23C, 23D—Chris Buck
- 24A—Lewis Allen (Sam Smith)
- 24B-25A—Rabea Massaad
- 25B—Soren Andersen
- 25C—Devin Townsend
- 25D—Nathan Navarro
- Vernon Reid
- 27B—Philip Bynoe
- 27C, 27D—Markus Reuter
HX Effects
- 12A-12D—Julien Baker
- 13A—Sarah "Noveller" Lipstate
- 13B, 13C—Steve Stevens
3.0 Owner's Manuals
Helix Floor, Helix Rack/Control, Helix LT, Helix Native, HX Effects, HX Stomp, HX Edit
As it's immensely expensive and complicated to translate Owner's Manuals into the many languages we're required by law to provide, Helix and HX Owner's Manuals have not been updated since 2.X. They've now been updated for 3.0:
- Helix Floor: Link available soon—watch this space
- Helix Rack/Control: Link available soon—watch this space
- Helix LT: Link available soon—watch this space
- Helix Native: Link available soon—watch this space
- HX Effects: Link available soon—watch this space
- HX Stomp: Link available soon—watch this space
- HX Edit: Link available soon—watch this space
Other Changes and Improvements
- On HX Stomp, Global Settings > Footswitches > Stomp Select now has an "Off" value. When set this way, neither touching nor pressing will change which block is in focus [value is already in Helix Floor, Rack, and LT]
- Favorites can now be restored from a backup, independently of setlists, presets, IRs, and Global Settings
- User Model Defaults can now be restored from a backup, independently of setlists, presets, IRs, and Global Settings
- Gain reduction meters now also appear for the Input block's noise gate
- Gain reduction meters and signal present indicators are now more responsive
- Parameter knob ballistics have been improved
- New splash screens for Helix Floor/Rack/LT and HX Stomp
- Parameter slider handles are thinner to accommodate new min/max value indicators
- Press-turning a knob to assign Snapshot control now requires a bit more turning to minimize accidental assignments
- Pitch/Synth > 4 OSC Generator OscFreq parameters now display single Hz resolution between 100 and 1000 Hz
Bug Fixes in 3.01
- In extremely rare cases with specific blocks in a specific order, audio could become severely corrupted–FIXED
- In certain cases, the Delay > Glitch Delay can exhibit minor pops and clicks when placed on Path 2, regardless of where its Smoothing parameter is set (that is, not the good type of glitchiness)—FIXED
- Many other minor fixes and improvements
Bug Fixes in 3.0
- When synced to external MIDI clock or retriggering via TAP, certain models with tremolo circuits' LFO set to square wave would invert the waveform–FIXED
- If Helix had been left powered on for 24 hours with the same preset active (What? Why?), its reverb blocks could become disabled until selecting another preset—FIXED
- Many other minor fixes and improvements
Known Issues in 3.01
- Distortion > Vermin Dist's resonant filter was mapped incorrectly, and is especially apparent at higher gain settings. This will be fixed in 3.10
- In the Poly Pitch models, very fast playing may exhibit some minor onset smearing. Additional improvements to the poly pitch engine are forthcoming
- The Shuffling Looper does not currently respond to Command Center > HX Commands or per-function MIDI commands
- Variax Model min and max sliders do not automatically update when a Variax is connected
- When Tuner View is active while Spillover is engaged, changing presets can sometimes cause audio output to stop
- After importing a .WAV file into the current 'Empty' slot of an Impulse Response block, all audio output can stop
- Clearing a Split block on Path 2 does not automatically remove its bypass assignment
Get Download
Helix Native
Helix Native
This update improves the stability of Helix Native and is recommended for all users.
- Fixes a crash that could occur when dialog boxes are presented
- Fixes a crash that would occur when loading a preset with a missing IR
Helix Native
Helix Native
This update improves the stability of Helix Native and is recommended for all users.
- Fixes a crash that would occur when loading a preset with a missing IR
Get Download
Helix Native
Helix Native
Helix/HX Firmware 2.92
Helix/HX 2.92 and Helix Native 1.92 include important bug fixes, and are strongly recommended for all Helix and HX owners. Doesn't matter what firmware your Helix/HX product is currently running; you can go straight to 2.92.
IMPORTANT! Carefully read and follow the update instructions below. If you don't—and then run to the forums asking why it's not working—the interwebs will make fun of you.
Updating Helix/HX Firmware to 2.92
Helix Floor, Helix Rack, Helix LT, HX Effects, HX Stomp
STEP 1—Updating HX Edit to 2.92 (assuming you haven't done this already)
- Log onto line6.com, download, and install HX Edit 2.90:
STEP 2—Updating Helix/HX Firmware to 2.92
- If you have Helix Rack/Control, turn off Helix Control. Also, shut down all Line 6 software or any programs that use audio, like DAWs, iTunes, Spotify, video games, etc.
- Connect your Helix/HX device to a Mac or PC via USB (do not use any sort of USB hub, which may include the front USB ports on towers) and turn it on.
- Launch the new version of HX Edit 2.92 you installed in Step 1 above. If you're not signed in, click "Check for Updates" in the lower right corner and sign in. If you're already signed in, a dialog panel appears, indicating an update is available.
- Click "Update Now." A window appears, asking you to back up your Helix/HX hardware. Click OK, optionally rename the backup and/or choose a different destination folder, and then click "Create Backup." IMPORTANT! Note the location where you've saved the backup.
- Continue following the prompts. Once updated, the window reads "Update Complete" and your Helix/HX hardware begins rebuilding its presets; wait for this to complete and click "Back to HX Edit."
- From the File pull-down menu, click "Restore from backup..." A dialog appears. Click "Restore Backup" and then "Yes."
- Once the restore has finished, turn your Helix/HX product off and then on again.
- If you have Helix Control connected to Helix Rack, turn on Helix Control. Helix Rack reads "Helix Control must be updated to work properly." Press Knob 6 (OK).
Bug Fixes in 2.92
- When Global Settings > Footswitches > Stomp Select is set to "Off" or "Press," touch-holding switches could still result in assignment and swap dialogs—FIXED
- The TAP LED in Helix Floor, Rack/Control, and LT could flash slightly slower than the actual tempo—FIXED
- In HX Effects' Command Center, Hotkey commands could display values for HX Preset commands—FIXED
- In HX Effects' Command Center, assigning a hold-type HX command could sometimes not engage properly—FIXED
- Engaging the MODE switch while Global Settings were visible could result in unexpected behavior—FIXED
- Engaging the MODE switch after selecting a different model during a bank queue could result in unexpected behavior—FIXED
- In rare cases, bypass and parameter changes made from Helix Floor, Rack, or LT may not be reflected in HX Edit—FIXED
- On Helix Floor and Helix Control's 1 Switch Looper scribble strip, Undo or Redo text could appear—FIXED
- In HX Effects' Command Center, adding an HX hold-type command could result in an inverted switch state—FIXED
- In HX Effects' Command Center, adding an HX Snapshot command could result in the wrong LED color—FIXED
- In HX Effects' Command Center, engaging a HX Looper > 1/2 Speed or Full speed command could sometimes cause a lockup—FIXED
- In rare cases on Helix Floor, Rack, or LT, renaming a snapshot could result in a preset change—FIXED
- The polarity of some amp models was reversed in 2.91—FIXED
- Dynamics > Rochester Comp could exhibit audible phase cancellation when its Mix parameter is set to 100%—FIXED
- Dynamics > Rochester Comp now behaves as expected when the Ratio is set lower than 3:1—FIXED
- In rare cases, scrolling quickly through the model list in HX Edit could cause the hardware to stop responding—FIXED
- The Looper > 1 Switch Looper LED states would not function properly when controlled via incoming MIDI CCs—FIXED
Known Issues in 2.92
- A slight thump can be heard when loading a Distortion > Kinky Boost, Arbitrator Fuzz, or Tycoctavia Fuzz model
- While backing up, the scribble strip on FS8 can sometimes flicker (Helix Floor, Helix Rack/Control)
- In very rare cases, leaving the unit on for many hours can sometimes cause reverb models to cease outputting audio
- In a preset with two IRs blocks, moving one IR block to Path B can sometimes cause the other IR block to reset its Impulse Response to slot 1
- In rare cases, after exporting and then importing presets using HX Edit, the Split block's bypass state can sometimes change (Helix Floor, Helix Rack/Control, Helix LT)
- When using Blue Cat Audio's PatchWork VST host software, resizing the Helix Native window may not scale smoothly (Helix Native)
Helix Native
Helix Native
Helix/HX 2.91
Helix/HX 2.91 includes important bug fixes, and is strongly recommended for all Helix and HX owners.
IMPORTANT!
Carefully read and follow the update instructions below. If you don’t — and then run to the forums asking why it’s not working—the interwebs will make fun of you.
Updating to 2.91
Helix Floor, Helix Rack, Helix LT, HX Effects, HX Stomp
STEP 1 — Updating HX Edit to 2.90 (assuming you haven’t done this already)
- Log onto line6.com , download, and install HX Edit 2.90:
- macOS: https://line6.com/software/readeula.html?rid=9678
- Windows 7/8/10: https://line6.com/software/readeula.html?rid=9677
STEP 2 — Updating Helix/HX Firmware to 2.91
- If you have Helix Rack/Control, turn off Helix Control. Also, shut down all Line 6 software or any programs that use audio, like DAWs, iTunes, Spotify, video games, etc.
- Connect your Helix/HX device to a Mac or PC via USB (do not use any sort of USB hub, which may include the front USB ports on towers) and turn it on.
- Launch the new version of HX Edit 2.90 you installed in Step 1 above. If you’re not signed in, click “Check for Updates” in the lower right corner and sign in. If you’re already signed in, a dialog panel appears, indicating an update is available.
- Click “Update Now.” A window appears, asking you to back up your Helix / HX hardware. Click OK, optionally rename the backup and / or choose a different destination folder, and then click “Create Backup.” IMPORTANT! Note the location where you’ve saved the backup.
- Continue following the prompts. Once updated, the window reads “Update Complete” and your Helix / HX hardware begins rebuilding its presets; wait for this to complete and click “Back to HX Edit.”
- From the File pull-down menu, click “Restore from backup…” A dialog appears. Click “Restore Backup” and then “Yes.”
- Turn your Helix / HX product off and then on again.
- If you have Helix Control connected to Helix Rack, turn on Helix Control. Helix Rack reads “Helix Control must be updated to work properly.” Press Knob 6 (OK).
Bug Fixes in 2.91
- Resolves multiple unexpected behavior that can occur when adjusting the Volume knob, entering the Tuner, or other actions during the first 30 seconds after power up—FIXED
- Engaging the Tap Tempo switch would calculate a different tempo than intended—FIXED
- When routing Path 1 to Path 2, the Path 2A andor Path 2B input blocks could display clipping even when the signal was not—FIXED/
- For presets with parallel paths, the Mixer > Merge block boosts signals by 3dB—FIXED
Known Issues in 2.91
- A slight thump can be heard when loading a Distortion > Kinky Boost, Arbitrator Fuzz, or Tycoctavia Fuzz model
- While backing up, the scribble strip on FS8 can sometimes flicker (Helix Floor, Helix RackControl)/
- In very rare cases, leaving the unit on for many hours can sometimes cause reverb models to cease outputting audio
- In a preset with two IRs blocks, moving one IR block to Path B can sometimes cause the other IR block to reset its Impulse Response to slot 1
- In rare cases, after exporting and then importing presets using HX Edit, the Split block’s bypass state can sometimes change (Helix Floor, Helix RackControl, Helix LT)/
- When using Blue Cat Audio’s PatchWork VST host software, resizing the Helix Native window may not scale smoothly (Helix Native)
- The Looper block’s Overdub function does not currently respond to incoming MIDI (HX Stomp)
- While connected to HX Edit, quickly changing models through the IR block can sometimes result in a unit freeze (HX Stomp)
Helix Native
Helix Native
Helix/HX 2.91
Helix/HX 2.91 includes important bug fixes, and is strongly recommended for all Helix and HX owners.
IMPORTANT!
Carefully read and follow the update instructions below. If you don’t — and then run to the forums asking why it’s not working—the interwebs will make fun of you.
Updating to 2.91
Helix Floor, Helix Rack, Helix LT, HX Effects, HX Stomp
STEP 1 — Updating HX Edit to 2.90 (assuming you haven’t done this already)
- Log onto line6.com , download, and install HX Edit 2.90:
- macOS: https://line6.com/software/readeula.html?rid=9678
- Windows 7/8/10: https://line6.com/software/readeula.html?rid=9677
STEP 2 — Updating Helix/HX Firmware to 2.91
- If you have Helix Rack/Control, turn off Helix Control. Also, shut down all Line 6 software or any programs that use audio, like DAWs, iTunes, Spotify, video games, etc.
- Connect your Helix/HX device to a Mac or PC via USB (do not use any sort of USB hub, which may include the front USB ports on towers) and turn it on.
- Launch the new version of HX Edit 2.90 you installed in Step 1 above. If you’re not signed in, click “Check for Updates” in the lower right corner and sign in. If you’re already signed in, a dialog panel appears, indicating an update is available.
- Click “Update Now.” A window appears, asking you to back up your Helix / HX hardware. Click OK, optionally rename the backup and / or choose a different destination folder, and then click “Create Backup.” IMPORTANT! Note the location where you’ve saved the backup.
- Continue following the prompts. Once updated, the window reads “Update Complete” and your Helix / HX hardware begins rebuilding its presets; wait for this to complete and click “Back to HX Edit.”
- From the File pull-down menu, click “Restore from backup…” A dialog appears. Click “Restore Backup” and then “Yes.”
- Turn your Helix / HX product off and then on again.
- If you have Helix Control connected to Helix Rack, turn on Helix Control. Helix Rack reads “Helix Control must be updated to work properly.” Press Knob 6 (OK).
Bug Fixes in 2.91
- Resolves multiple unexpected behavior that can occur when adjusting the Volume knob, entering the Tuner, or other actions during the first 30 seconds after power up—FIXED
- Engaging the Tap Tempo switch would calculate a different tempo than intended—FIXED
- When routing Path 1 to Path 2, the Path 2A andor Path 2B input blocks could display clipping even when the signal was not—FIXED/
- For presets with parallel paths, the Mixer > Merge block boosts signals by 3dB—FIXED
Known Issues in 2.91
- A slight thump can be heard when loading a Distortion > Kinky Boost, Arbitrator Fuzz, or Tycoctavia Fuzz model
- While backing up, the scribble strip on FS8 can sometimes flicker (Helix Floor, Helix RackControl)/
- In very rare cases, leaving the unit on for many hours can sometimes cause reverb models to cease outputting audio
- In a preset with two IRs blocks, moving one IR block to Path B can sometimes cause the other IR block to reset its Impulse Response to slot 1
- In rare cases, after exporting and then importing presets using HX Edit, the Split block’s bypass state can sometimes change (Helix Floor, Helix RackControl, Helix LT)/
- When using Blue Cat Audio’s PatchWork VST host software, resizing the Helix Native window may not scale smoothly (Helix Native)
- The Looper block’s Overdub function does not currently respond to incoming MIDI (HX Stomp)
- While connected to HX Edit, quickly changing models through the IR block can sometimes result in a unit freeze (HX Stomp)
Get Download
Helix Native
Helix Native
Helix / HX 2.90 | Helix Native 1.90
“The Always Level Presets By Ear at Stage Volume with the Rest of the Band Playing Update”
Helix / HX 2.90 and Helix Native 1.90 include new amps, cabs, effects, features, and bug fixes, and is strongly recommended for all Helix and HX owners.
Updating to 2.90
Helix Floor, Helix Rack, Helix LT, HX Effects, HX Stomp
STEP 1 — Updating HX Edit to 2.90
- Log onto line6.com, download, and install HX Edit 2.90:
- Mac OS X: https://line6.com/software/readeula.html?rid=9678
- Windows 7/8/10: https://line6.com/software/readeula.html?rid=9677
STEP 2 — Updating Helix / HX Firmware to 2.90
- If you have Helix Rack/Control, turn off Helix Control. Also, shut down all Line 6 software or any programs that use audio, like DAWs, iTunes, Spotify, video games, etc.
- Connect your Helix/HX device to a Mac or PC via USB (do not use any sort of USB hub, which may include the front USB ports on towers) and turn it on.
- Launch the new version of HX Edit 2.90 you installed in Step 1 above. If you’re not signed in, click “Check for Updates” in the lower right corner and sign in. If you’re already signed in, a dialog panel appears, indicating an update is available.
- Click “Update Now.” A window appears, asking you to back up your Helix/HX hardware. Click OK, optionally rename the backup and / or choose a different destination folder, and then click “Create Backup.”
- Continue following the prompts. Once updated, the window reads “Update Complete” and your Helix / HX hardware begins rebuilding its presets; wait for this to complete and click “Back to HX Edit.”
- If you have Helix Control connected to Helix Rack, turn on Helix Control. Helix Rack reads “Helix Control must be updated to work properly.” Press Knob 6 (OK).
New Amp Models in 2.90
Helix Floor, Helix Rack, Helix LT, Helix Native, HX Stomp
- Revv Gen Purple, based on* the purple (Gain 1) channel of the Revv® Generator 120
New Cab Models in 2.90
Helix Floor, Helix Rack, Helix LT, Helix Native, HX Stomp
- 1x12 Fullerton, based on* the classic 1958 Fender® 5C3 Tweed Deluxe
- 1x12 Grammatico, based on* the modern 2016 Grammatico LaGrange
New Effects Models in 2.90
Helix Floor, Helix Rack, Helix LT, Helix Native, HX Effects, HX Stomp
- Distortion > Alpaca Rouge (Mono, Stereo), inspired by* the Way Huge® Red Llama (modded)
- Distortion > Legendary Drive (Mono, Stereo), based on* the Carvin VLD1 Legacy Drive (high gain channel)
- Distortion > Xenomorph Fuzz (Mono, Stereo), inspired by* the Subdecay Harmonic Antagonizer
- Dynamics > Rochester Comp (Mono, Stereo), based on* the Ashly® CLX-52 and created in conjunction with Billy Sheehan
- Modulation> Pebble Phaser (Mono, Stereo), based on* the Electro-Harmonix® Small Stone phaser
- Split > Dynamic, Line 6 original. This new Split block type lets you dynamically route signals to Path B, depending on how hard you play. For example, you could roll your guitar’s volume back a bit and play clean chords through a Grammatico on Path A and then roll it back up and dig in to blend in a searing Revv Gen Purple lead on Path B
- Knob 1 (Threshold) — Signals below the Threshold are routed to Path A; signals above the Threshold are routed to Path B
- Knob 2 (Attack) — Determines how fast the signal routes to Path B once reaching the Threshold
- Knob 3 (Decay) — Determines how fast the signal returns to Path A once falling below the Threshold
- Knob 4 (Reverse) — Swaps dynamic path routing. When set to “On”, signals below the Threshold are routed to Path B and signals above the Threshold are routed to Path A
NOTE: All product names used in this document are trademarks of their respective owners and neither Yamaha Guitar Group nor Line 6 are associated or affiliated with them. These trademarks appear solely to identify products whose tones and sounds were studied by Line 6 during sound model development.
New Features in Helix/HX Firmware 2.90
Output Meters
Helix Floor, Helix Rack / Control, Helix LT
The following block types display output meters in the inspector when selected:
- Output
- Send/Return > Send
- Send/Return > FX Loop
IMPORTANT! Meters (in any product, not just Helix) are never appropriate for ensuring consistent levels from preset to preset. The models you use, the preset's frequency and dynamic response, your guitar or bass, your pickups, your playback system, your environment, your location in front of (or behind!) your playback system, and especially your bandmates all radically affect the perceived loudness of various presets. It's very common for the meters of one preset to show it's louder than another, while what you hear is the exact opposite. ALWAYS trust your ears when leveling presets, and whenever possible, level presets at stage volume, with the rest of the band playing.
Gain Reduction Meters
Helix Floor, Helix Rack / Control, Helix LT
The following block types display a gain reduction meter in the inspector when selected:
- Dynamics > Compressor (the 3-Band Comp displays three meters)
- Dynamics > Gate
Signal Present/Clip Indicators
Helix Floor, Helix Rack / Control, Helix LT, HX Stomp
The following block types now display a pale green background when signal is present and a bright red background if the block clips:
- Input
- Output
- Send/Return > Send (clip indication only)
- Send/Return > Return (clip indication only)
- Send/Return > FX Loop (clip indication only)
Improved IR Referencing
Helix Floor, Helix Rack / Control, Helix LT, Helix Native, HX Effects, HX Stomp
Impulse Response blocks now reference each IR file by waveform instead of index number. This means that when presets are shared and the recipient has the same IRs, they'll appear in the right place without having to manually reorder all IRs to match.
IMPORTANT! For improved IR referencing to take place, all presets must be rebuilt. Presets should've automatically been rebuilt after updating to 2.90, but if they didn't, you can manually rebuild them:
- Helix, Helix LT: While holding FS10 and FS11 (bottom row), turn on Helix. Wait for "Will rebuild all Presets..." to appear and let go
- Helix Rack: While holding Knobs 1 and 3 below the screen, turn on Helix Rack. Wait for "Will rebuild all Presets..." to appear and let go
- HX Effects: No preset rebuild necessary
- HX Stomp: While holding both the Upper and Lower Knobs, turn on HX Stomp. Wait for "Will rebuild Presets..." to appear and let go
- Helix Native: The first time you open the plug-in, a dialog appears, reading "Your presets are being parsed to associate IR blocks intelligently with the IRs they reference." Click OK.
Command Center > HX Preset
Helix Floor, Helix Rack / Control, Helix LT, HX Effects
A new Command Center command type lets you assign any preset (or Next Preset or Previous Preset) to any stomp switch. Together with HX Snapshot and HX Looper commands, you can now customize Stomp footswitch mode to your liking.
- From the Command Center, select a stomp switch and turn Knob 1 (Command) to select "HX Preset."
- Turn Knob 2 (Preset) to choose Next Preset, Previous Preset, or any single preset within the current setlist.
IMPORTANT! Although stomp mode switches can be assigned to multiple functions, to avoid unintended behavior, we strongly recommend HX Preset commands be assigned to empty footswitches.
Command Center > HX Snapshot
Helix Floor, Helix Rack / Control, Helix LT, HX Effects
A new Command Center command type lets you assign any snapshot (or Snapshot Up or Snapshot Down) to any stomp switch. Together with HX Preset and HX Looper commands, you can now customize Stomp footswitch mode to your liking.
- From the Command Center, select a stomp switch and turn Knob 1 (Command) to select "HX Snapshot."
- Turn Knob 2 (Behavior) to set the behavior of the stomp switch:
- Press / Release — Pressing the switch engages the Knob 3 (Press) function; releasing the switch engages the Knob 4 (Release) function.
- Press / Hold — Briefly pressing the switch engages the Knob 3 (Press) function; pressing and holding the switch for 1 second engages the Knob 4 (Hold) function
IMPORTANT! Although stomp mode switches can be assigned to multiple functions, to avoid unintended behavior, we strongly recommend HX Snapshot commands be assigned to empty footswitches.
Command Center > HX Looper
Helix Floor, Helix Rack / Control, Helix LT, HX Effects
A new Command Center command type lets you assign any Looper function to any stomp mode switch or instant command. Together with HX Preset and HX Looper commands, you can now customize Stomp footswitch mode to your liking. Note that a 6 Switch Looper or 1 Switch Looper block must be present in your preset for HX Looper commands to function properly. Also, caution should be taken when assigning HX Looper commands, as only the Press function is displayed on the scribble strip (Performance View on Helix LT); Release and Hold functions are not displayed.
- From the Command Center, select a stomp switch and turn Knob 1 (Command) to select "HX Looper."
- Turn Knob 2 (Behavior) to set the behavior of the stomp switch:
- Press / Release — Pressing the switch engages the Knob 3 (Press) function; releasing the switch engages the Knob 4 (Release) function.
- Press / Hold—Briefly pressing the switch engages the Knob 3 (Press) function; pressing and holding the switch for 1 second engages the Knob 4 (Hold) function.
IMPORTANT! Although stomp mode switches can be assigned to multiple functions, to avoid unintended behavior, we strongly recommend HX Looper commands be assigned to empty footswitches.
Shortcut > Model Subcategory
Helix Floor, Helix Rack / Control, Helix LT, HX Effects, HX Stomp
You can now quickly skip through model subcategories without ever having to open the model list. Finding a specific amp or effect is now faster than ever.
- Helix / Helix Rack / Helix LT — From the Home screen, hold < PAGE and press PAGE > to jump to the the next subcategory. Hold PAGE < and press > PAGE to jump to the previous subcategory. Then turn the joystick to select models within that subcategory
- HX Effects — From Stomp view, press and turn the Big Knob to skip subcategories, then turn normally to select models within that subcategory
- HX Stomp — From Edit view, press and turnthe Lower Knob to skip subcategories, then turn normally to select models within that subcategory
For example, if you have HX Stomp and have selected an empty block location, pressing and turning the Lower Knob will jump to the first model in each subcategory: Distortion > Mono, Distortion > Stereo, Distortion > Legacy, Dynamics > Mono, Dynamics > Stereo, Dynamics > Legacy, EQ > Mono, EQ > Stereo, Modulation > Mono, Modulation > Stereo, and so on.
Update Firmware From HX Edit
Helix Floor, Helix Rack / Control, Helix LT, HX Effects, HX Stomp
Instead of hanging out on social media, desperately asking when the next firmware’s dropping, you can now, I dunno, actually play guitar? As soon as a new update becomes available, HX Editwill tell you, and all you gotta do is follow the prompts.
New Features in Helix Native1.90
NOTE: For additional information on Helix Native 1.90 or HX Edit 2.90, check out the latest Helix Native and HX Edit Pilot’s Guides, which are automatically installed with the new 1.90 / 2.90 software.
A/B Compare
Helix Native
A new set of buttons lets you temporarily store all of the Helix Native instance’s model selection and parameter settings, then tweak any number of parameters and easily compare an A version and a B version. Click the middle button to quickly copy the current state to the other (A to B or B to A).
Other Changes and Improvements in Helix / HX 2.90 | Helix Native 1.90
- The EQ > Low / High Shelf model’s Hi Freq parameter now goes down to 400Hz (Helix Floor / Rack / LT, HX Effects, HX Stomp, Helix Native)
- Booting up now takes roughly half the time (Helix Floor / Rack / LT, HX Effects)
- While in Tuner mode, the three footswitch LEDs act as additional tuning indicators (HX Stomp [feature is already in HX Effects])
- Edited presets now display a small “E” icon (HX Effects, HX Stomp [feature is already in Helix Floor / Rack / LT])
- Blocks can now quickly be copied and pasted across signal flows by Option-dragging (Windows: Control-dragging) the block (Helix Native, HX Edit)
- IRs can now be dragged directly from the Impulses list onto the signal flow view (Helix Native, HX Edit)
- Double-clicking an IR in the Impulses list now auto-populates the currently selected IR block (Helix Native, HX Edit)
- Parameters with very few values now appear as select boxes instead of sliders (Helix Native, HX Edit)
- Parameters assigned to controllers now scale slider width to reflect Min and Max values (Helix Native)
- A “Check for Updates” box has been added to the Preferences window (Helix Native, HX Edit)
- Lots of stability and usability improvements across the board (Helix Native, HX Edit)
Bug Fixes in 2.90
- Distortion > Obsidian Drive’s polarity was reversed
- Remotely changing Powercab Plus speaker modes upon preset recall could sometimes result in a volume bump
- Using Learn to quickly assign a parameter to footswitch control could occasionally swap the switch’s Latching / Momentary setting
- Setting the Input block on Path 1A to S/PDIF could stop passing audio if a new Path 1B Input block had been created
- Connecting an expression pedal to Helix Control could sometimes cause the pedal position display to behave erratically
- Lots of other minor bug fixes
Known Issues in 2.90
- A slight thump can be heard when loading a Distortion > Kinky Boost, Arbitrator Fuzz, or Tycoctavia Fuzz model
- While backing up, the scribble strip on FS8 can sometimes flicker (Helix Floor, Helix Rack / Control)
- In very rare cases, leaving the unit on for many hours can sometimes cause reverb models to cease outputting audio
- In a preset with two IRs blocks, moving one IR block to Path B can sometimes cause the other IR block to reset its Impulse Response to slot 1
- In rare cases, after exporting and then importing presets using HX Edit, the Split block’s bypass state can sometimes change (Helix Floor, Helix RackControl, Helix LT)/
- When using Blue Cat Audio’s PatchWork VST host software, resizing the Helix Native window may not scale smoothly (Helix Native)
Get Download
Helix Native
Helix Native
Helix / HX 2.90 | Helix Native 1.90
“The Always Level Presets By Ear at Stage Volume with the Rest of the Band Playing Update”
Helix / HX 2.90 and Helix Native 1.90 include new amps, cabs, effects, features, and bug fixes, and is strongly recommended for all Helix and HX owners.
Updating to 2.90
Helix Floor, Helix Rack, Helix LT, HX Effects, HX Stomp
STEP 1 — Updating HX Edit to 2.90
1. Log onto line6.com, download, and install HX Edit 2.90:
- Mac OS X: link
- Windows 7/8/10: link
STEP 2 — Updating Helix / HX Firmware to 2.90
- If you have Helix Rack/Control, turn off Helix Control. Also, shut down all Line 6 software or any programs that use audio, like DAWs, iTunes, Spotify, video games, etc.
- Connect your Helix/HX device to a Mac or PC via USB (do not use any sort of USB hub, which may include the front USB ports on towers) and turn it on.
- Launch the new version of HX Edit 2.90 you installed in Step 1 above. If you’re not signed in, click “Check for Updates” in the lower right corner and sign in. If you’re already signed in, a dialog panel appears, indicating an update is available.
- Click “Update Now.” A window appears, asking you to back up your Helix/HX hardware. Click OK, optionally rename the backup and / or choose a different destination folder, and then click “Create Backup.”
- Continue following the prompts. Once updated, the window reads “Update Complete” and your Helix / HX hardware begins rebuilding its presets; wait for this to complete and click “Back to HX Edit.”
- If you have Helix Control connected to Helix Rack, turn on Helix Control. Helix Rack reads “Helix Control must be updated to work properly.” Press Knob 6 (OK).
New Amp Models in 2.90
Helix Floor, Helix Rack, Helix LT, Helix Native, HX Stomp
- Revv Gen Purple, based on* the purple (Gain 1) channel of the Revv® Generator 120
New Cab Models in 2.90
Helix Floor, Helix Rack, Helix LT, Helix Native, HX Stomp
- 1x12 Fullerton, based on* the classic 1958 Fender® 5C3 Tweed Deluxe
- 1x12 Grammatico, based on* the modern 2016 Grammatico LaGrange
New Effects Models in 2.90
Helix Floor, Helix Rack, Helix LT, Helix Native, HX Effects, HX Stomp
- Distortion > Alpaca Rouge (Mono, Stereo), inspired by* the Way Huge® Red Llama (modded)
- Distortion > Legendary Drive (Mono, Stereo), based on* the Carvin VLD1 Legacy Drive (high gain channel)
- Distortion > Xenomorph Fuzz (Mono, Stereo), inspired by* the Subdecay Harmonic Antagonizer
- Dynamics > Rochester Comp (Mono, Stereo), based on* the Ashly® CLX-52 and created in conjunction with Billy Sheehan
- Modulation> Pebble Phaser (Mono, Stereo), based on* the Electro-Harmonix® Small Stone phaser
- Split > Dynamic, Line 6 original. This new Split block type lets you dynamically route signals to Path B, depending on how hard you play. For example, you could roll your guitar’s volume back a bit and play clean chords through a Grammatico on Path A and then roll it back up and dig in to blend in a searing Revv Gen Purple lead on Path B
- Knob 1 (Threshold) — Signals below the Threshold are routed to Path A; signals above the Threshold are routed to Path B
- Knob 2 (Attack) — Determines how fast the signal routes to Path B once reaching the Threshold
- Knob 3 (Decay) — Determines how fast the signal returns to Path A once falling below the Threshold
- Knob 4 (Reverse) — Swaps dynamic path routing. When set to “On”, signals below the Threshold are routed to Path B and signals above the Threshold are routed to Path A
NOTE: All product names used in this document are trademarks of their respective owners and neither Yamaha Guitar Group nor Line 6 are associated or affiliated with them. These trademarks appear solely to identify products whose tones and sounds were studied by Line 6 during sound model development.
New Features in Helix/HX Firmware 2.90
Output Meters
Helix Floor, Helix Rack / Control, Helix LT
The following block types display output meters in the inspector when selected:
- Output
- Send/Return > Send
- Send/Return > FX Loop
IMPORTANT! Meters (in any product, not just Helix) are never appropriate for ensuring consistent levels from preset to preset. The models you use, the preset's frequency and dynamic response, your guitar or bass, your pickups, your playback system, your environment, your location in front of (or behind!) your playback system, and especially your bandmates all radically affect the perceived loudness of various presets. It's very common for the meters of one preset to show it's louder than another, while what you hear is the exact opposite. ALWAYS trust your ears when leveling presets, and whenever possible, level presets at stage volume, with the rest of the band playing.
Gain Reduction Meters
Helix Floor, Helix Rack / Control, Helix LT
The following block types display a gain reduction meter in the inspector when selected:
- Dynamics > Compressor (the 3-Band Comp displays three meters)
- Dynamics > Gate
Signal Present/Clip Indicators
Helix Floor, Helix Rack / Control, Helix LT, HX Stomp
The following block types now display a pale green background when signal is present and a bright red background if the block clips:
- Input
- Output
- Send/Return > Send (clip indication only)
- Send/Return > Return (clip indication only)
- Send/Return > FX Loop (clip indication only)
Improved IR Referencing
Helix Floor, Helix Rack / Control, Helix LT, Helix Native, HX Effects, HX Stomp
Impulse Response blocks now reference each IR file by waveform instead of index number. This means that when presets are shared and the recipient has the same IRs, they'll appear in the right place without having to manually reorder all IRs to match.
IMPORTANT! For improved IR referencing to take place, all presets must be rebuilt. Presets should've automatically been rebuilt after updating to 2.90, but if they didn't, you can manually rebuild them:
- Helix, Helix LT: While holding FS10 and FS11 (bottom row), turn on Helix. Wait for "Will rebuild all Presets..." to appear and let go
- Helix Rack: While holding Knobs 1 and 3 below the screen, turn on Helix Rack. Wait for "Will rebuild all Presets..." to appear and let go
- HX Effects: No preset rebuild necessary
- HX Stomp: While holding both the Upper and Lower Knobs, turn on HX Stomp. Wait for "Will rebuild Presets..." to appear and let go
- Helix Native: The first time you open the plug-in, a dialog appears, reading "Your presets are being parsed to associate IR blocks intelligently with the IRs they reference." Click OK.
Command Center > HX Preset
Helix Floor, Helix Rack / Control, Helix LT, HX Effects
A new Command Center command type lets you assign any preset (or Next Preset or Previous Preset) to any stomp switch. Together with HX Snapshot and HX Looper commands, you can now customize Stomp footswitch mode to your liking.
- From the Command Center, select a stomp switch and turn Knob 1 (Command) to select "HX Preset."
- Turn Knob 2 (Preset) to choose Next Preset, Previous Preset, or any single preset within the current setlist.
IMPORTANT! Although stomp mode switches can be assigned to multiple functions, to avoid unintended behavior, we strongly recommend HX Preset commands be assigned to empty footswitches.
Command Center > HX Snapshot
Helix Floor, Helix Rack / Control, Helix LT, HX Effects
A new Command Center command type lets you assign any snapshot (or Snapshot Up or Snapshot Down) to any stomp switch. Together with HX Preset and HX Looper commands, you can now customize Stomp footswitch mode to your liking.
- From the Command Center, select a stomp switch and turn Knob 1 (Command) to select "HX Snapshot."
- Turn Knob 2 (Behavior) to set the behavior of the stomp switch:
- Press / Release — Pressing the switch engages the Knob 3 (Press) function; releasing the switch engages the Knob 4 (Release) function.
- Press / Hold — Briefly pressing the switch engages the Knob 3 (Press) function; pressing and holding the switch for 1 second engages the Knob 4 (Hold) function
IMPORTANT! Although stomp mode switches can be assigned to multiple functions, to avoid unintended behavior, we strongly recommend HX Snapshot commands be assigned to empty footswitches.
Command Center > HX Looper
Helix Floor, Helix Rack / Control, Helix LT, HX Effects
A new Command Center command type lets you assign any Looper function to any stomp mode switch or instant command. Together with HX Preset and HX Looper commands, you can now customize Stomp footswitch mode to your liking. Note that a 6 Switch Looper or 1 Switch Looper block must be present in your preset for HX Looper commands to function properly. Also, caution should be taken when assigning HX Looper commands, as only the Press function is displayed on the scribble strip (Performance View on Helix LT); Release and Hold functions are not displayed.
- From the Command Center, select a stomp switch and turn Knob 1 (Command) to select "HX Looper."
- Turn Knob 2 (Behavior) to set the behavior of the stomp switch:
- Press / Release — Pressing the switch engages the Knob 3 (Press) function; releasing the switch engages the Knob 4 (Release) function.
- Press / Hold—Briefly pressing the switch engages the Knob 3 (Press) function; pressing and holding the switch for 1 second engages the Knob 4 (Hold) function.
IMPORTANT! Although stomp mode switches can be assigned to multiple functions, to avoid unintended behavior, we strongly recommend HX Looper commands be assigned to empty footswitches.
Shortcut > Model Subcategory
Helix Floor, Helix Rack / Control, Helix LT, HX Effects, HX Stomp
You can now quickly skip through model subcategories without ever having to open the model list. Finding a specific amp or effect is now faster than ever.
- Helix / Helix Rack / Helix LT — From the Home screen, hold
to jump to the the next subcategory. Hold PAGE> and press - HX Effects — From Stomp view, press and turn the Big Knob to skip subcategories, then turn normally to select models within that subcategory
- HX Stomp — From Edit view, press and turnthe Lower Knob to skip subcategories, then turn normally to select models within that subcategory
For example, if you have HX Stomp and have selected an empty block location, pressing and turning the Lower Knob will jump to the first model in each subcategory: Distortion > Mono, Distortion > Stereo, Distortion > Legacy, Dynamics > Mono, Dynamics > Stereo, Dynamics > Legacy, EQ > Mono, EQ > Stereo, Modulation > Mono, Modulation > Stereo, and so on.
Update Firmware From HX Edit
Helix Floor, Helix Rack / Control, Helix LT, HX Effects, HX Stomp
Instead of hanging out on social media, desperately asking when the next firmware’s dropping, you can now, I dunno, actually play guitar? As soon as a new update becomes available, HX Editwill tell you, and all you gotta do is follow the prompts.
New Features in Helix Native1.90
NOTE: For additional information on Helix Native 1.90 or HX Edit 2.90, check out the latest Helix Native and HX Edit Pilot’s Guides, which are automatically installed with the new 1.90 / 2.90 software.
A/B Compare
Helix Native
A new set of buttons lets you temporarily store all of the Helix Native instance’s model selection and parameter settings, then tweak any number of parameters and easily compare an A version and a B version. Click the middle button to quickly copy the current state to the other (A to B or B to A).
Other Changes and Improvements in Helix / HX 2.90 | Helix Native 1.90
- The EQ > Low / High Shelf model’s Hi Freq parameter now goes down to 400Hz (Helix Floor / Rack / LT, HX Effects, HX Stomp, Helix Native)
- Booting up now takes roughly half the time (Helix Floor / Rack / LT, HX Effects)
- While in Tuner mode, the three footswitch LEDs act as additional tuning indicators (HX Stomp [feature is already in HX Effects])
- Edited presets now display a small “E” icon (HX Effects, HX Stomp [feature is already in Helix Floor / Rack / LT])
- Blocks can now quickly be copied and pasted across signal flows by Option-dragging (Windows: Control-dragging) the block (Helix Native, HX Edit)
- IRs can now be dragged directly from the Impulses list onto the signal flow view (Helix Native, HX Edit)
- Double-clicking an IR in the Impulses list now auto-populates the currently selected IR block (Helix Native, HX Edit)
- Parameters with very few values now appear as select boxes instead of sliders (Helix Native, HX Edit)
- Parameters assigned to controllers now scale slider width to reflect Min and Max values (Helix Native)
- A “Check for Updates” box has been added to the Preferences window (Helix Native, HX Edit)
- Lots of stability and usability improvements across the board (Helix Native, HX Edit)
Bug Fixes in 2.90
- Distortion > Obsidian Drive’s polarity was reversed
- Remotely changing Powercab Plus speaker modes upon preset recall could sometimes result in a volume bump
- Using Learn to quickly assign a parameter to footswitch control could occasionally swap the switch’s Latching / Momentary setting
- Setting the Input block on Path 1A to S/PDIF could stop passing audio if a new Path 1B Input block had been created
- Connecting an expression pedal to Helix Control could sometimes cause the pedal position display to behave erratically
- Lots of other minor bug fixes
Known Issues in 2.90
- A slight thump can be heard when loading a Distortion > Kinky Boost, Arbitrator Fuzz, or Tycoctavia Fuzz model
- While backing up, the scribble strip on FS8 can sometimes flicker (Helix Floor, Helix Rack / Control)
- In very rare cases, leaving the unit on for many hours can sometimes cause reverb models to cease outputting audio
- In a preset with two IRs blocks, moving one IR block to Path B can sometimes cause the other IR block to reset its Impulse Response to slot 1
- In rare cases, after exporting and then importing presets using HX Edit, the Split block’s bypass state can sometimes change (Helix Floor, Helix RackControl, Helix LT)/
- When using Blue Cat Audio’s PatchWork VST host software, resizing the Helix Native window may not scale smoothly (Helix Native)
Helix Native
Helix Native
Helix Native 1.82 Release Notes
Bug Fixes
- In some cases, an error message would appear when clicking redo after deleting a block
- After cutting or clearing a block, its bypass/controller assignments could be lost
- Stepping through presets in order could be redone reliably, but not undone
- When changing models, clicking Undo could inadvertently clear automation assignments of common parameters
- Helix Native could not instantiate in hardened runtime builds of Cubase 10.5
- When in Hardware Compatibility Mode for HX Stomp, a direct (dry) signal could be heard
- Undo/Redo was limited to 31 steps
- In rare cases, clicking Undo or Redo could change a Cab > Dual block into a Cab > Single block
- Other minor bug fixes
Helix Native
Helix Native
Helix Native 1.82 Release Notes
Bug Fixes
- In some cases, an error message would appear when clicking redo after deleting a block
- After cutting or clearing a block, its bypass/controller assignments could be lost
- Stepping through presets in order could be redone reliably, but not undone
- When changing models, clicking Undo could inadvertently clear automation assignments of common parameters
- Helix Native could not instantiate in hardened runtime builds of Cubase 10.5
- When in Hardware Compatibility Mode for HX Stomp, a direct (dry) signal could be heard
- Undo/Redo was limited to 31 steps
- In rare cases, clicking Undo or Redo could change a Cab > Dual block into a Cab > Single block
- Other minor bug fixes
Get Download
Helix Native
Helix Native
Helix Native 1.81 Release Notes
Bug Fixes in 1.81
After loading two presets in a row containing a Looper block on Path 1B or 2B, audio could sometimes drop out
Changing IRs via controller or snapshot could sometimes result in an audible crossfade between IRs
Performing an Undo/Redo function could sometimes cause a Cab > Dual block to change to a Cab > Single block
Performing an Undo/Redo function could sometimes cause a stereo effect block to change to a mono effect block
On Windows, the Win Defender pop-up could block installation of Helix Native or HX Edit
Known Issues in 1.81
Pitch/Synth > 3 OSC Synth, 3 Note Generator, and 4 OSC Generator are louder than in 2.71
In rare cases, the Dynamics > LA Studio Comp model can sometimes cause a drop in preset volume
Helix Native will not open in hardened runtime builds of Cubase 10.5
Logic Pro X is currently unable to write snapshot or switch automation data for Helix Native
Performing an undo after a block cut or clear can delete the block’s footswitch and/or controller assignments
Moving an effect, amp, cab, or IR block can sometimes inadvertently reposition a Split or Merge block
Changing models can clear automation assignments of common parameters (such as Amp > Bass orDelay > Time)
Helix Native
Helix Native
NATIVE 1.80
IMPORTANT! 1.80 utilizes the new Helix Core engine, which unifies all Helix and HX products into the same ecosystem. Because there are tons of changes under the hood, presets created in 1.80 will not be compatible with earlier firmware, which means if you want to return to 1.71 for whatever reason, and you didn’t back up before updating to 1.80, your presets will NO LONGER WORK. Therefore, we STRONGLY RECOMMEND everyone back up everything BEFORE updating.
Instructions for backing up begin… now.
Updating to 1.80 (READ ME!)
1. Backing Up Helix Native.
- Open any instance of YOUR CURRENT VERSION Helix Native (NOT the new Helix Native 1.80) within your DAW and click the gear icon in the lower left corner to open the Preferences window.
- From the Presets/IRs tab, click “Export Bundle.”
- Choose the destination folder and click “Save.”
TIP: If you want to load the 1.80 factory presets, it’s better to manually back up individual setlists, so you can later import them into empty setlists. To do this, from the preset library along the left side, select the setlist you want to back up and click the small yellow “Export.” Choose a destination folder and click “Save.” Repeat for any other setlists you want to back up.
2. Loading the 1.80 Factory Presets / Templates
IMPORTANT! The following procedure will COMPLETELY ERASE ALL OF YOUR CUSTOM PRESETS! If you want to keep them, make sure you back them up First! (See “STEP 1: Backing Up Helix Native” above.)
- Open any instance of Helix Nativewithin your DAW and click the gear icon in the lower left corner to open the Preferences window.
- From the Presets/IRs tab, click “Restore Factory Setlists”
3. Restoring Helix Native from a Backup
- Open any instance of Helix Native within your DAW and click the gear icon in the lower left corner to open the Preferences window.
- From the Presets/IRs tab, click “Import Bundle.”
- Browse to the location chosen in STEP 1 above and click “Open.”
Whew! That wasn’t too terrible, now was it? What’s that… it was? Sorry. Now that Helix Core is finished, hopefully future update procedures will be less… involved.
New Amp Models in 1.80
Fullerton Nrm, based on* the classic 1958 Fender® 5C3 Tweed Deluxe (normal channel)
Fullerton Brt, based on* the classic 1958 Fender® 5C3 Tweed Deluxe (bright channel)
Fullerton Jump, based on* the classic 1958 Fender® 5C3 Tweed Deluxe (jumped channels)
Grammatico Nrm, based on* the modern 2016 Grammatico LaGrange (normal channel)
Grammatico Brt, based on* the modern 2016 Grammatico LaGrange (bright channel)
Grammatico Jump, based on* the modern 2016 Grammatico LaGrange (jumped channels)
Revv Gen Red, based on* the red (gain 2) channel of the Revv® Generator 120
Ampeg SVT-4 PRO, based on* the Ampeg® SVT-4 PRO
NOTE: All product names used in this document are trademarks of their respective owners and neither Yamaha Guitar Group nor Line 6 are associated or affiliated with them. These trademarks appear solely to identify products whose tones and sounds were studied by Line 6 during sound model development. That said, the teams at Revv and Grammatico are super cool (and patient!) and you should buy their awesome amps.
New Effects Models in 1.80
Distortion > Dhyana Drive (Mono, Stereo), based on* the Hermida Zendrive
Distortion > Heir Apparent (Mono, Stereo), based on* the Analogman Prince of Tone (basically half a King of Tone)
Distortion > Tone Sovereign (Mono, Stereo), based on* the Analogman King of Tone V4 (basically two Prince of Tones in one)
Distortion > ZeroAmp Bass DI (Mono, Stereo), based on* the Tech 21® SansAmp Bass Driver DI V1
Distortion > Ampeg Scrambler (Mono, Stereo), based on* the Ampeg® Scrambler Bass Overdrive
Filter > Asheville Pattrn (Mono, Stereo), based on* the Moog® Moogerfooger® MF-105M MIDI MuRF Filter (with both MuRF and Bass MuRF voicings)
EQ > Low/High Shelf (Mono, Stereo), Line 6 Original
EQ > Tilt (Mono, Stereo), Line 6 Original. Tilt is a subtle 6dB EQ that boosts high frequencies while simultaneously attenuating low frequencies (or vice versa). Great for quickly making tones a bit brighter or darker. The Center Freq parameter sets the frequency around which the boost and cut pivot
NOTE: All product names used in this document are trademarks of their respective owners and neither Yamaha Guitar Group nor Line 6 are associated or affiliated with them. These trademarks appear solely to identify products whose tones and sounds were studied by Line 6 during sound model development.
New Features in 1.80
NOTE: For additional information on Helix Native 1.80, check out the latest Helix Native Pilot’s Guides, which is automatically installed with the new 1.80 software.
Snapshot Bypass
There may be situations where you don’t want Helix’s snapshots to control a particular block’s bypass state; that is, you’d prefer to turn it on and off manually. For example, you may want manual control of a boost pedal at any time without worrying whether a particular snapshot might turn it on or off.
Right-click (Mac: control-click) on a processing block and uncheck “Snapshot Bypass.” Alternatively, right-click (Mac: control-click) the Bypass button to uncheck “Snapshot Bypass.”
Hardware Compatibility Mode
Helix Native can now reflect the signal flow and model set of all Helix and HX hardware devices, so transferring presets to and from your DAW is even easier. In addition, Hardware Compatibility can be disabled entirely, so the simultaneous model count is now limited only by the speed of your computer.
- Open any instance of Helix Native within your DAW and click the gear icon in the lower left corner to open the Preferences window.
- Click the Hardware Compatibility tab.
- From the “Current Hardware Compatibility Mode” pull-down menu, select one of the following options:
Off
Disables Hardware Compatibility and lets you add as many blocks (of any type) as your computer’s horsepower will allow. Choose this setting if you don’t own any Helix or HX hardware
Helix Floor /LT / Rack (the default)
Configures Helix Native such that any presets made can be easily loaded into Helix Floor, Helix Rack/Control, or Helix LT
HX Effects
Configures Helix Native such that any presets made can be easily loaded into HX Effects. In this mode, no Amp or Cab models will be available
HX Stomp
Configures Helix Native such that any presets made can be easily loaded into HX Stomp
- Click OK. Depending on the current Hardware Compatibility Mode, Helix Native may repopulate the preset list to reflect that of the selected hardware. For example, if you choose “HX Stomp,” HX Stomp’s factory presets will appear and the signal flow will be limited to six blocks
- Click “Set as Default” to ensure any new instances of Helix Native open in the selected mode.
IMPORTANT! Each Hardware Compatibility Mode incorporates its own, independent preset library. Therefore, you will see the Helix Native preset library automatically repopulate to reflect that of the selected hardware.
Helix / HX Preset Sharing
All Helix and HX hardware and software now live within the same ecosystem. Using multiple instances of Helix Native, both blocks and entire presets can be freely dragged and dropped or copied and pasted between units. Aside from the obvious caveats below, all Helix and HX products can now share the same content.
IMPORTANT! Due to the vast differences in how Helix/HX products manage controllers, snapshots, and Command Center messages, there is no guarantee that every single tiny detail of a preset will translate properly.
You can now drag / drop, copy / paste, or otherwise load:
HX Effects or HX Stomp presets into Helix Floor / Rack / LT and Helix Native. If an HX Effects preset has 9 blocks, the ninth block will be routed to Path 2
Helix Floor / Rack / LT, Helix Native, or HX Stomp presets into HX Effects. However, there are caveats.
To avoid an error message, the source preset must:
- Contain 9 or fewer blocks
- Not contain any Amp+Cab, Amp, Preamp, or Cab blocks
- Contain no more than one Split and Merge block
- Fit within one path worth of DSP processing
Helix Floor / Rack/LT, Helix Native, or HX Effects presets into HX Stomp. However, there are caveats. To avoid an error message, the source preset must:
- Contain 6 or fewer blocks
- Contain no more than one Split and Merge block Fit within one path worth of DSP processing
Helix Floor / Rack/LT, HX Effects, or HX Stomp presets into Helix Native
NOTE: A dialog box will appear if the source preset cannot be accommodated by the current Hardware Compatibility Mode (see above). At this point, you may choose to switch the current Hardware Compatibility Mode to that of the source preset, or attempt to translate the preset into the current Hardware Compatibility Mode, given the caveats above. See the Helix Native Pilot’s Guide for more information. Click the question mark icon in the lower left corner of the plug-in.
Undo/Redo
Helix Native now supports multiple levels of undo/redo.
- Click the Undo button to undo the most recent edit.
- Click the Redo button to redo the most recent undo.
MIDI Learn
Helix Native can now learn an incoming MIDI CC message and automatically assign it to a parameter.
- Right-click on a parameter and select Controller > MIDI Learn. A small brain icon flashes. If you change your mind, click the icon to cancel.
- Send Helix Native a MIDI CC message. The parameter is automatically assigned to it.
TIP: In Helix Native, right-click (Mac: control-click) on a processing block to open a pull-down that lets you manually assign a MIDI CC to block bypass. Right-click (Mac: control-click) on a parameter slider to open a pull-down menu that lets you manually assign a MIDI CC to parameter control.
NOTE: Not all DAW software automatically routes incoming MIDI data through to any plug-in, especially those instantiated as an insert on an audio track. See your DAW’s documentation for more information. The new MIDI In indicator in the lower right corner flashes if Helix Native receives MIDI data.
Other Changes and Improvements in 1.80
On a Cab > Dual block, changing the first cab no longer changes the second cab.
Impulse Response blocks now display as many IR file name characters as will fit in the inspector header
Additional values have been added to recall snapshots remotely via MIDI CC69 Value 8 will select the next snapshot and Value 9 will select the previous snapshot
A small indicator in the lower right corner of the plug-in window flashes whenever a MIDI message is received
Automation and MIDIcontroller assignments can now be managed together from the AutomationController Assign tab
Blocks assigned to controllers or automation now display their category name in brackets. Parameters assigned to controllers or automation display a small icon to the left of their parameter sliders. In addition, pop-up menus now display controller or automation assignments, if any
From the Automation/Controller Assign tab, right-click (Mac: control-click) an assignment to open a pull-down menu, letting you clear one or all assignments
A new “Restore Factory Settings” button has been added to the bottom of the Preferences window
Wow, you’re still reading this? Congratulations; you’re way cooler and better looking than other Helix/HX owners. Celebrate your superiority with some delicious tacos.
As Ampeg is now Line 6’s sister company, all pre-1.80 Ampeg models have been renamed:
Amp > Bass > Tuck n’ Go is now called “Ampeg B-15NF”
Amp > Bass > SV Beast Nrm is now called “Ampeg SVT Nrm”
Amp > Bass > SV Beast Brt is now called “Ampeg SVT Brt”
Cab > 1x15 Tuck n’ Go is now called “1x15 Ampeg B-15”
Cab > 4x10 Rhino is now called “4x10 Ampeg HLF”
Cab > 8x10 SV Beast is now called “8x10 Ampeg SVT E”
Numerous stability and performance improvements Lots of other little things
Known Issues in 1.80
Downgrading to 1.71 or older will erase ALL preset data.
A preset may load blank after dragging a looper block across a split, merge and another block two times. Simply load the preset again and it will load as expected.
Undo/Redo does not work when switching between time and note divisions.
Save to Library lists presets in “01A-32D” setlist format regardless of preferences.
Helix Native
Helix Native
NATIVE 1.80
IMPORTANT! 1.80 utilizes the new Helix Core engine, which unifies all Helix and HX products into the same ecosystem. Because there are tons of changes under the hood, presets created in 1.80 will not be compatible with earlier firmware, which means if you want to return to 1.71 for whatever reason, and you didn’t back up before updating to 1.80, your presets will NO LONGER WORK. Therefore, we STRONGLY RECOMMEND everyone back up everything BEFORE updating.
Instructions for backing up begin… now.
Updating to 1.80 (READ ME!)
1. Backing Up Helix Native.
- Open any instance of YOUR CURRENT VERSION Helix Native (NOT the new Helix Native 1.80) within your DAW and click the gear icon in the lower left corner to open the Preferences window.
- From the Presets/IRs tab, click “Export Bundle.”
- Choose the destination folder and click “Save.”
TIP: If you want to load the 1.80 factory presets, it’s better to manually back up individual setlists, so you can later import them into empty setlists. To do this, from the preset library along the left side, select the setlist you want to back up and click the small yellow “Export.” Choose a destination folder and click “Save.” Repeat for any other setlists you want to back up.
2. Loading the 1.80 Factory Presets / Templates
IMPORTANT! The following procedure will COMPLETELY ERASE ALL OF YOUR CUSTOM PRESETS! If you want to keep them, make sure you back them up First! (See “STEP 1: Backing Up Helix Native” above.)
- Open any instance of Helix Nativewithin your DAW and click the gear icon in the lower left corner to open the Preferences window.
- From the Presets/IRs tab, click “Restore Factory Setlists”
3. Restoring Helix Native from a Backup
- Open any instance of Helix Native within your DAW and click the gear icon in the lower left corner to open the Preferences window.
- From the Presets/IRs tab, click “Import Bundle.”
- Browse to the location chosen in STEP 1 above and click “Open.”
Whew! That wasn’t too terrible, now was it? What’s that… it was? Sorry. Now that Helix Core is finished, hopefully future update procedures will be less… involved.
New Amp Models in 1.80
Fullerton Nrm, based on* the classic 1958 Fender® 5C3 Tweed Deluxe (normal channel)
Fullerton Brt, based on* the classic 1958 Fender® 5C3 Tweed Deluxe (bright channel)
Fullerton Jump, based on* the classic 1958 Fender® 5C3 Tweed Deluxe (jumped channels)
Grammatico Nrm, based on* the modern 2016 Grammatico LaGrange (normal channel)
Grammatico Brt, based on* the modern 2016 Grammatico LaGrange (bright channel)
Grammatico Jump, based on* the modern 2016 Grammatico LaGrange (jumped channels)
Revv Gen Red, based on* the red (gain 2) channel of the Revv® Generator 120
Ampeg SVT-4 PRO, based on* the Ampeg® SVT-4 PRO
NOTE: All product names used in this document are trademarks of their respective owners and neither Yamaha Guitar Group nor Line 6 are associated or affiliated with them. These trademarks appear solely to identify products whose tones and sounds were studied by Line 6 during sound model development. That said, the teams at Revv and Grammatico are super cool (and patient!) and you should buy their awesome amps.
New Effects Models in 1.80
Distortion > Dhyana Drive (Mono, Stereo), based on* the Hermida Zendrive
Distortion > Heir Apparent (Mono, Stereo), based on* the Analogman Prince of Tone (basically half a King of Tone)
Distortion > Tone Sovereign (Mono, Stereo), based on* the Analogman King of Tone V4 (basically two Prince of Tones in one)
Distortion > ZeroAmp Bass DI (Mono, Stereo), based on* the Tech 21® SansAmp Bass Driver DI V1
Distortion > Ampeg Scrambler (Mono, Stereo), based on* the Ampeg® Scrambler Bass Overdrive
Filter > Asheville Pattrn (Mono, Stereo), based on* the Moog® Moogerfooger® MF-105M MIDI MuRF Filter (with both MuRF and Bass MuRF voicings)
EQ > Low/High Shelf (Mono, Stereo), Line 6 Original
EQ > Tilt (Mono, Stereo), Line 6 Original. Tilt is a subtle 6dB EQ that boosts high frequencies while simultaneously attenuating low frequencies (or vice versa). Great for quickly making tones a bit brighter or darker. The Center Freq parameter sets the frequency around which the boost and cut pivot
NOTE: All product names used in this document are trademarks of their respective owners and neither Yamaha Guitar Group nor Line 6 are associated or affiliated with them. These trademarks appear solely to identify products whose tones and sounds were studied by Line 6 during sound model development.
New Features in 1.80
NOTE: For additional information on Helix Native 1.80, check out the latest Helix Native Pilot’s Guides, which is automatically installed with the new 1.80 software.
Snapshot Bypass
There may be situations where you don’t want Helix’s snapshots to control a particular block’s bypass state; that is, you’d prefer to turn it on and off manually. For example, you may want manual control of a boost pedal at any time without worrying whether a particular snapshot might turn it on or off.
Right-click (Mac: control-click) on a processing block and uncheck “Snapshot Bypass.” Alternatively, right-click (Mac: control-click) the Bypass button to uncheck “Snapshot Bypass.”
Hardware Compatibility Mode
Helix Native can now reflect the signal flow and model set of all Helix and HX hardware devices, so transferring presets to and from your DAW is even easier. In addition, Hardware Compatibility can be disabled entirely, so the simultaneous model count is now limited only by the speed of your computer.
- Open any instance of Helix Native within your DAW and click the gear icon in the lower left corner to open the Preferences window.
- Click the Hardware Compatibility tab.
- From the “Current Hardware Compatibility Mode” pull-down menu, select one of the following options:
Off
Disables Hardware Compatibility and lets you add as many blocks (of any type) as your computer’s horsepower will allow. Choose this setting if you don’t own any Helix or HX hardware
Helix Floor /LT / Rack (the default)
Configures Helix Native such that any presets made can be easily loaded into Helix Floor, Helix Rack/Control, or Helix LT
HX Effects
Configures Helix Native such that any presets made can be easily loaded into HX Effects. In this mode, no Amp or Cab models will be available
HX Stomp
Configures Helix Native such that any presets made can be easily loaded into HX Stomp
- Click OK. Depending on the current Hardware Compatibility Mode, Helix Native may repopulate the preset list to reflect that of the selected hardware. For example, if you choose “HX Stomp,” HX Stomp’s factory presets will appear and the signal flow will be limited to six blocks
- Click “Set as Default” to ensure any new instances of Helix Native open in the selected mode.
IMPORTANT! Each Hardware Compatibility Mode incorporates its own, independent preset library. Therefore, you will see the Helix Native preset library automatically repopulate to reflect that of the selected hardware.
Helix / HX Preset Sharing
All Helix and HX hardware and software now live within the same ecosystem. Using multiple instances of Helix Native, both blocks and entire presets can be freely dragged and dropped or copied and pasted between units. Aside from the obvious caveats below, all Helix and HX products can now share the same content.
IMPORTANT! Due to the vast differences in how Helix/HX products manage controllers, snapshots, and Command Center messages, there is no guarantee that every single tiny detail of a preset will translate properly.
You can now drag / drop, copy / paste, or otherwise load:
HX Effects or HX Stomp presets into Helix Floor / Rack / LT and Helix Native. If an HX Effects preset has 9 blocks, the ninth block will be routed to Path 2
Helix Floor / Rack / LT, Helix Native, or HX Stomp presets into HX Effects. However, there are caveats.
To avoid an error message, the source preset must:
- Contain 9 or fewer blocks
- Not contain any Amp+Cab, Amp, Preamp, or Cab blocks
- Contain no more than one Split and Merge block
- Fit within one path worth of DSP processing
Helix Floor / Rack/LT, Helix Native, or HX Effects presets into HX Stomp. However, there are caveats. To avoid an error message, the source preset must:
- Contain 6 or fewer blocks
- Contain no more than one Split and Merge block Fit within one path worth of DSP processing
Helix Floor / Rack/LT, HX Effects, or HX Stomp presets into Helix Native
NOTE: A dialog box will appear if the source preset cannot be accommodated by the current Hardware Compatibility Mode (see above). At this point, you may choose to switch the current Hardware Compatibility Mode to that of the source preset, or attempt to translate the preset into the current Hardware Compatibility Mode, given the caveats above. See the Helix Native Pilot’s Guide for more information. Click the question mark icon in the lower left corner of the plug-in.
Undo/Redo
Helix Native now supports multiple levels of undo/redo.
- Click the Undo button to undo the most recent edit.
- Click the Redo button to redo the most recent undo.
MIDI Learn
Helix Native can now learn an incoming MIDI CC message and automatically assign it to a parameter.
- Right-click on a parameter and select Controller > MIDI Learn. A small brain icon flashes. If you change your mind, click the icon to cancel.
- Send Helix Native a MIDI CC message. The parameter is automatically assigned to it.
TIP: In Helix Native, right-click (Mac: control-click) on a processing block to open a pull-down that lets you manually assign a MIDI CC to block bypass. Right-click (Mac: control-click) on a parameter slider to open a pull-down menu that lets you manually assign a MIDI CC to parameter control.
NOTE: Not all DAW software automatically routes incoming MIDI data through to any plug-in, especially those instantiated as an insert on an audio track. See your DAW’s documentation for more information. The new MIDI In indicator in the lower right corner flashes if Helix Native receives MIDI data.
Other Changes and Improvements in 1.80
On a Cab > Dual block, changing the first cab no longer changes the second cab.
Impulse Response blocks now display as many IR file name characters as will fit in the inspector header
Additional values have been added to recall snapshots remotely via MIDI CC69 Value 8 will select the next snapshot and Value 9 will select the previous snapshot
A small indicator in the lower right corner of the plug-in window flashes whenever a MIDI message is received
Automation and MIDIcontroller assignments can now be managed together from the AutomationController Assign tab
Blocks assigned to controllers or automation now display their category name in brackets. Parameters assigned to controllers or automation display a small icon to the left of their parameter sliders. In addition, pop-up menus now display controller or automation assignments, if any
From the Automation/Controller Assign tab, right-click (Mac: control-click) an assignment to open a pull-down menu, letting you clear one or all assignments
A new “Restore Factory Settings” button has been added to the bottom of the Preferences window
Wow, you’re still reading this? Congratulations; you’re way cooler and better looking than other Helix/HX owners. Celebrate your superiority with some delicious tacos.
As Ampeg is now Line 6’s sister company, all pre-1.80 Ampeg models have been renamed:
Amp > Bass > Tuck n’ Go is now called “Ampeg B-15NF”
Amp > Bass > SV Beast Nrm is now called “Ampeg SVT Nrm”
Amp > Bass > SV Beast Brt is now called “Ampeg SVT Brt”
Cab > 1x15 Tuck n’ Go is now called “1x15 Ampeg B-15”
Cab > 4x10 Rhino is now called “4x10 Ampeg HLF”
Cab > 8x10 SV Beast is now called “8x10 Ampeg SVT E”
Numerous stability and performance improvements Lots of other little things
Known Issues in 1.80
Downgrading to 1.71 or older will erase ALL preset data.
A preset may load blank after dragging a looper block across a split, merge and another block two times. Simply load the preset again and it will load as expected.
Undo/Redo does not work when switching between time and note divisions.
Save to Library lists presets in “01A-32D” setlist format regardless of preferences.
Get Download
Helix Native
Helix Native
Helix Native 1.71
New Features
• Block Drag and Drop—Individual blocks in Helix Native can now be dragged and dropped between it and HX Edit or another Helix Native instance/panel
• Paste Before and Paste After—Blocks copied to the clipboard can now be inserted before or after the selected block. Right-click a block and select "Paste Before" or "Paste After”
Improvements/Changes
• Quick Clear—Hovering your mouse over a block again displays a small “x” icon. Click the icon to clear the block
Bug Fixes
• In Pro Tools, the compare function would load only the selected preset — FIXED
• In Logic Pro X, after moving an instance of Helix Native to another channel strip location, the compare state could sometimes reverse — FIXED
• In Final Cut Pro, the master input and output sliders could load at -120dB — FIXED
Helix Native
Helix Native
New Features (Helix Native 1.70)
• Marketplace support—Marketplace is a new online destination that lets users purchase presets and impulse responses created by select third-party content gurus. From the lower left-hand corner Helix Native, click "My Account" and then choose "Get More Presets..." or "Get More IRs..."
Bug Fixes
• Helix Native only—Control/Command-click on parameter slider would not always snap to the hardware's default value — FIXED
• Many other minor bug fixes and improvements
Get Download
Helix Native
Helix Native
New Features (Helix Native 1.70)
• Marketplace support—Marketplace is a new online destination that lets users purchase presets and impulse responses created by select third-party content gurus. From the lower left-hand corner Helix Native, click "My Account" and then choose "Get More Presets..." or "Get More IRs..."
Bug Fixes
• Helix Native only—Control/Command-click on parameter slider would not always snap to the hardware's default value — FIXED
• Many other minor bug fixes and improvements
Helix Native
Helix Native
Helix Native 1.60 “The Spring Cleaning Update”
Helix Native delivers the same award-winning HX amp and effects modeling found in Line 6’s best-selling Helix hardware guitar and effects processors, bringing authentic tone to your favorite DAW.
Helix Native is available as a fully functional 15-day free trial, which requires a Line 6 account.
Learn more at http://line6.com/helix/helixnative.html.
New Amp Models (2)
- Cali Texas Ch1, based on* the clean channel of the MESA/Boogie® Lonestar
- Placater Clean, based on* the clean channel of the Friedman BE-100
New Effects Models (3)
- Distortion > Deranged Master (Mono, Stereo), based on* the Dallas Rangemaster Treble Booster—WARNING! Like the real thing, this model will take your head off! Works best before a distorted amp
- Distortion > Deez One Vintage (Mono, Stereo), based on* the BOSS© DS-1 distortion pedal (classic Made-in-Japan version)
- Distortion > Deez One Mod (Mono, Stereo), based on* the BOSS© DS-1 distortion pedal (Keeley mod version)
* All product names are trademarks of their respective owners, which are in no way associated or affiliated with Line 6.
New Features
- MIDI block bypass—Helix Native now lets you bypass individual blocks via MIDI. Right-click (or Control-click) the desired block and from the pull-down menu, select MIDI Bypass > MIDI In. Then click the Automation/Controller Assign tab and choose the desired CC#. Note that there are lots of CCs that Helix Native will ignore, as these are reserved for Helix hardware functionality. See the Helix Native Pilot’s Guide for more information
- MIDI parameter control—Helix Native now lets you control parameters via MIDI. In the inspector, right-click (or Control-click) the desired parameter and from the pull-down menu, select Controller Assign > MIDI CC. Then click the Automation/Controller Assign tab and choose the parameter from the list. Adjust the MIDI CC#, Min, and Max Values
- MIDI snapshot select—To select a snapshot in Helix Native, send it a MIDI CC#69 message. Value 0 will recall Snapshot 1, Value 1 will recall Snapshot 2, Value 2 will recall Snapshot 3, and so on
- Block Copypaste between Helix Native and HX Edit/—Helix Native now lets you copy and paste individual blocks between plugin multiple instances and HX Edit. Right-click (or Control-click) the desired block and select Copy. Then switch to HX Edit and on the Signal Flow view, right click on the destination block (or an empty block location) and select Paste
- Helix Native now lets you copy and paste individual blocks after closing and then reopening the plugin window
- Helix Native now lets you copy and paste individual blocks between multiple instances
Improvements/Changes
- The most recent new HX Reverb models have been tweaked to sound notably wetter (see Known Issues below)
- When changing the Time parameter, Legacy delay models now exhibit a more organic behavior (like DL4 and Echo Pro)
- Helix, Helix Rack/Control, Helix LT only: Variax Shuriken bank names now appear in the Input > Multi and Input > Variax block without requiring connection to Variax Workbench
- Plug-in window now loads faster
- Many under-the-hood improvements
Bug Fixes
- DSP intensive presets with one or more Placater Amp+Cab, Amp, or Preamp blocks can sometimes generate an error message — FIXED
- The Filter > Legacy > Obi Wah model is mono (should be stereo) — FIXED
- Modulation > Legacy > Analog Chorus > Mode parameter was mislabeled “CH Vib” — FIXED
- PitchSynth > Legacy > Smart Harmony > Key parameter was mislabeled “V1 Key” — /FIXED
- Attempting to import a very long Impulse Response can sometimes result in Helix Native freezing — FIXED
- Clearing all setlists and presets does not clear preset names until the plugin window is closed and reopened — FIXED
- In some cases, tempo changes may not be properly recalled when Tempo is set to Per Snapshot — FIXED
- Moving the Merge > Mixer block to Path B and then moving it back to its original position on Path A can result in an error message — FIXED
- In some cases, Path 2B’s input cannot be set to Host — FIXED
- Many other minor bug fixes, optimizations, and stability improvements
Known Issues
- As the new HX Reverb models have been tweaked to sound notably “wetter”, any existing user presets that use these models will sound different. Although Helix and HX hardware has the ability to compensate for changes made to models when rebuilding presets (and one of our goals is to rarely if ever cause audible changes to existing user presets), the improvements made to the reverb blocks unfortunately cannot be compensated for.
- * In ProTools, the Compare function only loads the selected preset.
- In Logic 10.4.1, after moving an instance of Helix Native to another channel strip location, the Compare state can sometimes reverse.
- The DAW’s Compare function toggles between the two previously loaded presets, instead of toggling any edits made to the preset.
- A processing block cannot be moved between a Split or Mixer and another processing block.
- In Logic, switches 13-16, Master Input/Output, and Snapshot Index parameters are missing from the Automation lane list.
HAVE A GREAT IDEA FOR HELIX NATIVE?
If you have a great idea for Helix Native, we want to hear about it! Please visit *http://line6.ideascale.com* to post your requests and suggestions, or vote for features. This is the most direct way for you to influence our updates, and we look forward to hearing from you!
Helix Native
Helix Native
Helix Native 1.60 “The Spring Cleaning Update”
Helix Native delivers the same award-winning HX amp and effects modeling found in Line 6’s best-selling Helix hardware guitar and effects processors, bringing authentic tone to your favorite DAW.
Helix Native is available as a fully functional 15-day free trial, which requires a Line 6 account.
Learn more at http://line6.com/helix/helixnative.html.
New Amp Models (2)
- Cali Texas Ch1, based on* the clean channel of the MESA/Boogie® Lonestar
- Placater Clean, based on* the clean channel of the Friedman BE-100
New Effects Models (3)
- Distortion > Deranged Master (Mono, Stereo), based on* the Dallas Rangemaster Treble Booster—WARNING! Like the real thing, this model will take your head off! Works best before a distorted amp
- Distortion > Deez One Vintage (Mono, Stereo), based on* the BOSS© DS-1 distortion pedal (classic Made-in-Japan version)
- Distortion > Deez One Mod (Mono, Stereo), based on* the BOSS© DS-1 distortion pedal (Keeley mod version)
* All product names are trademarks of their respective owners, which are in no way associated or affiliated with Line 6.
New Features
- MIDI block bypass—Helix Native now lets you bypass individual blocks via MIDI. Right-click (or Control-click) the desired block and from the pull-down menu, select MIDI Bypass > MIDI In. Then click the Automation/Controller Assign tab and choose the desired CC#. Note that there are lots of CCs that Helix Native will ignore, as these are reserved for Helix hardware functionality. See the Helix Native Pilot’s Guide for more information
- MIDI parameter control—Helix Native now lets you control parameters via MIDI. In the inspector, right-click (or Control-click) the desired parameter and from the pull-down menu, select Controller Assign > MIDI CC. Then click the Automation/Controller Assign tab and choose the parameter from the list. Adjust the MIDI CC#, Min, and Max Values
- MIDI snapshot select—To select a snapshot in Helix Native, send it a MIDI CC#69 message. Value 0 will recall Snapshot 1, Value 1 will recall Snapshot 2, Value 2 will recall Snapshot 3, and so on
- Block Copypaste between Helix Native and HX Edit/—Helix Native now lets you copy and paste individual blocks between plugin multiple instances and HX Edit. Right-click (or Control-click) the desired block and select Copy. Then switch to HX Edit and on the Signal Flow view, right click on the destination block (or an empty block location) and select Paste
- Helix Native now lets you copy and paste individual blocks after closing and then reopening the plugin window
- Helix Native now lets you copy and paste individual blocks between multiple instances
Improvements/Changes
- The most recent new HX Reverb models have been tweaked to sound notably wetter (see Known Issues below)
- When changing the Time parameter, Legacy delay models now exhibit a more organic behavior (like DL4 and Echo Pro)
- Helix, Helix Rack/Control, Helix LT only: Variax Shuriken bank names now appear in the Input > Multi and Input > Variax block without requiring connection to Variax Workbench
- Plug-in window now loads faster
- Many under-the-hood improvements
Bug Fixes
- DSP intensive presets with one or more Placater Amp+Cab, Amp, or Preamp blocks can sometimes generate an error message — FIXED
- The Filter > Legacy > Obi Wah model is mono (should be stereo) — FIXED
- Modulation > Legacy > Analog Chorus > Mode parameter was mislabeled “CH Vib” — FIXED
- PitchSynth > Legacy > Smart Harmony > Key parameter was mislabeled “V1 Key” — /FIXED
- Attempting to import a very long Impulse Response can sometimes result in Helix Native freezing — FIXED
- Clearing all setlists and presets does not clear preset names until the plugin window is closed and reopened — FIXED
- In some cases, tempo changes may not be properly recalled when Tempo is set to Per Snapshot — FIXED
- Moving the Merge > Mixer block to Path B and then moving it back to its original position on Path A can result in an error message — FIXED
- In some cases, Path 2B’s input cannot be set to Host — FIXED
- Many other minor bug fixes, optimizations, and stability improvements
Known Issues
- As the new HX Reverb models have been tweaked to sound notably “wetter”, any existing user presets that use these models will sound different. Although Helix and HX hardware has the ability to compensate for changes made to models when rebuilding presets (and one of our goals is to rarely if ever cause audible changes to existing user presets), the improvements made to the reverb blocks unfortunately cannot be compensated for.
- * In ProTools, the Compare function only loads the selected preset.
- In Logic 10.4.1, after moving an instance of Helix Native to another channel strip location, the Compare state can sometimes reverse.
- The DAW’s Compare function toggles between the two previously loaded presets, instead of toggling any edits made to the preset.
- A processing block cannot be moved between a Split or Mixer and another processing block.
- In Logic, switches 13-16, Master Input/Output, and Snapshot Index parameters are missing from the Automation lane list.
HAVE A GREAT IDEA FOR HELIX NATIVE?
If you have a great idea for Helix Native, we want to hear about it! Please visit *http://line6.ideascale.com* to post your requests and suggestions, or vote for features. This is the most direct way for you to influence our updates, and we look forward to hearing from you!
Get Download
Helix Native
Helix Native
Helix Native 1.50 Release Notes
Helix Native delivers the same award-winning HX amp and effects modeling found in Line 6’s best-selling Helix hardware guitar and effects processors, bringing authentic tone to your favorite DAW.
Helix Native is available as a fully functional 15-day free trial, which requires a Line 6 account.
Learn more at http://line6.com/helix/helixnative.html.
NEW AMP MODELS (2)
- Cali Texas Ch2, based on* the drive channel of the MESA/Boogie® Lonestar (Ch1 coming later this spring).- Placater Dirty, based on* the BE/HBE channel of the Friedman® BE-100 (Clean channel coming later this spring).
NEW HX EFFECTS MODELS (6)
Helix Native now includes a library of effects from M13, M9, M5, DL4, DM4, FM4, and MM4. These appear in a new "Legacy" subcategory in the model list.
- Delay > Multi Pass (Mono, Stereo), Line 6 Original- Reverb > Glitz (Mono, Stereo), Line 6 Original
- Reverb > Ganymede (Mono, Stereo), Line 6 Original
- Reverb > Searchlights (Mono, Stereo), Line 6 Original
- Reverb > Plateaux (Mono, Stereo), Line 6 Original
- Reverb > Double Tank(Mono, Stereo), Line 6 Original
NEW LEGACY MODELS (77)
- Distortion > Tube Drive, based on* the Chandler Tube Driver.- Distortion > Screamer, based on* the Ibanez® Tube Screamer®.
- Distortion > Overdrive, based on* the DOD® Overdrive/Preamp 250.
- Distortion > Classic Dist, based on* the ProCo Rat.
- Distortion > Heavy Dist, based on* the BOSS® Metal Zone.
- Distortion > Colordrive, based on* the Colorsound® Overdriver.
- Distortion > Buzz Saw, based on* the Maestro® Fuzz Tone.
- Distortion > Facial Fuzz, based on* the Arbiter® Fuzz Face®.
- Distortion > Jumbo Fuzz, based on* the Vox® Tone Bender.
- Distortion > Fuzz Pi, based on* the Electro-Harmonix® Big Muff Pi®.
- Distortion > Jet Fuzz, based on* the Roland® Jet Phaser.
- Distortion > Line 6 Drive, based on* the Colorsound® Overdriver (modded).
- Distortion > Line 6 Distortion, Line 6 Original.
- Distortion > Sub Oct Fuzz, based on* the PAiA Rocktave Divider.
- Distortion > Octave Fuzz, based on* the Tycobrahe® Octavia.
- Dynamics > Tube Comp, based on* the Teletronix® LA-2A®.
- Dynamics > Red Comp, based on* the MXR® Dyna Comp.
- Dynamics > Blue Comp, based on* the BOSS® CS-1.
- Dynamics > Blue Comp Treb, based on* the BOSS® CS-1 (Treble switch on).
- Dynamics > Vetta Comp, Line 6 Original.
- Dynamics > Vetta Juice, Line 6 Original.
- Dynamics > Boost Comp, based on* the MXR® Micro Amp.
- Modulation > Pattern Tremolo, Line 6 Original.
- Modulation > Panner, Line 6 Original.
- Modulation > Bias Tremolo, based on* the 1960 Vox® AC-15 Tremolo.
- Modulation > Opto Tremolo, based on* the 1964 Fender® Deluxe Reverb®.
- Modulation > Script Phase, based on* the MXR® Phase 90 (script logo version).
- Modulation > Panned Phaser, based on* the Ibanez® Flying Pan.
- Modulation > Barberpole, Line 6 Original.
- Modulation > Dual Phaser, based on* the Mu-Tron® Bi-Phase.
- Modulation > U-Vibe, based on* the Shin-ei Uni-Vibe®.
- Modulation > Phaser, based on* the MXR® Phase 90.
- Modulation > Pitch Vibrato, based on* the BOSS® VB-2.
- Modulation > Dimension, based on* the Roland® Dimension D.
- Modulation > Analog Chorus, based on* the BOSS® CE-1.
- Modulation > Tri Chorus, based on* the Dytronics® Tri-Stereo Chorus.
- Modulation > Analog Flanger, based on* the MXR® Flanger.
- Modulation > Jet Flanger, based on* the A/DA Flanger.
- Modulation > AC Flanger, based on* the MXR® Flanger.
- Modulation > 80A Flanger, based on* the A/DA Flanger.
- Modulation > Frequency Shift, Line 6 Original.
- Modulation > Ring Modulator, Line 6 Original.
- Modulation > Rotary Drum, based on* the Fender® Vibratone.
- Modulation > Rotary Drm/Horn, based on* the Leslie® 145.
- Delay > Ping Pong, Line 6 Original.
- Delay > Dynamic, based on* the TC Electronic® 2290.
- Delay > Stereo, Line 6 Original.
- Delay > Digital, Line 6 Original.
- Delay > Dig w/ Mod, Line 6 Original.
- Delay > Reverse, Line 6 Original.
- Delay > Lo Res, Line 6 Original.
- Delay > Tube Echo, based on* the Maestro® Echoplex EP-1.
- Delay > Tape Echo, based on* the Maestro® Echoplex EP-3.
- Delay > Sweep Echo, Line 6 Original.
- Delay > Echo Platter, based on* the Binson® EchoRec®.
- Delay > Analog Echo, based on* the BOSS® DM-2.
- Delay > Analog w/ Mod, based on* the Electro-Harmonix® Deluxe Memory Man.
- Delay > Auto-Volume Echo, Line 6 Original.
- Delay > Multi-Head, based on* the Roland® RE-101 Space Echo.
- Pitch/Synth > Bass Octaver, based on* the EBS® OctaBass.
- Pitch/Synth > Smart Harmony, based on* the Eventide® H3000.
- Pitch/Synth > Octi Synth, Line 6 Original.
- Pitch/Synth > Synth O Matic, Line 6 Original.
- Pitch/Synth > Attack Synth, based on* the Korg® X911 Guitar Synth.
- Pitch/Synth > Synth String, based on* the Roland® GR700 Guitar Synth.
- Pitch/Synth > Growler, Line 6 Original.
- Filter > Voice Box, Line 6 Original.
- Filter > V Tron, based on* the Musitronics® Mu-Tron® III.
- Filter > Q Filter, Line 6 Original.
- Filter > Seeker, based on* the Z Vex Seek Wah.
- Filter > Obi Wah, based on* the Oberheim® voltage-controlled S&H filter.
- Filter > Tron Up, based on* the Musitronics® Mu-Tron® III (up position).
- Filter > Tron Down, based on* the Musitronics® Mu-Tron® III (down position).
- Filter > Throbber, based on* the Electrix® Filter Factory.
- Filter > Slow Filter, Line 6 Original.
- Filter > Spin Cycle, based on* the Craig Anderton's Wah/Anti-Wah.
- Filter > Comet Trails, Line 6 Original.
* All product names are trademarks of their respective owners, which are in no way associated or affiliated with Line 6.
NEW FEATURES
- Snapshots - Helix Native now supports up to eight Snapshots per preset.
- Drag block to clear - Click and drag a block out out of the signal flow view to clear it.
- Dragging an amp/effect block nudges neighboring blocks out of the way to allow insertion
- Dragging a split/join block reveals insertion points between amp/effect positions (basically the same as previous behavior).
- Split/join positions can be nudged from any direction at any point along path A.
IMPROVEMENTS/CHANGES
- 12 of Helix’s 17 reverbs originally appeared in M-Class processors and Verbzilla. As such, they’ve been moved into the new “Legacy” subcategory within the Reverb category.
- Helix's tempo no longer responds to pressing TAP at tempo lower than 40.0 BPM (Beats Per Minute). This is to ensure that multiple fast tap entries are recognized properly, as previously, they could be seen as one really slow tap entry. You may still manually select a tempo all the way down to 20.0 BPM and your presets can still be saved with tempi down to 20.0 BPM.
BUG FIXES
- If its Mid and Bass parameters are set to 0.0, the Cali IV Lead Amp/Amp+Cab model could sometimes exhibit a decrease in gain.
- The Tempo Host Sync would be lost when reloading a session.
- Pro Tools: Latency Compensation broken when Helix Native plugin is bypassed.
KNOWN ISSUES
- Recalling an effect or instrument rack in Ableton Live with Helix Native instantiated can mute the track.
Workaround: Uninstantiate and re-instantiate the plug-in. - When using two 1024 IR's in a preset, moving the upper IR block before or after a pre/post split block can change the sonic character of the IR block.
- The copy/paste clipboard may be cleared after closing and reopening Helix Native.
HAVE A GREAT IDEA FOR HELIX NATIVE?
If you have a great idea for Helix Native, we want to hear about it! Please visit http://line6.ideascale.com to post your requests and suggestions, or vote for features. This is the most direct way for you to influence our updates, and we look forward to hearing from you!
Helix Native
Helix Native
Helix Native 1.50 Release Notes
Helix Native delivers the same award-winning HX amp and effects modeling found in Line 6’s best-selling Helix hardware guitar and effects processors, bringing authentic tone to your favorite DAW.
Helix Native is available as a fully functional 15-day free trial, which requires a Line 6 account.
Learn more at http://line6.com/helix/helixnative.html.
NEW AMP MODELS (2)
- Cali Texas Ch2, based on* the drive channel of the MESA/Boogie® Lonestar (Ch1 coming later this spring).- Placater Dirty, based on* the BE/HBE channel of the Friedman® BE-100 (Clean channel coming later this spring).
NEW HX EFFECTS MODELS (6)
Helix Native now includes a library of effects from M13, M9, M5, DL4, DM4, FM4, and MM4. These appear in a new "Legacy" subcategory in the model list.
- Delay > Multi Pass (Mono, Stereo), Line 6 Original- Reverb > Glitz (Mono, Stereo), Line 6 Original
- Reverb > Ganymede (Mono, Stereo), Line 6 Original
- Reverb > Searchlights (Mono, Stereo), Line 6 Original
- Reverb > Plateaux (Mono, Stereo), Line 6 Original
- Reverb > Double Tank(Mono, Stereo), Line 6 Original
NEW LEGACY MODELS (77)
- Distortion > Tube Drive, based on* the Chandler Tube Driver.- Distortion > Screamer, based on* the Ibanez® Tube Screamer®.
- Distortion > Overdrive, based on* the DOD® Overdrive/Preamp 250.
- Distortion > Classic Dist, based on* the ProCo Rat.
- Distortion > Heavy Dist, based on* the BOSS® Metal Zone.
- Distortion > Colordrive, based on* the Colorsound® Overdriver.
- Distortion > Buzz Saw, based on* the Maestro® Fuzz Tone.
- Distortion > Facial Fuzz, based on* the Arbiter® Fuzz Face®.
- Distortion > Jumbo Fuzz, based on* the Vox® Tone Bender.
- Distortion > Fuzz Pi, based on* the Electro-Harmonix® Big Muff Pi®.
- Distortion > Jet Fuzz, based on* the Roland® Jet Phaser.
- Distortion > Line 6 Drive, based on* the Colorsound® Overdriver (modded).
- Distortion > Line 6 Distortion, Line 6 Original.
- Distortion > Sub Oct Fuzz, based on* the PAiA Rocktave Divider.
- Distortion > Octave Fuzz, based on* the Tycobrahe® Octavia.
- Dynamics > Tube Comp, based on* the Teletronix® LA-2A®.
- Dynamics > Red Comp, based on* the MXR® Dyna Comp.
- Dynamics > Blue Comp, based on* the BOSS® CS-1.
- Dynamics > Blue Comp Treb, based on* the BOSS® CS-1 (Treble switch on).
- Dynamics > Vetta Comp, Line 6 Original.
- Dynamics > Vetta Juice, Line 6 Original.
- Dynamics > Boost Comp, based on* the MXR® Micro Amp.
- Modulation > Pattern Tremolo, Line 6 Original.
- Modulation > Panner, Line 6 Original.
- Modulation > Bias Tremolo, based on* the 1960 Vox® AC-15 Tremolo.
- Modulation > Opto Tremolo, based on* the 1964 Fender® Deluxe Reverb®.
- Modulation > Script Phase, based on* the MXR® Phase 90 (script logo version).
- Modulation > Panned Phaser, based on* the Ibanez® Flying Pan.
- Modulation > Barberpole, Line 6 Original.
- Modulation > Dual Phaser, based on* the Mu-Tron® Bi-Phase.
- Modulation > U-Vibe, based on* the Shin-ei Uni-Vibe®.
- Modulation > Phaser, based on* the MXR® Phase 90.
- Modulation > Pitch Vibrato, based on* the BOSS® VB-2.
- Modulation > Dimension, based on* the Roland® Dimension D.
- Modulation > Analog Chorus, based on* the BOSS® CE-1.
- Modulation > Tri Chorus, based on* the Dytronics® Tri-Stereo Chorus.
- Modulation > Analog Flanger, based on* the MXR® Flanger.
- Modulation > Jet Flanger, based on* the A/DA Flanger.
- Modulation > AC Flanger, based on* the MXR® Flanger.
- Modulation > 80A Flanger, based on* the A/DA Flanger.
- Modulation > Frequency Shift, Line 6 Original.
- Modulation > Ring Modulator, Line 6 Original.
- Modulation > Rotary Drum, based on* the Fender® Vibratone.
- Modulation > Rotary Drm/Horn, based on* the Leslie® 145.
- Delay > Ping Pong, Line 6 Original.
- Delay > Dynamic, based on* the TC Electronic® 2290.
- Delay > Stereo, Line 6 Original.
- Delay > Digital, Line 6 Original.
- Delay > Dig w/ Mod, Line 6 Original.
- Delay > Reverse, Line 6 Original.
- Delay > Lo Res, Line 6 Original.
- Delay > Tube Echo, based on* the Maestro® Echoplex EP-1.
- Delay > Tape Echo, based on* the Maestro® Echoplex EP-3.
- Delay > Sweep Echo, Line 6 Original.
- Delay > Echo Platter, based on* the Binson® EchoRec®.
- Delay > Analog Echo, based on* the BOSS® DM-2.
- Delay > Analog w/ Mod, based on* the Electro-Harmonix® Deluxe Memory Man.
- Delay > Auto-Volume Echo, Line 6 Original.
- Delay > Multi-Head, based on* the Roland® RE-101 Space Echo.
- Pitch/Synth > Bass Octaver, based on* the EBS® OctaBass.
- Pitch/Synth > Smart Harmony, based on* the Eventide® H3000.
- Pitch/Synth > Octi Synth, Line 6 Original.
- Pitch/Synth > Synth O Matic, Line 6 Original.
- Pitch/Synth > Attack Synth, based on* the Korg® X911 Guitar Synth.
- Pitch/Synth > Synth String, based on* the Roland® GR700 Guitar Synth.
- Pitch/Synth > Growler, Line 6 Original.
- Filter > Voice Box, Line 6 Original.
- Filter > V Tron, based on* the Musitronics® Mu-Tron® III.
- Filter > Q Filter, Line 6 Original.
- Filter > Seeker, based on* the Z Vex Seek Wah.
- Filter > Obi Wah, based on* the Oberheim® voltage-controlled S&H filter.
- Filter > Tron Up, based on* the Musitronics® Mu-Tron® III (up position).
- Filter > Tron Down, based on* the Musitronics® Mu-Tron® III (down position).
- Filter > Throbber, based on* the Electrix® Filter Factory.
- Filter > Slow Filter, Line 6 Original.
- Filter > Spin Cycle, based on* the Craig Anderton's Wah/Anti-Wah.
- Filter > Comet Trails, Line 6 Original.
* All product names are trademarks of their respective owners, which are in no way associated or affiliated with Line 6.
NEW FEATURES
- Snapshots - Helix Native now supports up to eight Snapshots per preset.
- Drag block to clear - Click and drag a block out out of the signal flow view to clear it.
- Dragging an amp/effect block nudges neighboring blocks out of the way to allow insertion
- Dragging a split/join block reveals insertion points between amp/effect positions (basically the same as previous behavior).
- Split/join positions can be nudged from any direction at any point along path A.
IMPROVEMENTS/CHANGES
- 12 of Helix’s 17 reverbs originally appeared in M-Class processors and Verbzilla. As such, they’ve been moved into the new “Legacy” subcategory within the Reverb category.
- Helix's tempo no longer responds to pressing TAP at tempo lower than 40.0 BPM (Beats Per Minute). This is to ensure that multiple fast tap entries are recognized properly, as previously, they could be seen as one really slow tap entry. You may still manually select a tempo all the way down to 20.0 BPM and your presets can still be saved with tempi down to 20.0 BPM.
BUG FIXES
- If its Mid and Bass parameters are set to 0.0, the Cali IV Lead Amp/Amp+Cab model could sometimes exhibit a decrease in gain.
- The Tempo Host Sync would be lost when reloading a session.
- Pro Tools: Latency Compensation broken when Helix Native plugin is bypassed.
KNOWN ISSUES
- Recalling an effect or instrument rack in Ableton Live with Helix Native instantiated can mute the track.
Workaround: Uninstantiate and re-instantiate the plug-in. - When using two 1024 IR's in a preset, moving the upper IR block before or after a pre/post split block can change the sonic character of the IR block.
- The copy/paste clipboard may be cleared after closing and reopening Helix Native.
HAVE A GREAT IDEA FOR HELIX NATIVE?
If you have a great idea for Helix Native, we want to hear about it! Please visit http://line6.ideascale.com to post your requests and suggestions, or vote for features. This is the most direct way for you to influence our updates, and we look forward to hearing from you!
Get Download
Helix Native
Helix Native
Helix Native 1.10 Release Notes
New Amps (7)
- Voltage Queen, based on* the Victoria® Electro King
- Derailed Ingrid, based on* the Trainwreck Circuits® Express
- Brit Trem Nrm, based on* the normal channel of the Marshall® Plexi Tremolo 50
- Brit Trem Brt, based on* the bright channel of the Marshall® Plexi Tremolo 50
- Brit Trem Jump, based on* the normal and bright channel (jumped) of the Marshall® Plexi Tremolo 50
- Cartographer, based on* the Ben Adrian Cartographer
- Agua 51, based on* the Aguilar® DB751 bass amp
New Effects (7)
- Distortion > Kinky Boost (Mono, Stereo), based on* the Xotic® EP Booster
- Distortion > Thrifter Fuzz (Mono, Stereo), Line 6 Original
- Dynamics > Kinky Comp (Mono, Stereo), based on* the Xotic® SP Compressor
- Modulation > Bleat Chop Trem (Mono, Stereo), based on* the Lightfoot Labs© Goatkeeper
- Modulation > Double Take (Mono, Stereo), Line 6 Original doubler
- Delay > Cosmos Echo (Mono, Stereo), based on* the Roland® RE-201 Space Echo
- Volume/Pan > Stereo Width (Stereo), Line 6 Original utility to collapse stereo paths
* All product names are trademarks of their respective owners, which are in no way associated or affiliated with Line 6.
New Features
- Plug-in Window Resizing—Click and drag the lower right-hand corner of Helix Native to resize the window and view more or fewer parameters and model list items
Show/Hide PRESETS/IMPULSES List—Click the icon to the left of the preset name to show or hide the PRESETS/IMPULSES list
Bug Fixes
- In the rare case that all paths are full, it is possible to drag more blocks into them, which may result in the error “Failed to move item. (Unknown. [code -1])” -FIXED
- On rare occasions, a warning dialog may appear during AU Validation scan of other AudioUnit plug-ins -FIXED
- After updating from OS X 10.12 Sierra to OS X 10.13 High Sierra, Helix Native may not load properly in GarageBand -FIXED
- After importing an IR file in a certain instance of Helix Native, the same file may not automatically appear in subsequent instances -FIXED
- Many other minor bug fixes and optimizations
- General stability improvements
Known Issues
- Recalling an effect or instrument rack in Ableton Live with Helix Native instantiated can mute the track. Workaround: Uninstantiate and re-instantiate the plug-in
- In rare cases, clearing Helix Native’s preset library while the DAW is under high CPU loads can sometimes cause the plug-in to become unresponsive. Workaround: Close the Helix Native plug-in window and reopen
- EXP pedal assignments may not automatically be assigned
- The copy/paste clipboard may be cleared after closing and reopening Helix Native
Helix Native
Helix Native
Helix Native Version 1.01
The new Helix® Native plug-in delivers the same award-winning HX amp and effects modeling found in the best-selling Line 6 Helix hardware guitar and effects processors, bringing authentic tone to your favorite DAW.
Helix Native is available as a fully functional 15-day free trial, which requires a Line 6 account.
Learn more at http://line6.com/helix/helixnative.html.
Download the user manual here.
GETTING STARTED
- Supports VST3, AAX, and AU, 64-bit only.
- Try it for FREE for 15 days by clicking "start my 15-day free trial" on first launch (internet connection is required for the trial period)
- Check your Authorized Devices if you can't authorize Helix Native, you might have too many authorized devices on your account
- Presets Compatible with Helix 2.21 firmware. Make sure your Helix hardware and editor software are up-to-date before transferring presets, setlists, etc.
WHAT'S NEW
- The Settings Window is accessed via a more easily discoverable gear icon in the bottom left of the window.
- Import and Export bundle has moved to the Settings Window
- CPU Optimizations under the hood to the stock cab models
- Note Sync now stays synced when changing delay and mod models
- Block movement and placement has been improved
WHAT'S FIXED
- Unfreezing Tracks and other modals dialogs under Logic Pro X no longer darken the plug-in UI.
- Time remaining in trial no longer displays negative or invalid numbers
- Various other bug fixes and stability improvements
KNOWN ISSUES
We're dedicated to being as transparent as possible, and here are the current known issues.
- Cali IV Lead Amp model will decrease in gain when Mid and Bass are set to 0. This is already known to occur on Helix hardware.
- Moving blocks while Automation is running may cause some errors during playback/record on Pro Tools.
HAVE A GREAT IDEA FOR HELIX NATIVE?
We've already received a ton of feature requests from beta users, but if you have a great idea for Helix Native, we want to hear about it! Please visit http://line6.ideascale.com to post your requests and suggestions, or vote for features. This is the most direct way for you to influence our updates, and we look forward to hearing from you!
Get Download
Helix Native
Helix Native
Helix Native Version 1.01
The new Helix® Native plug-in delivers the same award-winning HX amp and effects modeling found in the best-selling Line 6 Helix hardware guitar and effects processors, bringing authentic tone to your favorite DAW.
Helix Native is available as a fully functional 15-day free trial, which requires a Line 6 account.
Learn more at http://line6.com/helix/helixnative.html.
Download the user manual here.
GETTING STARTED
- Supports VST3, AAX, and AU, 64-bit only.
- Try it for FREE for 15 days by clicking "start my 15-day free trial" on first launch (internet connection is required for the trial period)
- Check your Authorized Devices if you can't authorize Helix Native, you might have too many authorized devices on your account
- Presets Compatible with Helix 2.21 firmware. Make sure your Helix hardware and editor software are up-to-date before transferring presets, setlists, etc.
WHAT'S NEW
- The Settings Window is accessed via a more easily discoverable gear icon in the bottom left of the window.
- Import and Export bundle has moved to the Settings Window
- CPU Optimizations under the hood to the stock cab models
- Note Sync now stays synced when changing delay and mod models
- Block movement and placement has been improved
WHAT'S FIXED
- Unfreezing Tracks and other modals dialogs under Logic Pro X no longer darken the plug-in UI.
- Time remaining in trial no longer displays negative or invalid numbers
- Various other bug fixes and stability improvements
KNOWN ISSUES
We're dedicated to being as transparent as possible, and here are the current known issues.
- Cali IV Lead Amp model will decrease in gain when Mid and Bass are set to 0. This is already known to occur on Helix hardware.
- Moving blocks while Automation is running may cause some errors during playback/record on Pro Tools.
HAVE A GREAT IDEA FOR HELIX NATIVE?
We've already received a ton of feature requests from beta users, but if you have a great idea for Helix Native, we want to hear about it! Please visit http://line6.ideascale.com to post your requests and suggestions, or vote for features. This is the most direct way for you to influence our updates, and we look forward to hearing from you!
Helix Native
Helix Native
Helix Native Version 1.00
The new Helix® Native plug-in delivers the same award-winning HX amp and effects modeling found in Line 6’s best-selling Helix hardware guitar and effects processors, bringing authentic tone to your favorite DAW.
Helix Native is available as a fully functional 15-day free trial, which requires a Line 6 account.
Learn more at http://line6.com/helix/helixnative.html.
Download the user manual here.
THE WAIT IS OVER!
- At long last... We are very proud to announce that this is the first version of the Helix Native plug-in for VST3, AAX, and AU made available to the public!
- Try it for FREE for 15 days by clicking "start my 15-day free trial" on first launch.
- Check your Authorized Devices if you can't authorize Helix Native, you might have too many authorized devices on your account.
- Presets Compatible with Helix 2.21 firmware. Make sure your Helix hardware and editor software are up-to-date before transferring presets, setlists, etc.
KNOWN ISSUES
We're dedicated to being as transparent as possible, and here's some not-so-great stuff that you may encounter.
- Editing min/max for automation of a parameter slider can temporarily stop reading the automation lane.
- Editing parameters assigned to automation can can temporarily stop reading the automation lane during playback/record.
- Cali IV Lead Amp model will decrease in gain when Mid and Bass are set to 0. This is already known to occur on Helix hardware.
- Unfreezing Tracks in Logic Pro X will darken the plug-in UI, just close and reopen it in the meantime.
- Moving blocks while Automation is running may cause some errors during playback/record on Pro Tools.
HAVE A GREAT IDEA FOR HELIX NATIVE?
We've already received a ton of feature requests from beta users, but if you have a great idea for Helix Native, we want to hear about it! Please visit http://line6.ideascale.com to post your requests and suggestions, or vote for features. This is the most direct way for you to influence our updates, and we look forward to hearing from you!
Get Download
Helix Native
Helix Native
Helix Native Version 1.00
The new Helix® Native plug-in delivers the same award-winning HX amp and effects modeling found in Line 6’s best-selling Helix hardware guitar and effects processors, bringing authentic tone to your favorite DAW.
Helix Native is available as a fully functional 15-day free trial, which requires a Line 6 account.
Learn more at http://line6.com/helix/helixnative.html.
Download the user manual here.
THE WAIT IS OVER!
- At long last... We are very proud to announce that this is the first version of the Helix Native plug-in for VST3, AAX, and AU made available to the public!
- Try it for FREE for 15 days by clicking "start my 15-day free trial" on first launch.
- Where's VST2? If your DAW does not yet support the VST3 standard, like Ableton Live or Reason, be sure to check the "install VST2" checkbox during installation.
- Check your Authorized Devices if you can't authorize Helix Native, you might have too many authorized devices on your account.
- Presets Compatible with Helix 2.21 firmware. Make sure your Helix hardware and editor software are up-to-date before transferring presets, setlists, etc.
KNOWN ISSUES
We're dedicated to being as transparent as possible, and here's some not-so-great stuff that you may encounter.
- Please temporarily disable your antivirus during the installation as some users have had trouble downloading or authorizing and we don't want that to happen to you too.
- Editing min/max for automation of a parameter slider can temporarily stop reading the automation lane.
- Editing parameters assigned to automation can can temporarily stop reading the automation lane during playback/record.
- Cali IV Lead Amp model will decrease in gain when Mid and Bass are set to 0. This is already known to occur on Helix hardware.
- Unfreezing Tracks in Logic Pro X will darken the plug-in UI, just close and reopen it in the meantime.
- Moving blocks while Automation is running may cause some errors during playback/record on Pro Tools.
HAVE A GREAT IDEA FOR HELIX NATIVE?
We've already received a ton of feature requests from beta users, but if you have a great idea for Helix Native, we want to hear about it! Please visit http://line6.ideascale.com to post your requests and suggestions, or vote for features. This is the most direct way for you to influence our updates, and we look forward to hearing from you!