

Helix/HX 3.50 (released November 3, 2022) includes 24 new cabs running on an all new cab engine, 5 new amps, 7 new effects, new features, additional improvements, and bug fixes, and is strongly recommended for all users.
How do I update to 3.50?
IMPORTANT! The 3.50 update process may take 30 MINUTES OR MORE TO COMPLETE. This is totally normal, as it includes significant improvements to Helix Core and thousands of IR files.
Updating Helix/HX Hardware
-
With Helix/HX connected to your computer, launch HX Edit (3.01 or higher), and make sure you're signed in. HX Edit knows when a new update is available and will walk you through the entire update procedure for both hardware and software, including backing up everything to your computer. IMPORTANT! If you're running HX Edit 3.00 or older, download HX Edit 3.50 and repeat step 1.
- HX Edit 3.50 (macOS): https://line6.com/software/readeula.html?rid=11599
- HX Edit 3.50 (Windows): https://line6.com/software/readeula.html?rid=11598
-
Helix Floor/Rack/LT only: Halfway through the update to 3.50, Helix's LCD reads "Boot Failure. Entered Update Mode!" THIS IS NORMAL. Breathe deep, everything is fine. You're almost there.
-

- HX Edit will display a message indicating the device must be reset. Click resume and wait for the second part of the update to complete.
-
-
Perform a factory reset. IMPORTANT! MAKE SURE YOU HAVE A BACKUP FIRST, AS A FACTORY RESET WILL ERASE ALL YOUR WORK!
- Helix Floor/LT: While holding footswitches 9 & 10 (bottom row, 2 middle switches), turn on Helix Floor/LT
- Helix Rack: While holding knobs 5 & 6 (2 furthest right knobs below the screen), turn on Helix Rack
- HX Effects: While holding footswitches 6 & TAP (2 farthest right switches on the bottom row), turn on HX Effects
- HX Stomp: While holding footswitches 2 & 3, turn on HX Stomp
- HX Stomp XL: While holding footswitches C & D, turn on HX Stomp
- OPTIONAL: Performing a factory reset loads the new 3.50 Factory Presets, but restoring from your backup will overwrite these. Spend some time exploring these and export the factory presets you want to keep (or drag them to your desktop). If you have unused setlists in Helix Floor/Rack/LT, you can also export the entire FACTORY 1 bundle for loading into an unused setlist later.
- From the top File menu, select Restore From Backup... If you don't have any important presets in Setlist 1, click the disclosure triangle next to Presets and uncheck the first setlist's box; this will retain 3.50's FACTORY 1 setlist. Select the backup file created in Step 1 and click Restore Backup.
Updating Helix Native
- Before updating Helix Native, it is highly recommended that you export a preset/setlist bundle. Click the gear icon in the lower left, select the Presets/IRs tab, and then click Export Bundle. Some hardware compatibility modes (HX Stomp, HX Stomp XL, HX Effects) do not have this feature as they have only one setlist. In these cases, at the top of the preset list, click the yellow EXPORT to export the setlist.
-
Quit your DAW and download and install Helix Native 3.50:
- Helix Native 3.50 (macOS): https://line6.com/software/readeula.html?rid=11601
- Helix Native 3.50 (Windows): https://line6.com/software/readeula.html?rid=11600
- Open your DAW and open an instance of Helix Native.
- OPTIONAL: The only way to hear 3.50's new factory presets is to restore them. IMPORTANT! MAKE SURE YOU'VE EXPORTED A BUNDLE (OR ANY IMPORTANT SETLISTS) FIRST, AS RESTORING FACTORY SETLISTS WILL ERASE ALL YOUR WORK! Click the gear icon in the lower left, select the Presets/IRs tab, and then click Restore Factory Setlists. Click Yes.
NOTE: Presets created in 3.50 are not compatible with earlier firmware versions.
I updated but why don't I see [Model X] in HX Edit?
HX Edit can't magically pull new model names and graphics from your Helix/HX hardware; you must update HX Edit as well (which you would've done had you followed "How do I update to 3.50?" above).
My Helix/HX is at version X.XX. Can I go straight to 3.50?
Yes, but note that if you're starting from 2.80 or lower, the update may appear to happen three times and will take notably longer than 30 minutes. This is normal.
All New Cab Engine/New Cabs in 3.50
Helix Floor, Helix Rack, Helix LT, Helix Native, HX Stomp, HX Stomp XL
Thousands of impulses were captured with Sound Design's all new IR capture system and consolidated into 20 guitar cabs and 4 bass cabs. As such, cab subcategories have been updated:
- Single—One new cab
- Dual—Two new cabs
- Legacy Single—One older Hybrid cab
- Legacy Dual—Two older Hybrid cabs
Amp+Cab subcategories have been updated as well:
- Guitar—Guitar Amp+new cab
- Bass—Bass Amp+new cab
- Guitar+Legacy—Guitar Amp+older Hybrid cab
- Bass+Legacy—Bass Amp+older Hybrid cab
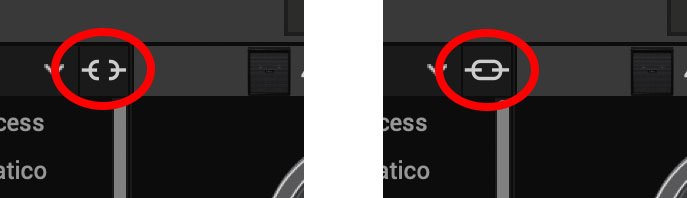
With Cab > Dual blocks, you can now also choose whether changing the first cab automatically recalls a matching cab for the second.
- From the Global Settings menu, select the Preferences page.
- Press PAGE> until you see Link Dual Cabs. When set to "On" (default), changing the first cab automatically loads a matching cab for the second. Choose this option if you want to emulate the sound of two different mics (or two of the same mic with different angles or positions) on the same cab. When set to "Off," both cabs are completely independent of one another.
- Alternatively, in HX Edit (and Helix Native), click the Link Dual Cabs icon. Off (left) and On (right):
New Guitar Cabs
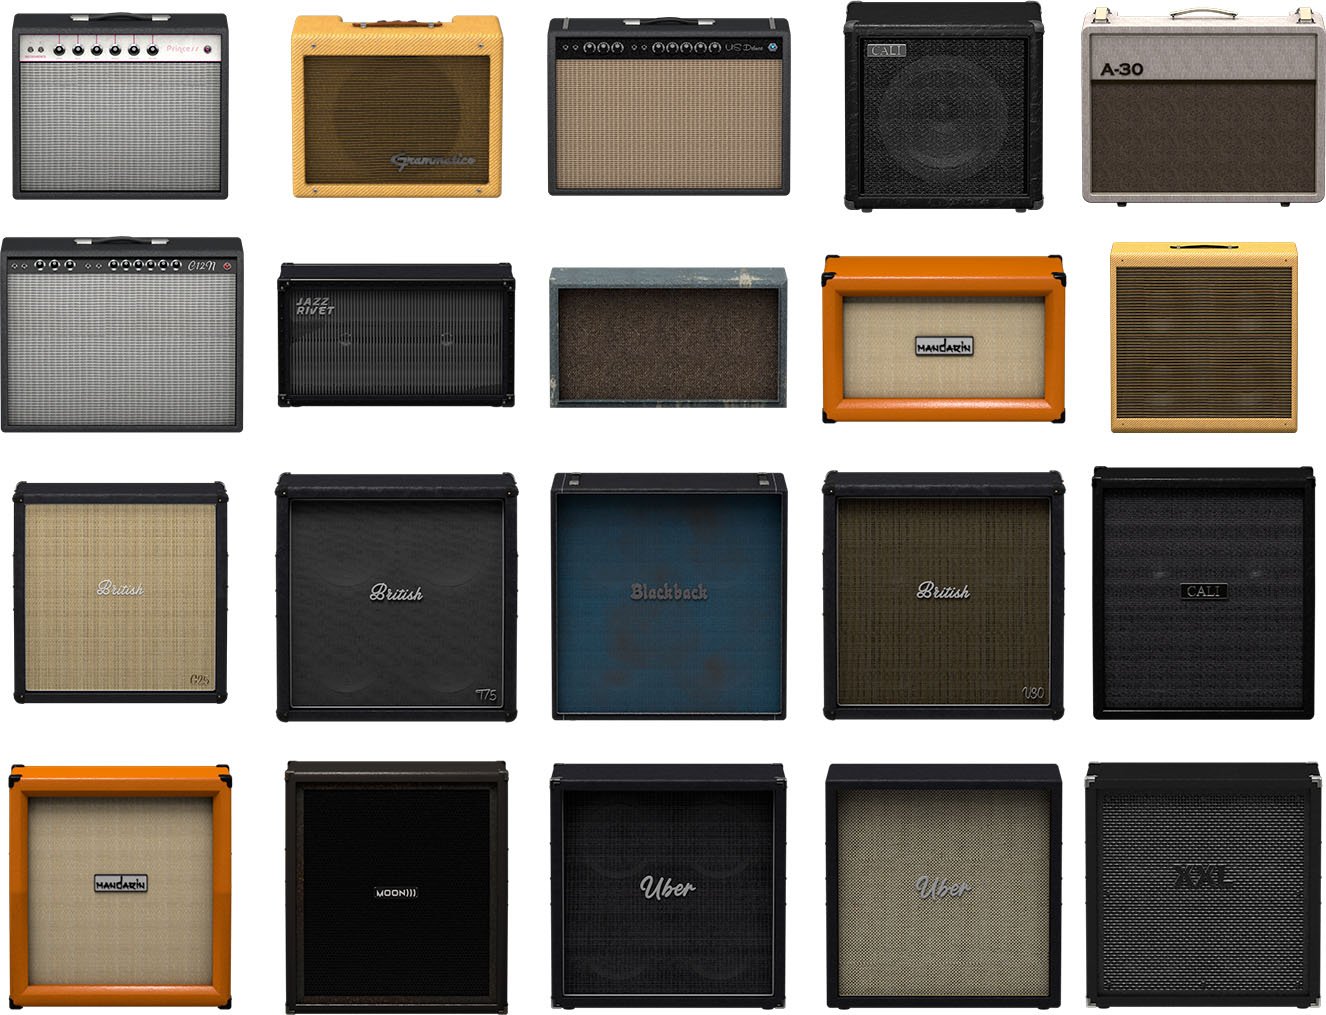
Cab > 1x10 US Princess (Single, Dual), captured from* the 1x10" Fender Princeton Eminence Copperhead
Cab > 1x12 Grammatico (Single, Dual), captured from* the 1x12" Grammatico LaGrange P12Q
Cab > 1x12 US Deluxe (Single, Dual), captured from* the 1×12″ Fender® Deluxe Oxford
Cab > 1x12 Cali EXT (Single, Dual), captured from* the 1x12" Mesa Boogie Extension Cab
Cab > 2x12 Blue Bell (Single, Dual), captured from* the 2×12″ Vox® AC-30 Fawn Blue
Cab > 2x12 Double C12N (Single, Dual), captured from* the 2×12″ Fender Twin C12N
Cab > 2x12 Jazz Rivet (Single, Dual), captured from* the 2×12″ Roland® JC-120
Cab > 2x12 Mail C12Q (Single, Dual), captured from* the 2×12″ Silvertone® 1484
Cab > 2x12 Mandarin 30 (Single, Dual), captured from* the 2x12" Orange PPC212 V30
Cab > 4x10 Tweed P10R (Single, Dual), captured from* the 4×10″ Fender Bassman® P10R
Cab > 4x12 Greenback25 (Single, Dual), captured from* the 4×12″ Marshall® Basketweave G12 M25
Cab > 4x12 1960A T75 (Single, Dual), captured from* the 4×12″ Marshall 1960A T75
Cab > 4x12 Blackback 30 (Single, Dual), captured from* the 4×12″ Park® 75 G12 H30
Cab > 4x12 Brit V30 (Single, Dual), captured from* the 4×12″ Marshall® 1960AV V30
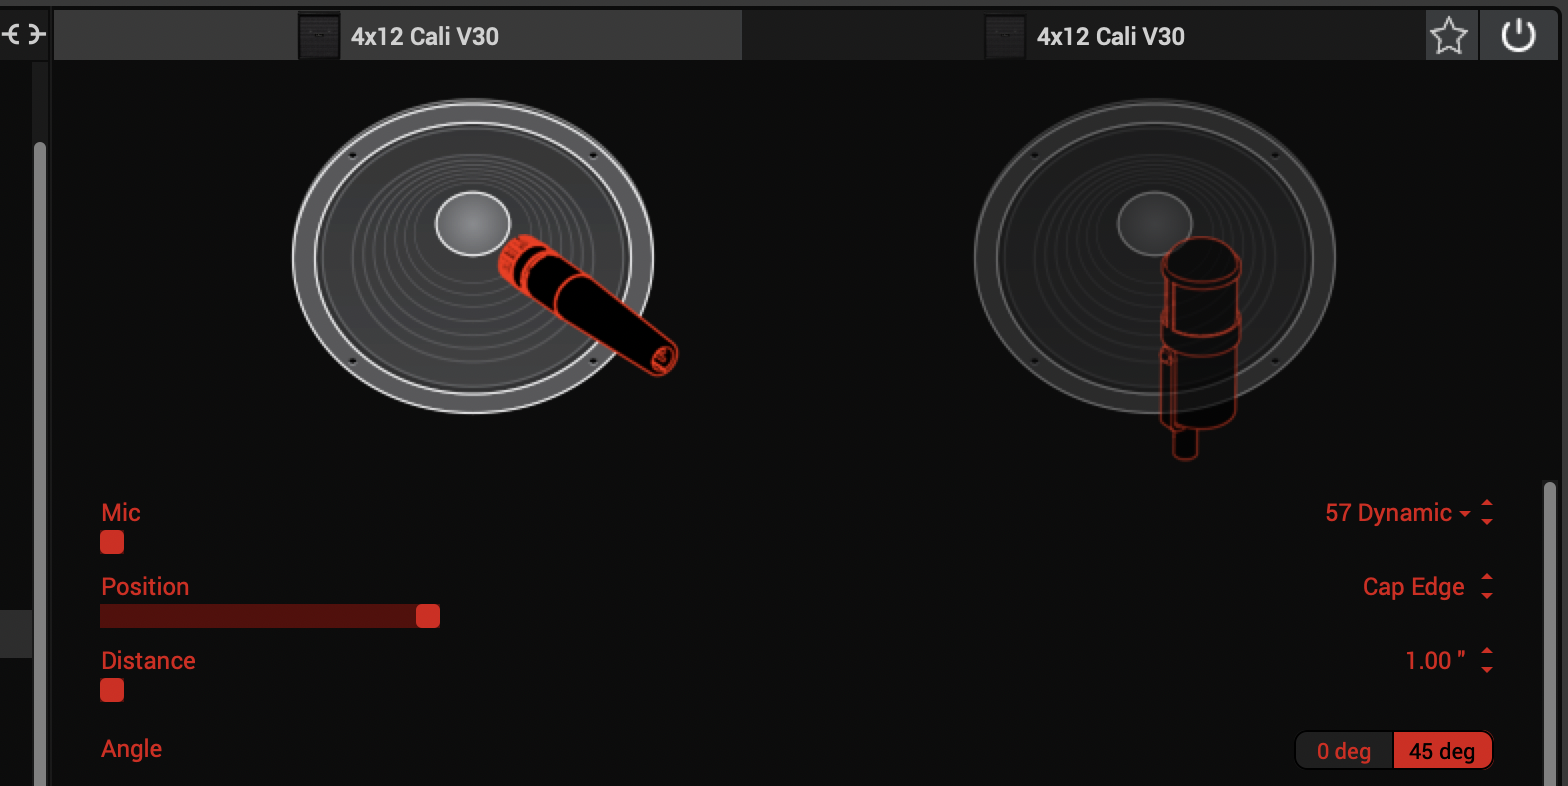
Cab > 4x12 Cali V30 (Single, Dual), captured from* the 4×12″ MESA/Boogie® 4FB V30
Cab > 4x12 Mandarin EM (Single, Dual), captured from* the 4×12″ Orange Eminence
Cab > 4x12 MOO)))N T75 (Single, Dual), captured from* the 4x12" Sunn Cab w/G75T
Cab > 4x12 Uber T75 (Single, Dual), captured from* the 4×12″ Bogner® Uberkab T75
Cab > 4x12 Uber V30 (Single, Dual), captured from* the 4×12″ Bogner Uberkab V30
Cab > 4x12 XXL V30 (Single, Dual), captured from* the 4×12″ ENGL® XXL V30
-
Mic—Select from up to 12 mics:
- 57 Dynamic—Shure® SM57
- 421 Dynamic—Sennheiser® MD 421-U
- 7 Dynamic—Shure SM7
- 906 Dynamic—Sennheiser e906
- 30 Dynamic—Heil Sound® PR 30
- 121 Ribbon—Royer® R-121
- 160 Ribbon—Beyerdynamic® M 160
- 4038 Ribbon—Coles 4038
- 84 Ribbon—AEA R84
- 414 Cond—AKG® C414 XLS
- 47 Cond FET—Neumann® U47 FET
- 67 Cond—Neumann U67
- Position—Sets the lateral location of the mic in relation to the speaker cone. Choose from Center ~ Cap Edge ~ Edge. Cap Edge may appear in a different location depending on the selected cab
- Distance—Sets the distance of the mic from the speaker cone. Choose from 1.00" to 12.00" in 1/4" increments
- Angle—Sets the angle of the mic. 0 degrees is pointing directly at the speaker, 45 degrees is pointing off-axis
- Low Cut—Applies a low cut (high pass) filter, letting you remove all audio below a certain frequency. May be useful in removing undesirable low end rumble
- High Cut—Applies a high cut (low pass) filter, letting you remove all audio above a certain frequency. May be useful in removing high end harshness
- Level—Sets the overall level of the cab
- Pan (Dual only)—Moves the signal left or right across the stereo sound field. For example, if you're running a stereo playback system with two or more speakers, panning the first cab to Left 100 and the second cab to Right 100 can make your tone sound notably wider. Press the knob to return to Center
- Delay (Dual only)—Although the new cabs in 3.50 perfectly line up with one another, there may be situations where you want to delay one side very slightly, to perhaps impart a bit of phase incoherence or at higher values, to increase the apparent stereo spread. A little goes a long way here
New Bass Cabs
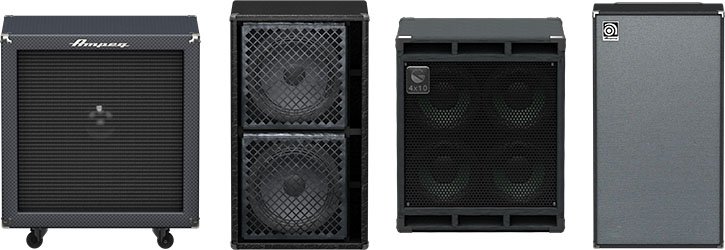
Cab > 1x15 Ampeg B-15 (Single, Dual), captured from* the 1×15″ Ampeg® B-15
Cab > 2×15 Brute (Single, Dual), captured from* the 2×15″ MESA/Boogie® 2×15 EV
Cab > 4×10 Garden (Single, Dual), captured from* the 4x10" Eden D410XLT
Cab > 8x10 SVT AV (Single, Dual), captured from* the 8×10″ Ampeg® SVT® (SVT-810AV Heritage Edition)
-
Mic—Select from up to 12 mics:
- 57 Dynamic—Shure SM57
- 421 Dynamic—Sennheiser MD 421-U
- 7 Dynamic—Shure SM7
- 88 Dynamic—Beyerdynamic M88TG
- 52 Dynamic—Shure Beta 52A
- 112 Dynamic—AKG D112
- D6 Dynamic—Audix D6
- 40 Dynamic—Heil Sound PR 40
- 4038 Ribbon—Coles 4038
- 414 Cond—AKG C414 TLII
- 47 Cond FET—Neumann U47 FET
- 67 Cond—Neumann U67
- All other parameters the same as for guitar cabs (see above)
New Amps in 3.50
Helix Floor, Helix Rack, Helix LT, Helix Native, HX Stomp, HX Stomp XL
Amp/Preamp > MOO)))N T Nrm, based on* the normal channel of the Sunn Model T.
"The Moon model is based on a 1974, silver knob Sunn Model T amplifier. This is the early version with the more traditional tone stack. Though it has been repaired over the years, the circuit has every component at stock value. This specific unit has been well used, well maintained, and regularly enveloped in fog.
"This amp circuit can best be described as a Fender Tweed Bassman/Marshall JTM45 preamp mated with a very high volume, very flat, ultralinear power amp that uses 6550 tubes. The result of this configuration is a tone with a raw growl that really has a strong punch to the gut. In addition, this configuration takes pedals very well; adding a distortion or booster can turn the amp into a high gain, doom machine."
—Ben Adrian, Sound Design Manager

Amp/Preamp > MOO)))N T Brt, based on* the bright channel of the Sunn Model T
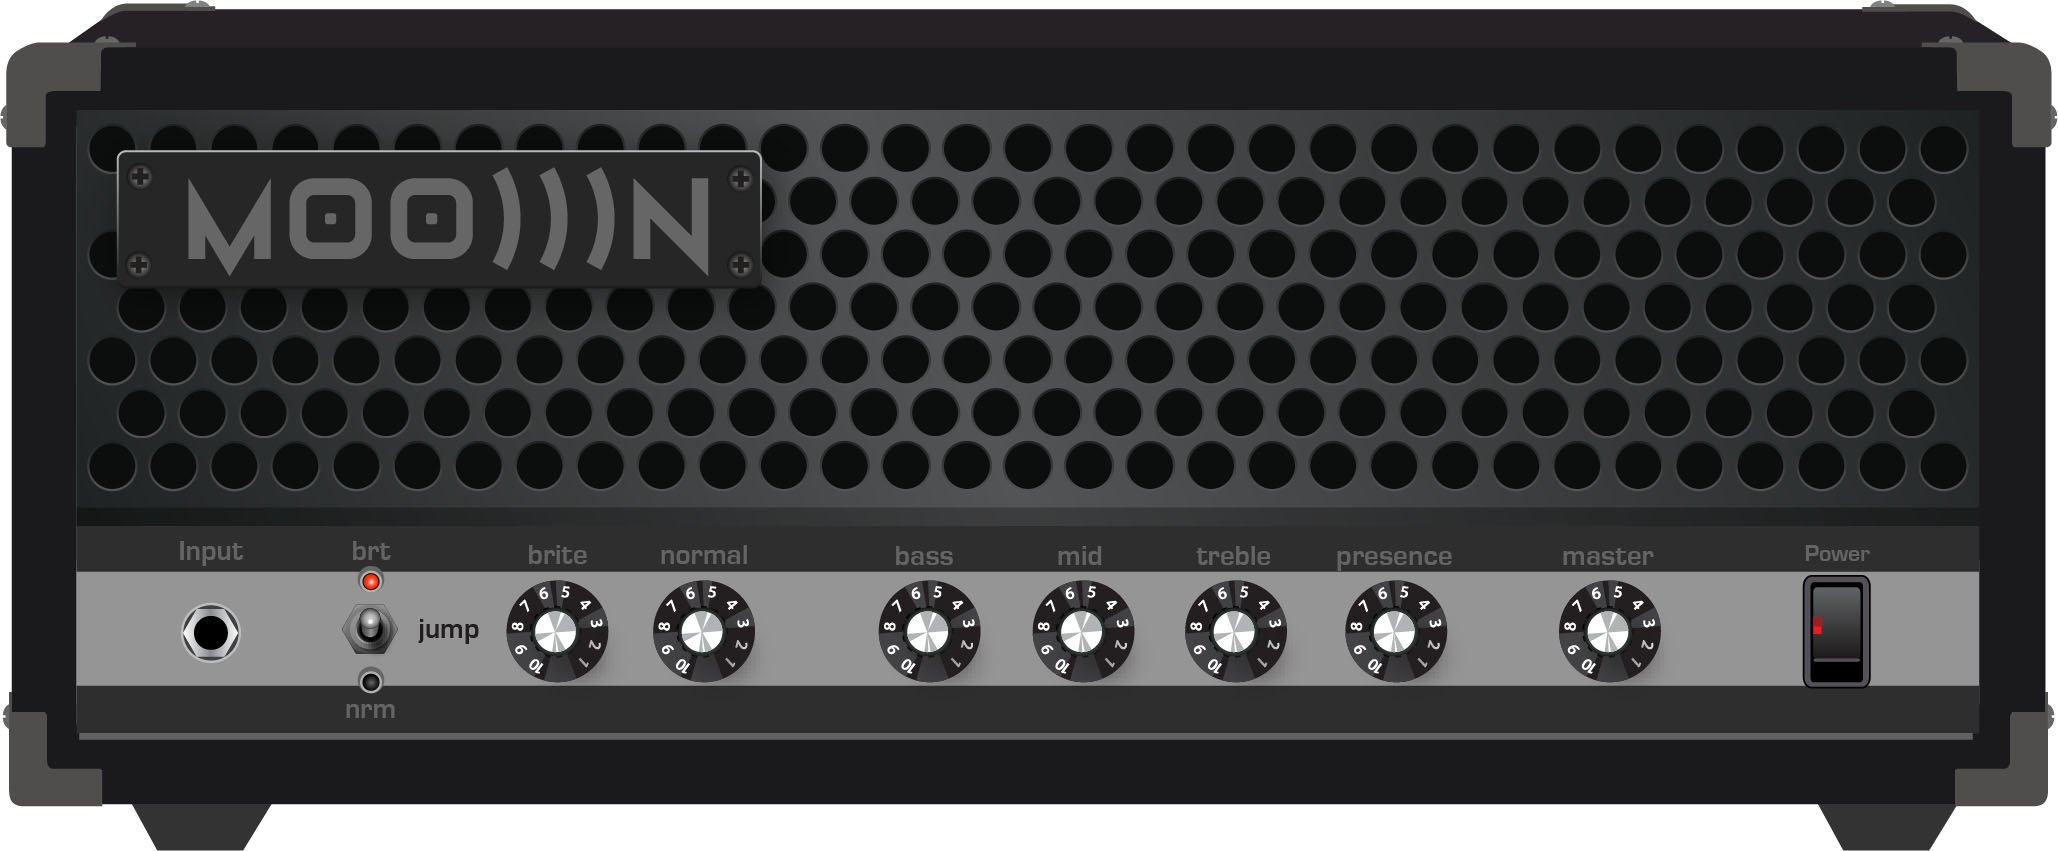
Amp/Preamp > MOO)))N T Jump, based on* the normal and bright channels jumped in the Sunn Model T

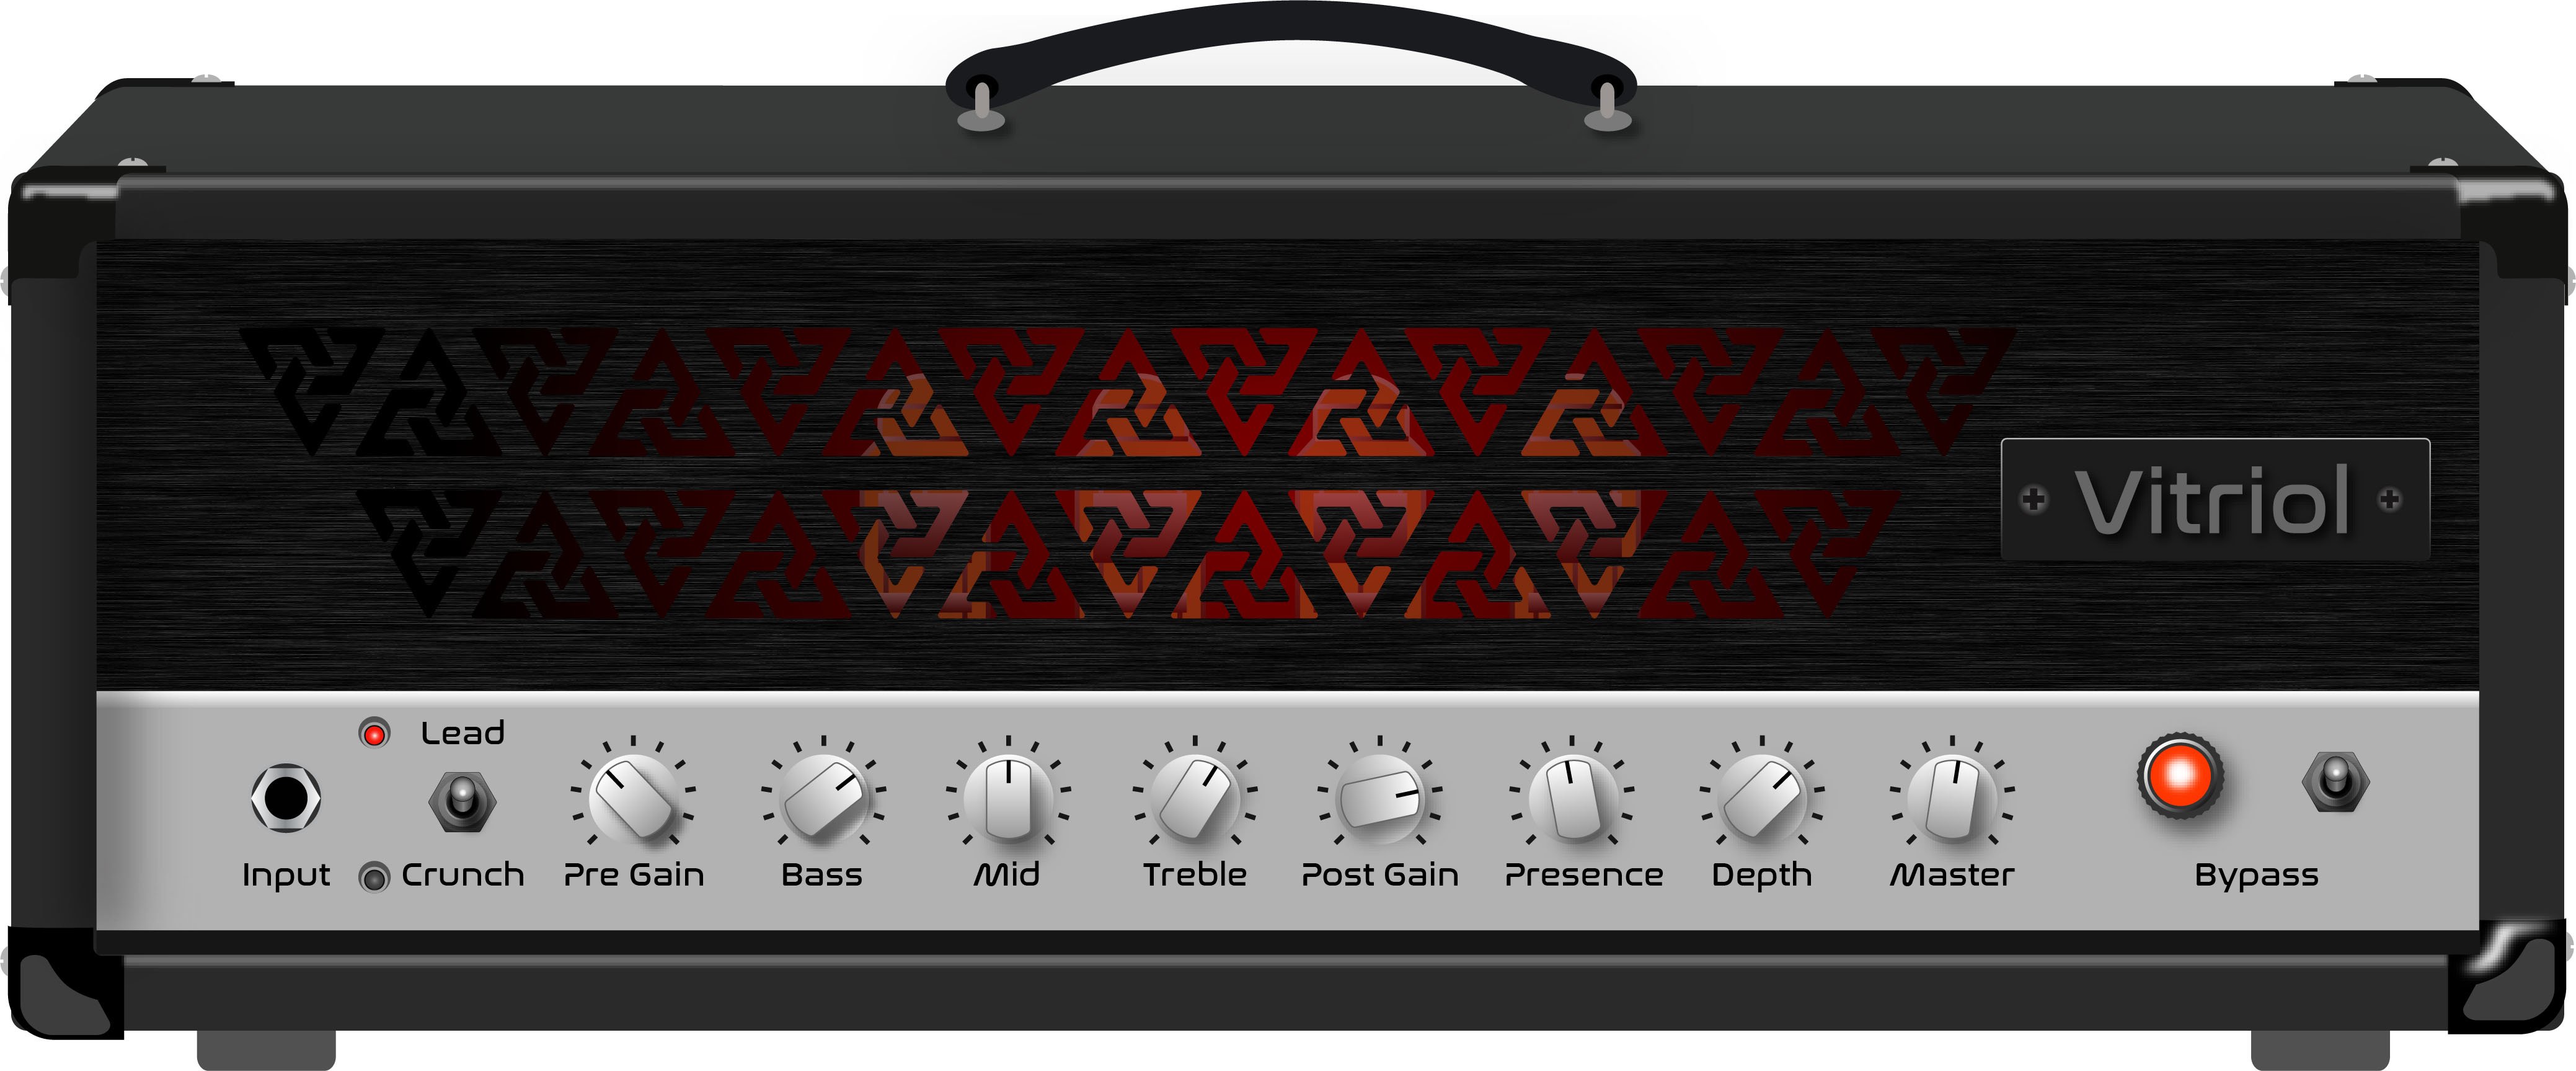
Amp/Preamp > PV VitriolCrunch, based on* the crunch channel of the Peavey Invective (Master boost off). Peavey designed this 6L6 tube-powered monster in collaboration with Misha Mansoor of Periphery, with the goal of offering no-compromise, high-gain performance and flexibility.

Amp/Preamp > PV Vitriol Lead, based on* the lead channel of the Peavey Invective (Master boost off)
New Effects in 3.50
Helix Floor, Helix Rack, Helix LT, Helix Native, HX Effects, HX Stomp, HX Stomp XL
Distortion > Pillars OD (Mono, Stereo), based on* the Earthquaker Devices Plumes distortion
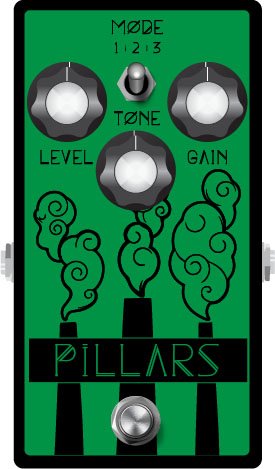
- Gain—Sets the amount of distortion
- Tone—Sets the overall tonal balance of the distortion
- Level—Sets the overall level of the block
- Mode—Chooses the type of clipping circuit—1 is LED, 2 is Clean Opamp, 3 is Asymmetrical
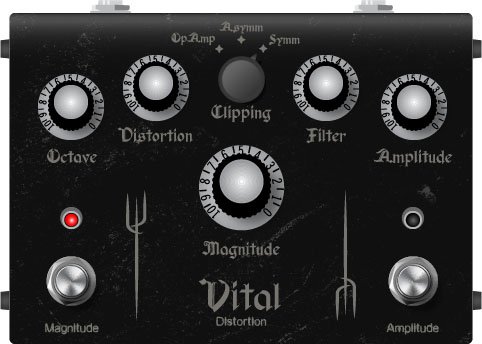
Distortion > Vital Dist (Mono, Stereo), based on* the Earthquaker Devices Life pedal (Amplitude side)
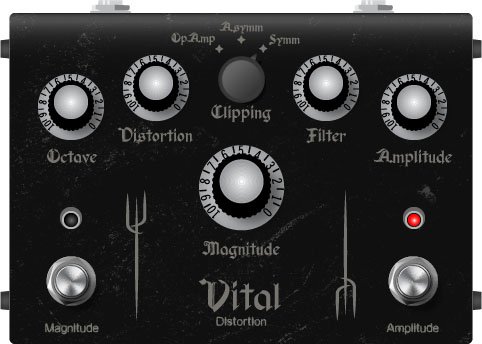
- Gain—Sets the amount of distortion
- Filter—Applies a high cut (or low pass) filter to the signal, letting you remove treble frequencies. At 0.0, no filter is applied
- Level—Sets the overall level of the block
- Clipping—Chooses the type of clipping circuit—Opamp, Asymmetrical, or Symmetric[al]
- Octave—Blends in a signal one octave up. At 0.0, no octave signal is heard. Works best when playing single notes
Distortion > Vital Boost (Mono, Stereo), based on* the Earthquaker Devices Life pedal (Magnitude side)
- Boost—Sets the output level of the boost circuit
Modulation > 4-Voice Chorus (Mono, Stereo), Line 6 Original

- Rate—Adjusts the speed of the chorus’ low-frequency oscillator (LFO) from slow to fast
- Depth—Adjusts the amplitude of the modulation, from mild to deep
- Voices—Determines the number of voices in the chorus (2, 3, or 4)
- Low Cut—Applies a low cut (high pass) filter to the chorus, letting you remove the effected signal below a certain frequency
- HighShelf—Applies a high cut (low pass) filter to the fills, letting you remove the effected signal above a certain frequency
- Mix—Controls the wet/dry mix of the chorus. When set to 0%, no chorus is heard; when set to 100%, no dry signal is heard
- Level—Controls the overall output level of the block
Modulation > FlexoVibe (Mono, Stereo), Line 6 Original
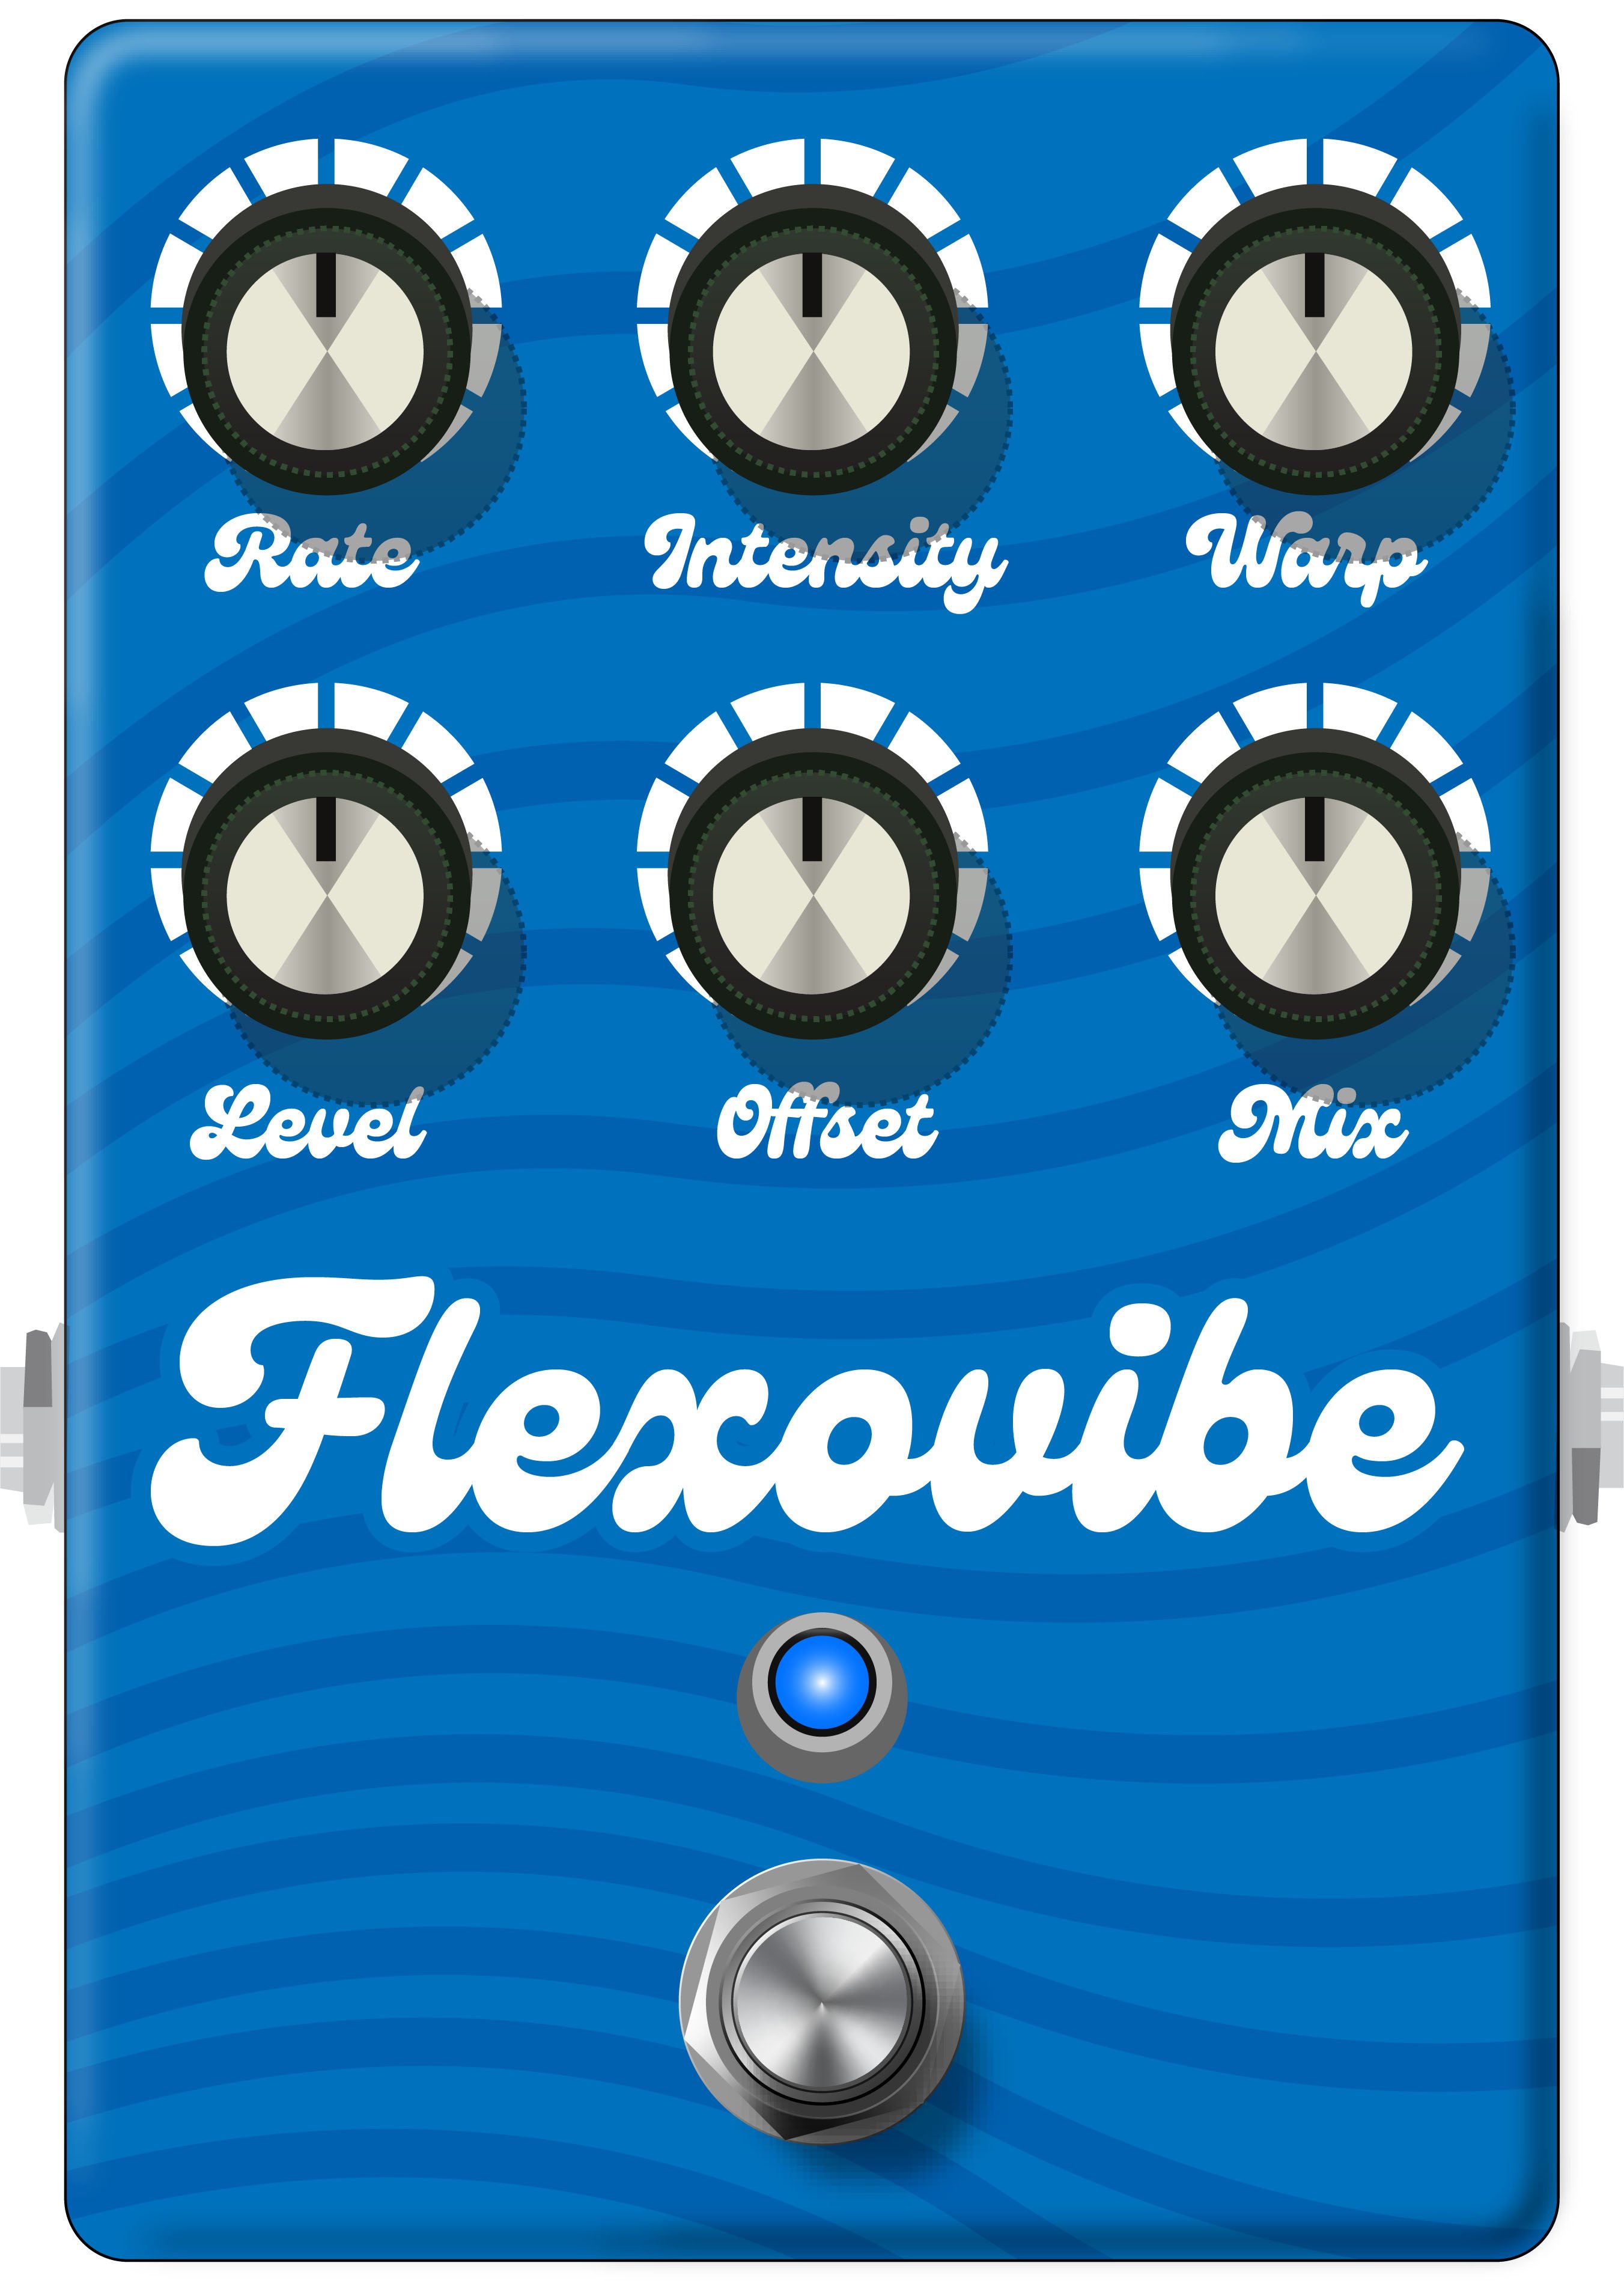
- Rate—Adjusts the speed of the chorus’ low-frequency oscillator (LFO) from slow to fast
- Intensity—Adjusts the amplitude of the modulation, from mild to deep
- Warp—Controls the shape of the LFO. At 0.0, the LFO waveform is a triangle; at +1.0 and -1.0, the waveforms exhibit more chaos, or "warping"
- Spread—Controls the phase offset between the two LFOs. At 0.0, no offset is heard; at 10.0, the two LFOs are separated by 180°. Generally sounds best somewhere in the middle
- Mix—Controls the wet/dry mix of the FlexoVibe effect. When set to 0%, no effect is heard; when set to 100%, no dry signal is heard
- Level—Controls the overall output level of the block
Reverb > Dynamic Ambience (Mono, Stereo), Line 6 Original ambience reverb. At less extreme settings can be used to "open up" the sound of your amp without applying a notable reverb effect. Also utilizes less DSP than other Dynamic reverbs.
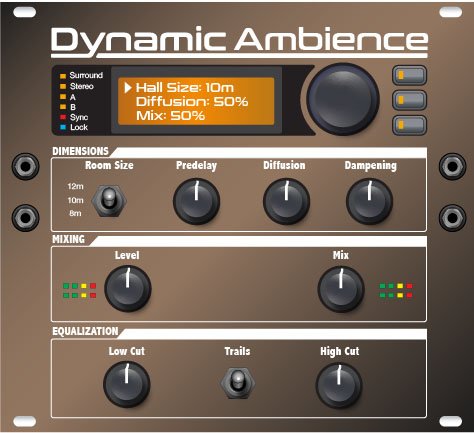
- Room Size—Sets the size of the hall (8, 10, or 12 meters)
- Predelay—Determines the amount of delay heard before the signal enters the hall. Can sometimes result in more definition between the dry and effected signals
- Damping—Determines the frequency above which the reverb will be absorbed. For example, if your hall is full of people wearing fake ocelot jumpsuits, more high frequencies would be absorbed than if the room were empty
- Diffusion—Sets the amount of smearing between discrete echoes, sometimes resulting in a softer effected signal
- Shape—Controls the blend of the Early and Late reflections. Turning the knob clockwise adds more Late reflections; turning the knob counterclockwise adds more Early reflections. Press the knob to reset to "Even"
- Mix—Controls the wet/dry mix of the reverb. When set to 0%, no reverb is heard; when set to 100%, no dry signal is heard
- Low Cut—Applies a low cut (or high pass) filter to the reverb, letting you remove the effected signal below a certain frequency
- High Cut—Applies a high cut (or low pass) filter to the reverb, letting you remove the effected signal above a certain frequency
- Level—Controls the overall output level of the block
- Trails—When on, reverb decay continues to ring out after the block is bypassed
Pitch/Synth > Boctaver (Mono, Stereo), based on* the BOSS® OC-2 Octaver
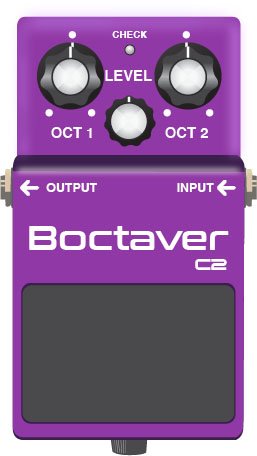
- –1 Oct—Sets the level of the signal one octave down
- –2 Oct—Sets the level of the signal two octaves down
- Dry Level—Sets the level of the dry (unaffected) signal
*NOTE: All product names used in this document are trademarks of their respective owners and neither Yamaha Guitar Group nor Line 6 are associated or affiliated with them. These trademarks appear solely to identify products whose tones and sounds were studied by Line 6 during sound model development.
New Features in 3.50
IR > Dual Block
Helix Floor, Helix Rack/Control, Helix LT, HX Effects, HX Stomp, HX Stomp XL

3.50 renames the Impulse Response > Mono subcategory as "Single" and adds a new subcategory—Dual. The IR > Dual block can accommodate two 1024-point IRs, you can pan them independently, flip the polarity of either one, and even slightly delay one vs. the other to account for any phase inconsistencies between IR developers.
- IR Select A—Selects the IR file for the first (A) slot
- Low Cut A—Applies a low cut (high pass) filter to the IR, letting you remove the signal below a certain frequency
- High Cut A—Applies a high cut (low pass) filter to the decks, letting you remove the signal above a certain frequency
- Level A—Sets the level of the first (A) IR
- Pan A—Pans the IR left or right between stereo speakers. Press the knob to reset to Center
- Polarity A—Flips the polarity of the IR's waveform. If your IR block suddenly makes everything sound thin, try setting this to "Inverted" to see if it helps
- IR Select B—Selects the IR file for the second (B) slot
- Low Cut B—Applies a low cut (high pass) filter to the IR, letting you remove the signal below a certain frequency
- High Cut B—Applies a high cut (low pass) filter to the decks, letting you remove the signal above a certain frequency
- Level B—Sets the level of the second (B) IR
- Pan B—Pans the IR left or right between stereo speakers. Press the knob to reset to Center
- Polarity B—Flips the polarity of the IR's waveform. If your IR block suddenly makes everything sound thin, try setting this to "Inverted" to see if it helps
- [Both] Delay—Some IR files don't line up perfectly, especially when mixing and matching files from two different developers. This can result in phase incoherence or a thin, unfocused tone. Turning this knob clockwise delays the B side IR by a tiny bit; turning it counterclockwise delays the A side by a tiny bit. Press the knob to return Delay to "None"
- [Both] Mix—Controls the wet/dry mix of the IR block. For Cab IRs, you should leave this set to 100%, but when utilizing body resonance IRs for acoustic guitars, you may want to find the right blend between the IR and dry signal
New Cabs and IRs now use 66-80% Less DSP
Helix Floor, Helix Rack/Control, Helix LT, Helix Native, HX Effects [IRs only], HX Stomp, HX Stomp XL
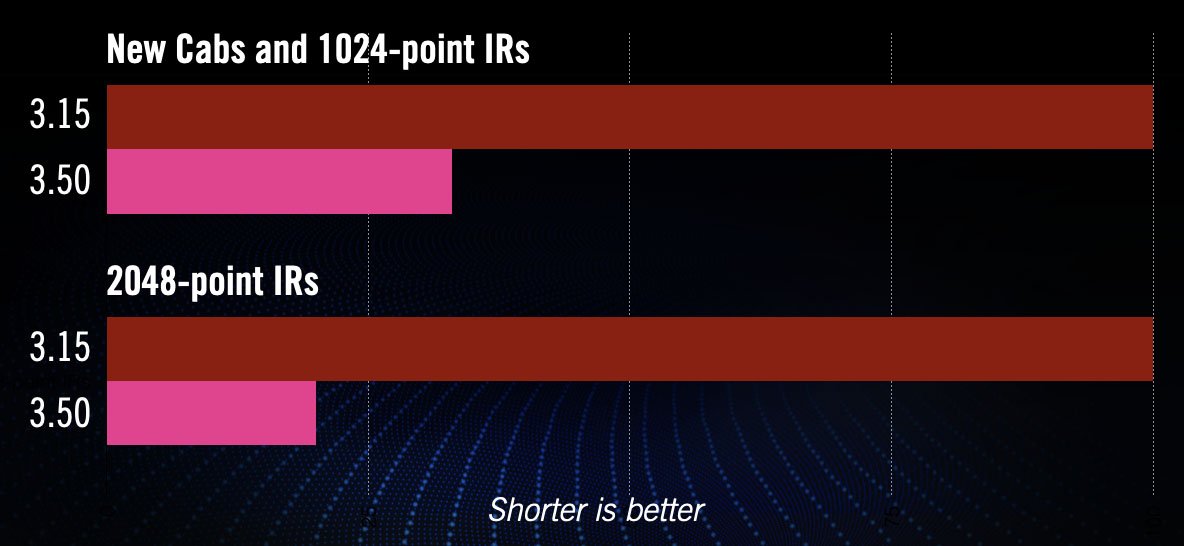
Due to further improvements to Helix Core, new Cabs and 1024-point IRs use roughly 66% less DSP as older Hybrid cabs and IRs in 3.15 and earlier versions. A new Cab > Dual block uses less DSP than a single Hybrid cab block and the new IR > Dual block uses less DSP than a single IR block in 3.15. 2048-point IRs use roughly 80% less DSP, although they still use a lot of memory, so they're still limited to one instance per path. NOTE: Older Hybrid cabs use the same amount of DSP as in earlier firmware.
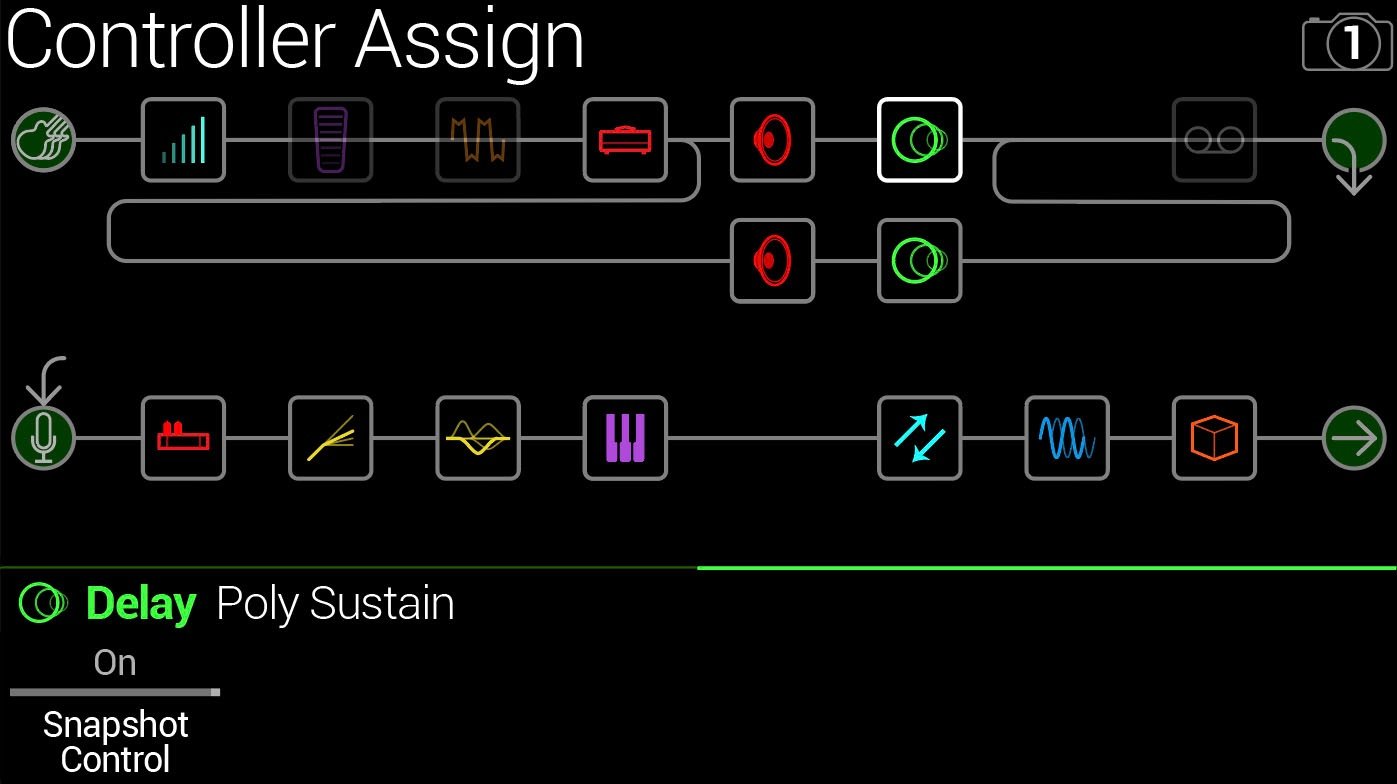
Disable Snapshot Control over Parameter Assignments
Helix Floor, Helix Rack/Control, Helix LT, HX Effects, HX Stomp, HX Stomp XL
Prior to 3.50, when assigning a parameter to a physical control (EXP 1, footswitch, etc.) or MIDI, Snapshots are also always assigned. In 3.50, they still are, but there's an additional "Snapshot Control" parameter on the Controller Assign page that lets you bypass this behavior.
- From the Controller Assign menu, select the desired parameter and turn Knob 2 (Controller) to select any value other than "None" or "Snapshots." A second page appears.
- Press PAGE> and turn Knob 1 (Snapshot Control) to "Off." It's set to "On" by default for all parameters.
Other Changes and Improvements in 3.50
- Encoder ballistics have been drastically improved. For example, tonestack values can go from 0.0 to 10.0 with one turn
- Helix Floor/Rack/LT only—SHORTCUT: While the Model List is open, pressing [AMP] jumps to highlight the Amp category without having to scroll down to it
- Helix Floor/Rack/LT only—The Impulse Response category's name has been shortened to "IR" (now matches that of HX Stomp/XL) to accommodate a wider subcategory column in the model list as well as accommodate longer IR names in the inspector header
Bug Fixes in 3.50
- Reverb > Shimmer's Pitch parameter was inconsistent between hardware and HX Edit—FIXED
- Reverb > Dynamic Room's Mot Rate value range was inconsistent between hardware and HX Edit—FIXED
- Delay > Stereo > ADT's Mod Rate value range was inconsistent between hardware and HX Edit—FIXED
- Delay > Tesselator and Ratchet's Operation is set to "Mute All," the signal would be muted even when bypassed—FIXED
- When Global Settings > Preferences > Snapshot Edits is set to "Discard," holding FS12 (SAVE+EXIT) while in Pedal Edit mode did not always save edited parameters when controlled by snapshots—FIXED
- After loading a preset containing a Command Center > Instant > Ext Amp command, EXP Pedal 1 could sometimes stop functioning properly—FIXED
- When a snapshot is reloaded, a duplicate MIDI PC message was not sent—FIXED
- When many Command Center commands are assigned, snapshot names could sometimes disappear—FIXED
- While in tuner view, attempting to restore globals could sometimes cause Helix to crash—FIXED
- When assigning block bypass to an expression pedal, Behavior > "Heel Down" or "Toe Down" could sometimes revert to "Toggle"—FIXED
- HX Stomp/HX Stomp XL only—Upon receiving MIDI CC73, changing views was not functioning as expected—FIXED
- HX Stomp/HX Stomp XL only—Overly long favorite names could result in graphical glitches—FIXED
- HX Stomp XL only—After changing presets using footswitches, capacitive sensing could become disabled until pressing a stomp switch—FIXED
- HX Stomp XL only—When a Command Center > Snapshot Up or Down command is assigned to Footswitch 7 or 8, an extra Snapshot Up/Down message could occur—FIXED
- HX Edit only—Copying and pasting an IR with more than 31 characters in the name would truncate the IR's name—FIXED
- HX Stomp w/ HX Edit only—After restoring from a 3.01 backup, if path B exists, blocks move 1 position to the right—FIXED
- Many other minor fixes and improvements
Known Issues in 3.50
- In some cases, the Input block's Variax Tone Knob setting is not recalled across preset changes
- In some cases, sending MIDI CC49-59 (footswitch emulation control) to engage stomp switches assigned to snapshot commands can result in inconsistent behavior. Instead, send Helix CC69 messages (values 0-7) to recall snapshots
- In rare cases, attempting to fill all 128 user IR locations can result in a "Failed to get impulse names" -8207 error and the device will appear to be frozen on "Transferring data." In the meantime, load 127 or fewer IRs at a time
- If Global Settings > Footswitches > Stomp Select is set to "Press" or "Touch+Press," engaging multiple block bypasses assigned to the same switch (set to momentary) can sometimes appear to lag
- In the Command Center, any MIDI notes assigned to a footswitch can sometimes unexpectedly trigger upon snapshot changes
- Helix Floor/Rack/LT only—If Path 1 is routed to Path 2, engaging the Tuner while Tuner Trails is on can sometimes mute the processed audio signal
- Helix Floor/Rack only—While in 10 Stomp footswitch mode, the momentary state of FS1 or FS7 can sometimes become reversed
- HX Effects only—If HX Effects is receiving MIDI clock, loading a new preset can sometimes cause the TAP LED to flash at double the tempo (audio is not affected, however)
- HX Edit only—In specific cases, moving a Path 2 block across a Split or Merge block can sometimes cause the block's location in the hardware to become out of sync