

Helix/HX 3.70 (released November 16, 2023) includes 10 new amps, 9 new cabs, 5 new effects, new features, and bug fixes.
Helix/HX 3.71 (released Jan 10, 2024) includes additional important bug fixes, and is recommended for all users. IMPORTANT! 3.71 does not apply to HX Edit.
- When running sufficient level into a Reverb > Dynamic Bloom block, audio clipping could occur—FIXED
- The mono version of Reverb > Nonlinear exhibits a less-smooth decay than the stereo version, which is especially noticeable on percussive material. It also affects the stereo version if merged to a mono path or when utilizing a mono output—FIXED
- When choosing the 30 Dynamic microphone at a distance of 7.0 ~ 11.75, Cab > WhoWatt Cab exhibits abnormal treble resonance—FIXED
- Delay > Tesselator could exhibit unexpected behavior in 3.70—FIXED
- Adjusting the Delay > Glitch Delay block's Time parameter could sometimes result in muted audio or other unexpected audio behavior—FIXED
- Adjusting the IR > Dual block's Delay parameter could sometimes result in graphical anomalies—FIXED
- Helix Native (Windows VST/AAX) only: Switching from certain reverb types to others (for example, from Hot Springs to Shimmer or Glitz to Shimmer) can result in DSP loss—FIXED
- Other minor fixes and improvements
3.71 for HX One (released Feb 8, 2024) includes one important bug fix, and is recommended for all users:
- HX One would only pass MIDI messages through on the MIDI channel it's set to (or when set to Omni, all channels). This clearly undermines the whole point of having MIDI thru at all—FIXED
How do I update to 3.71?
IMPORTANT! The 3.71 update process may take 30 MINUTES OR MORE TO COMPLETE. This is totally normal, as it includes thousands of additional IR files.
Updating Helix/HX Hardware (Except For HX One)
-
There is no HX Edit 3.71. With Helix/HX connected to your computer, launch HX Edit 3.70 (3.01 or higher), and make sure you're signed in. HX Edit knows when a new update is available and will walk you through the entire update procedure for both hardware and software, including backing up everything to your computer. IMPORTANT! If you're running HX Edit 3.00 or older, download HX Edit 3.70 and repeat step 1.
- HX Edit 3.70 (macOS): https://line6.com/software/readeula.html?rid=12404
- HX Edit 3.70 (Windows): https://line6.com/software/readeula.html?rid=12406
-
If your Helix Floor/Rack/LT is currently running firmware 3.15 or older, halfway through the update to 3.71, Helix's LCD reads "Boot Failure. Entered Update Mode!" THIS IS NORMAL. Breathe deep, everything is fine. You're almost there.
-

- HX Edit will display a message indicating the device must be reset. Click resume and wait for the second part of the update to complete.
-
-
Perform a factory reset. IMPORTANT! MAKE SURE YOU HAVE A BACKUP FIRST, AS A FACTORY RESET WILL ERASE ALL YOUR WORK!
- Helix Floor/LT: While holding footswitches 9 & 10 (bottom row, 2 middle switches), turn on Helix Floor/LT
- Helix Rack: While holding knobs 5 & 6 (2 furthest right knobs below the screen), turn on Helix Rack
- HX Effects: While holding footswitches 6 & TAP (2 farthest right switches on the bottom row), turn on HX Effects
- HX Stomp: While holding footswitches 2 & 3, turn on HX Stomp
- HX Stomp XL: While holding footswitches C & D, turn on HX Stomp
- OPTIONAL: Performing a factory reset loads the new 3.70 Factory Presets, but restoring from your backup will overwrite these. Spend some time exploring these and export the factory presets you want to keep (or drag them to your desktop). If you have unused setlists in Helix Floor/Rack/LT, you can also export the entire FACTORY 1 bundle for loading into an unused setlist later.
- From the top File menu, select Restore From Backup... If you don't have any important presets in Setlist 1, click the disclosure triangle next to Presets and uncheck the first setlist's box; this will retain 3.70's FACTORY 1 setlist. Select the backup file created in Step 1 and click Restore Backup.
If you run into trouble, check out this link.
Updating Helix Native
- Before updating Helix Native, it is highly recommended that you export a preset/setlist bundle. Click the gear icon in the lower left, select the Presets/IRs tab, and then click Export Bundle. Some hardware compatibility modes (HX Stomp, HX Stomp XL, HX Effects) do not have this feature as they have only one setlist. In these cases, at the top of the preset list, click the yellow EXPORT to export the setlist.
-
Quit your DAW and download and install Helix Native 3.71:
- Helix Native 3.71 (macOS): https://line6.com/software/readeula.html?rid=12503
- Helix Native 3.71 (Windows): https://line6.com/software/readeula.html?rid=12502
- Open your DAW and open an instance of Helix Native.
- OPTIONAL: The only way to hear 3.71's new factory presets is to restore them. IMPORTANT! MAKE SURE YOU'VE EXPORTED A BUNDLE (OR ANY IMPORTANT SETLISTS) FIRST, AS RESTORING FACTORY SETLISTS WILL ERASE ALL YOUR WORK! Click the gear icon in the lower left, select the Presets/IRs tab, and then click Restore Factory Setlists. Click Yes.
I updated but why don't I see [Model X] in HX Edit?
HX Edit can't magically pull new model names and graphics from your Helix/HX hardware; you must update HX Edit as well (which you would've done had you followed "How do I update to 3.71?" above).
My Helix/HX is at version X.XX. Can I go straight to 3.71?
Yes, but note that if you're starting from 2.80 or lower, the update may appear to happen three times and will take notably longer than 30 minutes. This is normal.
New Guitar Amps in 3.70
Helix Floor, Helix Rack, Helix LT, Helix Native, HX Stomp, HX Stomp XL
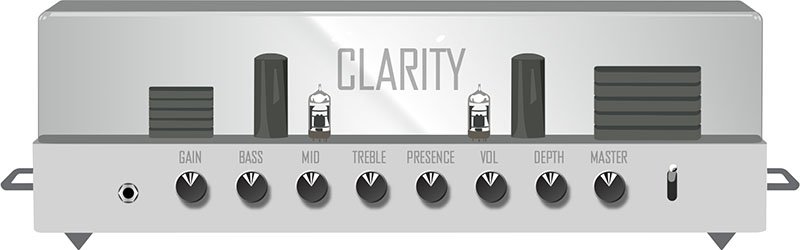
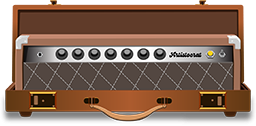
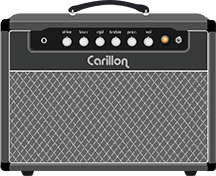
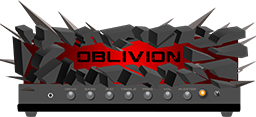
The six Original Amp Designs in Helix/HX 3.70 (Clarity, Aristocrat, Carillon, Voltage, Kinetic, and Oblivion) are taken from Line 6's popular line of Catalyst guitar amps. Each boasts a unique, integrated boost circuit optimized specifically for that amp. You can assign the Boost parameter to a stomp switch:
- Select one of the six Original Amp Design models below.
- Press and hold the Boost knob. Helix/HX jumps to the Controller Assign screen.
- [HX only: Press PAGE> to show the Learn knob.] Press Learn.
- Press the desired stomp switch. Helix/HX automatically assigns it. If you like, adjust Min Value and Max Value to dial in how much boost you want.
- Press HOME to exit. Wonder to yourself "wait, it's that easy to assign any parameter in Helix/HX to a stomp switch? Why haven't I done this before?"—OR—ponder "I'm a power user who knows all the shortcuts. I should assign parameters to switches more often."
Amp/Preamp > Line 6 Clarity, Original Amp Design inspired by classic clean solid-state and tube amps. Lots of clean headroom with just a touch of overdrive at the very end of the Drive knob's range.
Amp/Preamp > Line 6 Aristocrat, Original Amp Design inspired by rare, unobtainable boutique mid-gain black-panel amps. Features aren’t limited by what can be done with analog circuits.
Amp/Preamp > Line 6 Carillon, Line 6 Original inspired by modern and vintage versions of a popular EL84 driven tube amp with added grit at higher gain settings. We kept the good quirks and eliminated the ugly ones, while also making the tone controls more flexible.
Amp/Preamp > Line 6 Voltage, Line 6 Original inspired by the classic British "plexi" amp, but with an additional gain stage and more tonal versatility.

Amp/Preamp > Line 6 Kinetic, Line 6 Original where all the preamp stages clip at roughly the same time, allowing the amp to go from mostly clean to heavily distorted using the guitar's volume control.

Amp/Preamp > Line 6 Oblivion, Line 6 Original designed to cover both modern metal and old-school '80s thrash. We took out a lot of the noise associated with high gain, retaining just enough so that it doesn’t sound sterile or artificial.
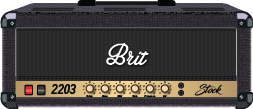
Amp/Preamp > Brit 2203, based on* the Marshall JCM800 2203 (Stock). TIP: Use snapshots (or a Stomp switch) to change the 2203's Input parameter between Low and High
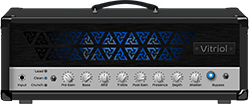
Amp/Preamp > PV Vitriol Clean, based on* the Peavey Invective (Clean Channel)
New Bass Amps in 3.70
Helix Floor, Helix Rack, Helix LT, Helix Native, HX Stomp, HX Stomp XL
Amp/Preamp > US Dripman Nrm, based on* the Fender Bassman (Silver Panel)
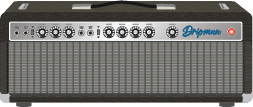
Should I use US Dripman Nrm as a bass amp or a guitar amp?
Yes.
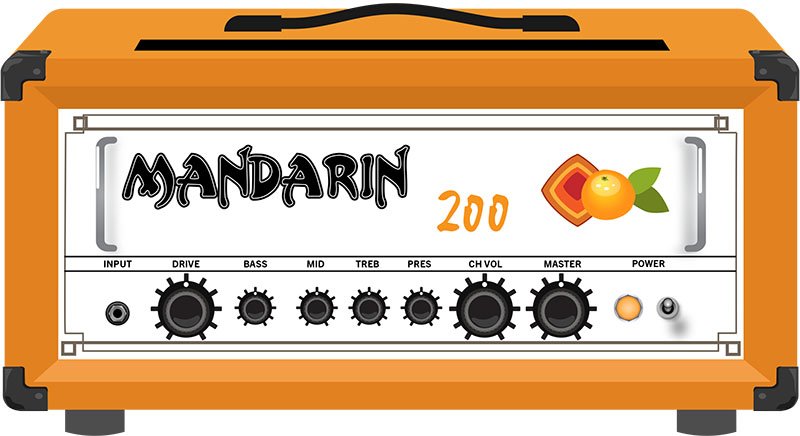
Amp/Preamp > Mandarin 200, based on* the Orange AD200 MkIII bass amp
New Cabs in 3.70
Helix Floor, Helix Rack, Helix LT, Helix Native, HX Stomp, HX Stomp XL
Cab > Soup Pro Ellipse (Single, Dual), captured from* the 1x6×9″ Supro® S6616

Cab > 1x8 Small Tweed (Single, Dual), captured from* the 1×8″ Fender® Champ

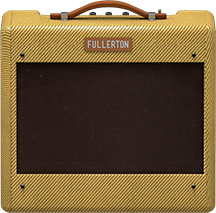
Cab > 1x12 Fullerton (Single, Dual), captured from* the 1x12" Fender® 5C3 Tweed Deluxe
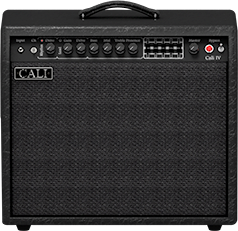
Cab > 1x12 Cali IV (Single, Dual), captured from* the 1x12" MESA/Boogie® Mk IV combo
Cab > 2x12 Interstate (Single, Dual), captured from* the 2×12″ Dr Z® Z Best V30

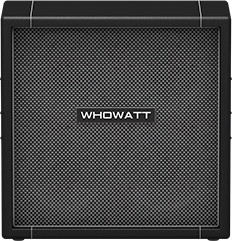
Cab > 4x12 WhoWatt 100 (Single, Dual), captured from* the 4×12″ Hiwatt® AP Fane®
Cab > 4x12 Greenback 30 (Single, Dual), captured from* the 4×12″ Marshall® Basketweave G12H-30

Cab > 2x15 Dripman (Single, Dual), captured from* the 2x15" Fender® Bassman JBL D130
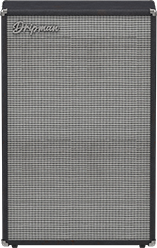
Cab > 6x10 Cali Power (Single, Dual), captured from* the 6×10″ MESA/Boogie® Power House
New Effects in 3.70
Helix Floor, Helix Rack, Helix LT, Helix Native, HX Effects, HX Stomp, HX Stomp XL, HX One
Distortion > Prize Drive (Mono, Stereo), based on* the Nobels ODR-1

- Drive—Sets the amount of distortion
- Spectrum—When turned down, mids are accentuated; when turned up, lows and highs are accentuated. Could almost be considered a "scoop" control.
- Level—Sets the overall level of the block.
- Bass Cut—When set to "On," slightly attenuates low bass frequencies.
- Voltage—The Nobels ODR-1 can behave differently depending on how much power it receives. Choose 9V or 18V, which gives a bit more headroom.
Distortion > Regal Bass DI (Mono, Stereo), based on* the Noble Preamp bass DI

- Bass—Adds a 150Hz bass boost to the signal. 0.0 is flat.
- Treble—Adds a 3.5kHz treble boost to the signal. 0.0 is flat.
- Low Cut—Applies a 90Hz low cut (high pass) filter to the signal (6dB/octave).
- Volume—Controls the overall output level of the DI.
Dynamics > Feedbacker (Mono), Line 6 Original feedback generator
Oh man, this one is fun with a capital Ffffff but you'll want to read up on how to get the best results. Works best as one of the first blocks in your signal flow. NOTE: Feedbacker loads bypassed by default.
- Fdbk Gain—Controls the amount of feedback. At higher settings, can easily overwhelm your guitar signal; at lower settings, the feedback can better "sit" between chords. WARNING! Be careful, as this effect can quickly go off the rails, just like real feedback. Consider assigning it to a momentary stomp so feedback only appears while you hold the switch.
-
Fdbk Type—Determines the type of the feedback generated. TIP: Try assigning different Feedback Type values to snapshots.
- –Octave—Feedback appears one octave below the "reference frequency," which is basically the note Feedbacker chooses to base its feedback generation on. Depending on the chord, Feedbacker may choose different reference frequencies.
- Unison—Feedback appears at the reference frequency.
- +Octave—Feedback appears one octave above the the reference frequency.
- Oct +5th—Feedback appears one octave plus a 5th above the the reference frequency.
- +2 Octaves—Feedback appears two octaves above the the reference frequency.
- 2 Oct+3rd—Feedback appears two octaves plus a 3rd above the reference note frequency.
- 2 Oct+5th—Feedback appears two octaves plus a 5th above the reference note frequency.
- 2 Oct+7th—Feedback appears two octaves plus a 7th above the reference note frequency.
- Mid to Low—Feedback typically starts on the highest harmonic below 500 Hz and drops down to lower harmonics as the signal decays.
- High to Low—Feedback typically begins on the highest harmonic below 1200 Hz and descends to lower harmonics as the signal decays.
- Rndm Onset—New harmonics are selected randomly every time a new onset (note or chord's attack) is detected. In this case, repeating the same chord could still generate different harmonics.
- Rndm Trigger—New harmonics are selected randomly every time the Retrigger parameter is set to "Trigger." See the Retrigger parameter below.
- Attack—Controls how quickly feedback appears.
- Release—Controls how quickly each harmonic dies out or transitions to a different one. At higher values, you may hear more than one harmonic as they transition.
-
Dry Kill—Determines what happens to the dry (unaffected) signal:
- Off—The dry signal is controlled by the Dry Level parameter but is otherwise unaffected when the Feedbacker block is turned on
- On—The dry signal is muted when the Feedback block is turned on. TIP: With Dry Kill on and Fdbk Type set to "Unison," playing slower, single notes can result in sounds similar to using an E-bow.
- Always—The dry signal is completely muted from the entire path, regardless of whether the Feedback block is on or off. TIP: Use this setting only when Feedbacker is on a parallel path.
- Dry Level—Sets the amount of dry signal through the Feedbacker block. TIP: Assign this parameter to an expression pedal for blending in the dry signal behind the feedback.
- Reference—Determines which note within a chord is referenced by the feedback. "Lowest" prioritizes a chord's lowest-pitched note as the feedback reference, which often represents the fundamental frequency of the chord. "Loudest" prioritizes the loudest note in the chord as the feedback reference, which may not be the lowest note.
- Silence Thr—Sets the level threshold above which feedback is generated. Below this level, no feedback will be generated.
- Onset Thr—When Feedback Type is set to Rndm Offset, sets the threshold of onsets (plucks) that cause changes to the feedback note. Lower values increase sensitivity to plucking and strumming, so changes to the feedback note take place more often. Higher values reduce sensitivity to plucking and strumming, so changes to the feedback note take place less often.
- Offset Thr—Rapid drops in the signal level by this amount will quickly kill the feedback to prevent warbling.
-
Retrigger—Okay, Retrigger isn't a parameter per sé; it's meant for you to assign it to an unused momentary stomp switch. (Press and hold the Retrigger knob, press Learn, press the desired stomp switch, and then set Type to "Momentary.") Every time you press the switch (and the parameter changes from "---" to "Trigger"), the feedback generated will change, depending on the type of mode:
- Mid to Low or High to Low modes—Pressing the Retrigger switch will cause the Feedbacker to descend to lower harmonics.
- Rndm Trigger or Rndm Onset—Pressing the Retrigger switch will cause the Feedbacker to randomly choose a different harmonic.
- All other modes—Pressing the Retrigger switch will cause feedback to regenerate at the mode's selected frequency.
- Trails—When on, feedback continues to ring out (for the duration of the Release parameter) after the block is bypassed. When off, feedback stops abruptly when the block is bypassed.
Reverb > Dynamic Bloom (Mono, Stereo), Line 6 Original bloom reverb.

- Decay—Sets the decay of the reverb (0.1 sec ~ 45.0 sec, or Infinity).
- Damping—Determines the frequency above which the reverb will be absorbed. For example, if your hall is full of people wearing fake ocelot jumpsuits, more high frequencies would be absorbed than if the room were empty.
- Mot Rate—Motion Rate, or how fast the echoes' intensity changes.
- Rise Time—Sets how long it takes for the reverb to bloom. Choose Short, Medium (default), or Long.
- Mix—Controls the wet/dry mix of the reverb. When set to 0%, no reverb is heard; when set to 100%, no dry signal is heard.
- Low Freq—Sets the frequency below which the Low Gain parameter is applied.
- Low Gain—Sets the reverb time for frequencies below the Low Freq value. Values below 0.0dB mean the bass frequencies decay faster than the treble frequencies; values above 0.0dB mean the bass frequencies decay slower than the treble frequencies.
- Low Cut—Applies a low cut (or high pass) filter to the reverb, letting you remove the effected signal below a certain frequency.
- High Cut—Applies a high cut (or low pass) filter to the reverb, letting you remove the effected signal above a certain frequency.
- Ducking—Traditionally, ducking controls how much of the entire reverb is dropped in volume (or "ducked") while the signal is active. With Dynamic Bloom, the ducking instead applies to the reverb's feedback only. For example, if you set Decay really high and strum one chord, you'll hear that chord sustain for a long time. While it's ringing out, hit another chord. Without ducking, both chords now sustain together. With Ducking set high, the first chord quickly fades out, and all you'll hear sustaining is the 2nd chord. This can help your bloom from turning into a sloppy mess.
- Level—Sets the overall level of the block.
- Trails—When set to "Off," reverb decay is instantly muted when the block is bypassed. When set to "On," the reverb continues to decay naturally when the block is bypassed or a different snapshot is selected.
Reverb > Nonlinear (Mono, Stereo), Line 6 Original nonlinear reverb with a variety of decay tail shapes (including multiple reverse reverb shapes).
- Decay—Sets the decay of the reverb (1.0 ms ~ 2.000 sec). Press the knob to toggle between ms/sec and note values. TIP: When set to note values, playing a note/chord 4 beats (Decay set to "1/1") or 2 beats (Decay set to "1/2") before a song transition can cause the reverb to stop right on the downbeat.
- Predelay—Determines the amount of delay heard before the signal enters the reverb.
-
Shape—Determines the shape of the reverb's decay:
- Linear—Traditional reverse reverb with an even, linear slope; abruptly stops after the decay length.
- Log—Reverse reverb with a logarithmic curve so it starts low and ramps up toward the decay's end.
- Inverse Log—Reverse reverb with an inverse logarithmic curve so it ramps up quickly.
- Gauss—Ramps up and then down in a gaussian curve shape.
- Inverse Gauss—Ramps down and then up in a gaussian curve shape.
- Triangle—Ramps up and then down in a triangle shape.
- Inverse Triangle—Ramps up and then down in a triangle shape.
- Full—No ramp at all; the reverb is on full blast for the duration of the decay and then abruptly stops after the decay length.

- Late Dry—Adds a bit of the original signal as the very last tap. Most audible when playing simple lines with gaussian and triangle shapes.
- Mix—Controls the wet/dry mix of the reverb. When set to 0%, no reverb is heard; when set to 100%, no dry signal is heard.
- Level—Sets the overall level of the block.
- Diffusion—Sets the amount of smearing between discrete echoes, sometimes resulting in a softer effected signal.
- Low Cut—Applies a low cut (or high pass) filter to the reverb, letting you remove the effected signal below a certain frequency.
- High Cut—Applies a high cut (or low pass) filter to the reverb, letting you remove the effected signal above a certain frequency.
- Mod—Controls the amount of modulation applied to the reverb.
- Rate—Controls the rate or speed of modulation applied to the reverb.
- Spread (Stereo version only)—Determines the stereo width or spread of the effected signal.
- Trails—When set to "Off," reverb decay is instantly muted when the block is bypassed. When set to "On," the reverb continues to decay naturally when the block is bypassed or a different snapshot is selected.
*NOTE: All product names used in this document are trademarks of their respective owners and neither Yamaha Guitar Group nor Line 6 are associated or affiliated with them. These trademarks appear solely to identify products whose tones and sounds were studied by Line 6 during sound model development.
New Features in 3.70
Cab Delay > Auto Value
Helix Floor, Helix Rack/Control, Helix LT, HX Stomp, HX Stomp XL
Helix/HX's new cab engine (introduced with 3.50) makes it easy to quickly find a great cab sound by automatically phase and time-aligning the mics in dual cab setups; this avoids the phasing or "thinning out" that can occur naturally when using two mics at different distances. However, some studio engineers are very adept at using phase misalignment to achieve interesting sounds. We've now added a new "Auto" value to the Cab > Delay parameter (all the way left, before 0.0 ms) that automatically approximates the delay through the air when changing the mic Distance parameter.
For most people, however, we recommend leaving Delay set to the default "0.0 ms."
Bug Fixes in 3.70/3.71
- When Amp/Preamp > PV Vitriol Crunch's Gain knob was turned all the way up, the signal could drop out unexpectedly—FIXED
- With very fast attack times, Dynamics > Deluxe Comp could sometimes exhibit distortion on some source material—FIXED
- Some reverbs would not reflect the Tuner > Trails parameter—FIXED
- Stereo versions of select distortion and modulation effects could exhibit an unbalanced stereo field, some more so than others—FIXED
- In rare cases, some HX Command messages could appear laggy when assigned to a stomp switch with many other assignments—FIXED
- HX Stomp/HX Stomp XL only: Accessing the Tempo panel by touching the Tap switch could sometimes make the Tempo knob non-responsive—FIXED
- HX One only: In rare cases, adjusting select parameters and then pressing an external footswitch assigned to Next or Previous preset can cause HX One to become unresponsive—FIXED
- HX One only: When Settings > Guitar-In Z was set to "Auto" and HX One was bypassed, the effect's impedance value would be retained—FIXED
- HX One only: Flux On/Off Time would not respond to MIDI Clock when set to note division or beat values—FIXED
- HX One only: Bypass state wouldn't always be recalled correctly after a power cycle—FIXED
- HX One only: When using stereo inputs, in certain cases, the right channel would be offset by up to 6dB—FIXED
- HX One only: Turning the BPM value knob could be a bit glitchy—FIXED
- 3.71—When running sufficient level into a Reverb > Dynamic Bloom block, audio clipping could occur—FIXED
- 3.71—The mono version of Reverb > Nonlinear exhibits a less-smooth decay than the stereo version, which is especially noticeable on percussive material. It also affects the stereo version if merged to a mono path or when utilizing a mono output—FIXED
- 3.71—When choosing the 30 Dynamic microphone at a distance of 7.0 ~ 11.75, Cab > WhoWatt Cab exhibits abnormal treble resonance—FIXED
- 3.71—Delay > Tesselator could exhibit unexpected behavior in 3.70—FIXED
- 3.71—Adjusting the Delay > Glitch Delay block's Time parameter could sometimes result in muted audio or other unexpected audio behavior—FIXED
- 3.71—Adjusting the IR > Dual block's Delay parameter could sometimes result in graphical anomalies—FIXED
- 3.71—Helix Native (Windows VST/AAX) only: Switching from certain reverb types to others (for example, from Hot Springs to Shimmer or Glitz to Shimmer) can result in DSP loss—FIXED
- 3.71—Other minor fixes and improvements
Known Issues in 3.70/3.71
- In some cases if a Path 1B or 2B Input block is set to the same return as a block on a B path in a corresponding preset, the preset can load blank.
- After performing a Factory Reset, attempting to load 128 or more IRs can result in a "Failed to get impulse names" -8207 error. Instead, load fewer than 128 IRs at once.
- If Looper > 1 Switch Looper is playing, the first MIDI CC62 (Play Once) command is ignored. Sending a second CC62 command will work properly.
- Helix LT only: After entering and exiting the tuner from Snapshot performance view, Helix LT returns to the home screen. In the meantime, note that pressing FS6 (MODE) and FS12 (TAP/TUNER) together returns to Snapshot performance view.
- HX Stomp/HX Stomp XL only: If you have a snapshot command set to a footswitch (and Global Settings > Displays > LED Rings is set to "Off/Brt"), the footswitches may not light up red when pressed.
- HX One only: User Model Defaults created with 3.60 firmware are lost after update to 3.70. IMPORTANT! Be sure to use HX One Librarian to back up all data BEFORE updating to 3.70!
- HX One only: In rare cases, very quickly push-turning the EFFECT encoder can maintain the effect category carousel view. Press HOME to exit.
- HX One only: When using HX One in 4-Cable Method, stereo models can collapse to mono when the Insert position is set to Post.
- HX One only: When True Bypass is engaged, the Tuner does not operate correctly.